3.3.Mac OS X
OpenLink Software's components are fully supported on Mac OS X versions 10.1.x through 10.4.x ("Puma" to "Tiger"). In most ways, these look the same to users. However, there are some significant differences to be aware of between these Operating Systems.
As shipped from Apple, Mac OS X did not include any ODBC support until Jaguar. The ODBC Driver Manager, Data Source Administrator, etc. - all had to be delivered with the Drivers. When Apple introduced Darwin, an Open-Source project meant to form the kernel of Mac OS X, OpenLink were determined to port its open-source iODBC Driver Manager to the new platform. With the introduction of the Preview Release of Mac OS X, the traditional set of dynamic libraries was broadened to include a system of Frameworks to encourage the development of fully ODBC compliant, native Mac OS X drivers and client applications.
That set of Frameworks, along with the OpenLink ODBC Administrator (then known as the iODBC Administrator), has been included with all OpenLink installations for Mac OS X since 10.0. The OpenLink ODBC Administrator supports all core features of ODBC, and presents driver-specific DSN configuration panels, as defined by the Driver developer, through the use of Setup Libraries.
Jaguar's release marked Apple's recognition that Data Access was an important part of an Enterprise Operating System. Already part of the standard distribution of Darwin, the basic iODBC dynamic libraries are now a part of the standard installation of Mac OS X 10.2. Apple also included their own version of an ODBC Administrator, as a proof-of-concept. Apple's Administrator permits Driver Registration, Tracing, and all other core features of ODBC; however, among other hard edges, all DSN configuration must be done by manually entering Keyword-Value pairs. Further, the user must know what Keywords to use, along with their acceptable Values.
The OpenLink Generic Multi-Tier Driver for ODBC for Mac OS X is distributed in a single disk image (.dmg) file, which contains a Macintosh Installer mpkg.
The OpenLink ODBC Client Components for Mac OS X comprise the following:
Table3.3.
| Component | Purpose |
|---|---|
| iODBC Driver Manager | A shared library that links ODBC compliant applications to ODBC Drivers |
| Generic ODBC Driver | A shared library that provides database connectivity and data access services to ODBC compliant applications |
| Sample ODBC Applications | Simple programs that can be used to verify your ODBC installation and working environment |
3.3.1.Installation
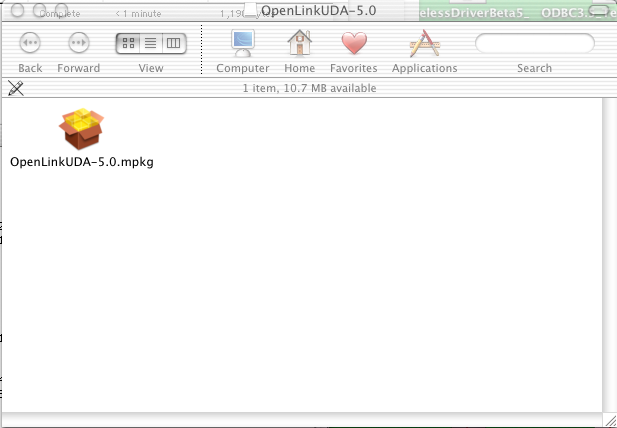
Double-click the mpkg to start the installation process.
Figure3.72.OpenLinkUDA-4.5.dmg
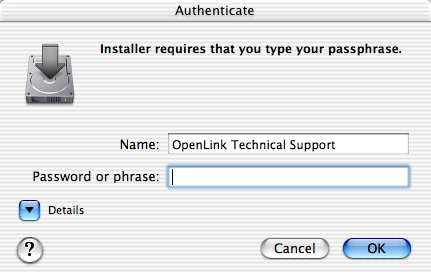
You must have an Administration username and password to install the OpenLink Generic Multi-Tier Driver for ODBC. The Jaguar Installer will immediately prompt you to enter your Mac OS X Username and Password.
Figure3.73.Authentication
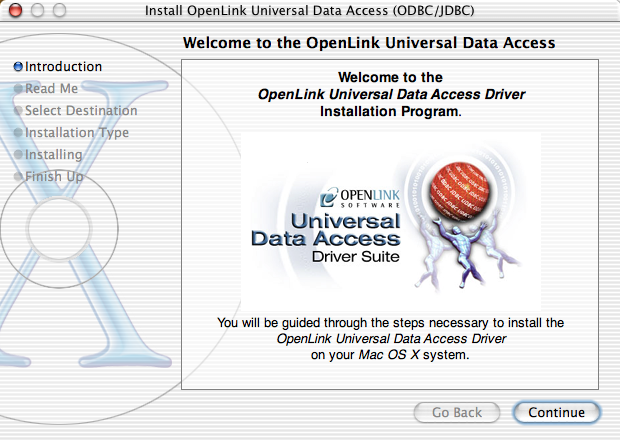
The installer will display a "Welcome" message. Click "Continue".
Figure3.74.Welcome
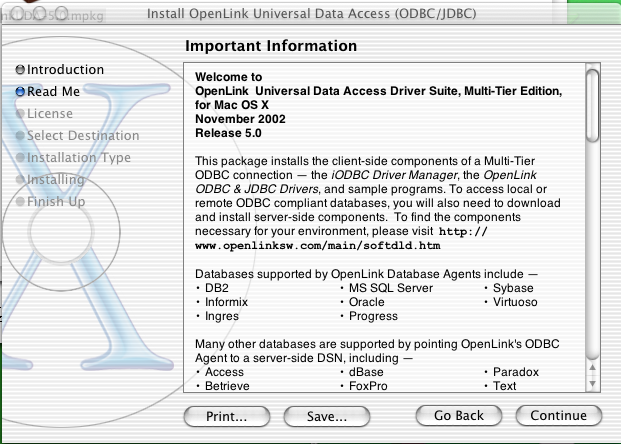
The next screen will display the Read-Me file, including any last-minute updates to these documents. Please read carefully, and click "Continue" when finished.
Figure3.75.Read Me
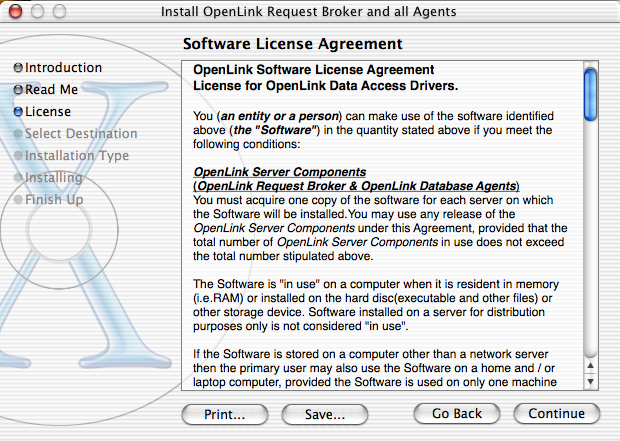
The next screen will display the License Agreement for the OpenLink Single-Tier Driver for ODBC. Please read, and click "Continue".
Figure3.76.Software License Agreement
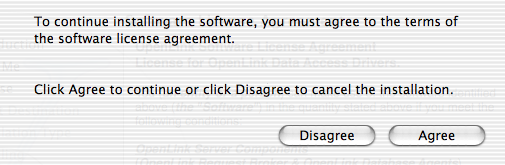
You will be prompted to "Agree" to continue the installation, or "Diagree" to abort.
Figure3.77.Agree or Disagree to Licensing
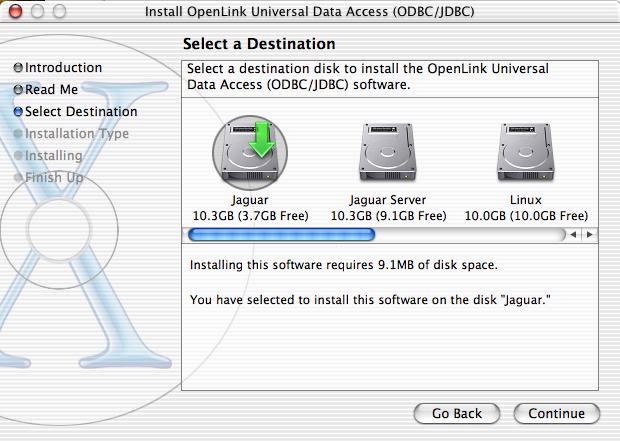
You will be asked to select a Destination Volume. Generally, this should be your Mac OS X boot volume. Click on the desired disk icon, and then click "Continue".
Figure3.78.Choose Destination
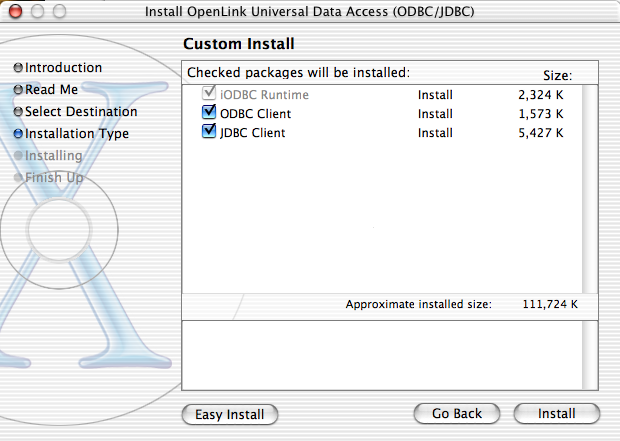
You may now choose the Easy Install, or if you are an experienced user, you may Customize which components are installed. OpenLink generally recommends the Easy Install. If you have installed OpenLink or iODBC components in the past, click "Upgrade" to continue; otherwise, click "Install".
Figure3.79.Easy Install
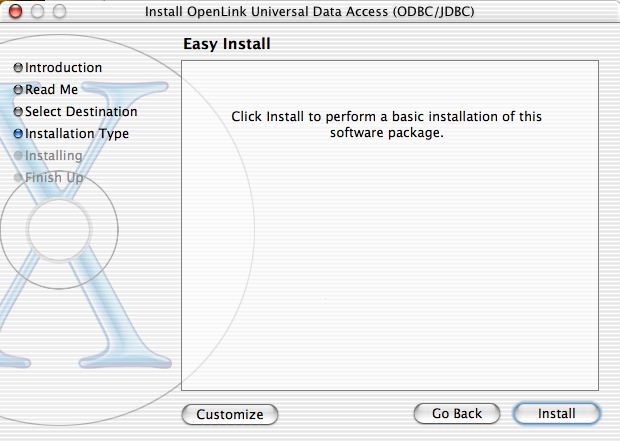
Figure3.80.Custom Install
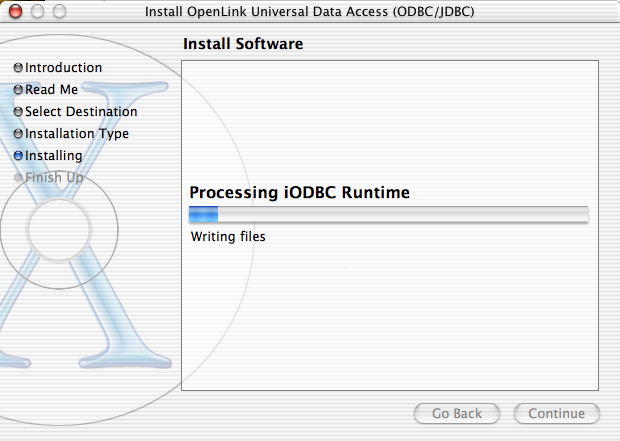
You will be shown a graphical progress bar as Installation progresses, followed by System Optimization.
Figure3.81.Installation Progress
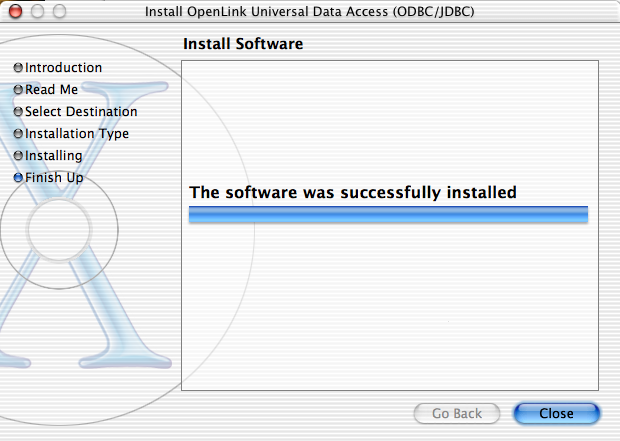
When the process is complete, you will be told that the software was successfully installed. Click "Close" and your new database driver for ODBC is ready for use!
Figure3.82.Installation Proceeds
3.3.2.Data Source Configuration
The OpenLink ODBC Administrator for Mac OS X currently supports creation of User and System Data Source Names (DSNs). Support for File DSNs will be delivered in a future release.
A User DSN is only available to the user who creates the data
source. Its parameters are stored in that user's settings file
~/Library/Preferences/ODBC.preference.
A System DSN is available to the whole system so that any user,
including the system itself, will be able to use that data source.
Its parameters are stored in the System settings file /Library/Preferences/ODBC.preference.
A File DSN is a special 'mobile' data source that stores the data source information associated with the Driver in a file, which may then be copied and shared among different users and ODBC application host machines.
Creating User or System Data Sources
The steps for creating a DSN are as follows:
-
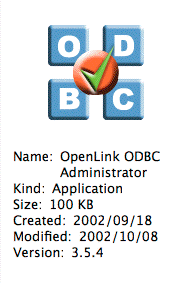
Launch the OpenLink ODBC Administrator, found in the
/Applications/Utilities/directory.Figure3.83.OpenLink ODBC Administrator icon
-
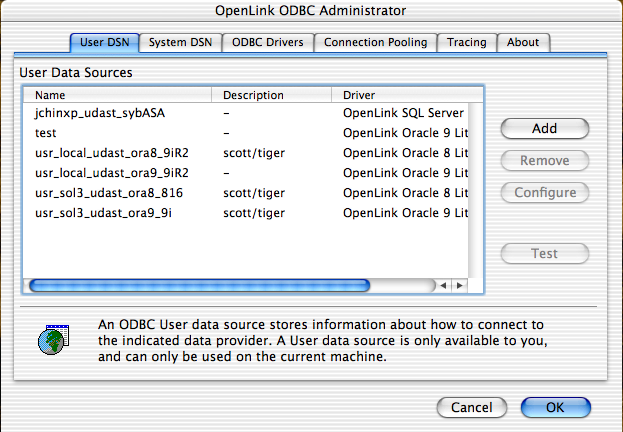
Click the tab for the kind of DSN you wish to create - User or System. Press the Add button to begin creating a new Data source.
Figure3.84.OpenLink ODBC Administrator, User DSN tab
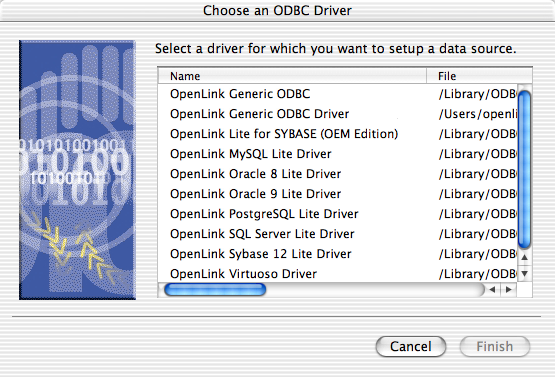
-
Select the Driver to be used to create your ODBC DSN. In this example make sure "OpenLink Generic ODBC Driver" is highlighted. Then click the Finish button.
Figure3.85.Choose an ODBC Driver
![[Note]](images/note.png)
Note: The connections will not succeed until Server-side components are installed and properly configured.
-
The ODBC Driver manager now launches the selected driver code so that the DSN may be configured. In this example it will present the OpenLink ODBC Data Source Configuration dialog (depicted below).
Configure the fields of the ODBC "System" or "User" DSN Configuration dialog in the manner explained below:
Name. (Datasource) The name of the ODBC DSN, this is how you will interact with the OpenLink ODBC Driver from within ODBC compliant applications once your ODBC DSN has been created.
Description. Additional information that further describes the ODBC DSN that you are creating.
Server. Selected Zero Configuration service name or
<hostname or IP
address>:<port>
of running Broker.The easiest way to complete this field is to select a machine from the drop-down list-box. This list of servers is automatically generated by the Zero Configuration service, so you only need to chose which machine you wish to reach.
Alternatively, enter the hostname or IP address that identifies a Server Machine running OpenLink Server Components, that speak the OpenLink Data Access Protocol. Follow this with a colon and the TCP/IP Port number of the Broker to contact. This corresponds to the Listen parameter on the target Broker.
This example shall now assume the selection of a server from a picklist.
Figure3.86.OpenLink Generic ODBC Setup Dialog
-
Click on the Next button or the Connection tab. Now select the database and configuration details:
Domain
This is how you pick the Database Engine Type that your ODBC DSN is to be associated with e.g. Informix 7, Oracle 7, Progress 7 etc.
The default offered from the Zero Configuration is typically accepted. An alternative compatable Domain may be chosen for a specific customisation.
Database. This is how an actual database name within the Provider Type Domain is identified, for instance "stores7" indicates an "Informix 7" database called "stores7". This option corresponds to the Database parameter in the preference files.
Connection Options. This is where you place any database specific database connection options. This field in a majority of cases should be left blank by default.
Connect now..
When this tick box is checked, a test connection is made to verify the Data Source connection.
If there is no check then the Login ID and Password fields are ignored, and no test is performed.
Login ID. The default database UserID to use when logging on to a remote database engine (identified by the Domain above).
Password. The Password for the login of the above UserID.
Figure3.87.OpenLink Generic ODBC Setup Dialog
-
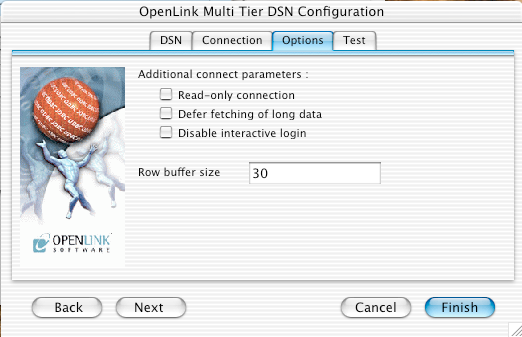
Click on the Next button or the Options tab.
Now define additonal connection parameters:
Read-only connection. Specify whether the connection is to be "Read-only". Make sure the checkbox is unchecked to request a "Read/Write" connection.
Defer fetching of long data. Check this box to defer the fetching of long data.
Disable interactive login. Suppress the ODBC "Username" and "Password" login dialog box when interacting with your ODBC DSN from within an ODBC compliant application.
Row Buffer Size. This attribute specifies the number of records to be transported over the network in a single network hop. Values can range from 1 to 99.
Figure3.88.OpenLink Generic ODBC Setup Dialog
-
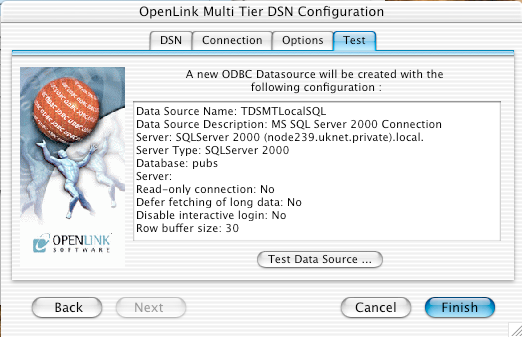
The list of parameters for the DSN are now shown. The Test Data Source button will trigger a test of the DSN using the existing login parameters.
Click on the Next button or the Test tab.
Figure3.89.OpenLink Generic ODBC Setup Dialog
-
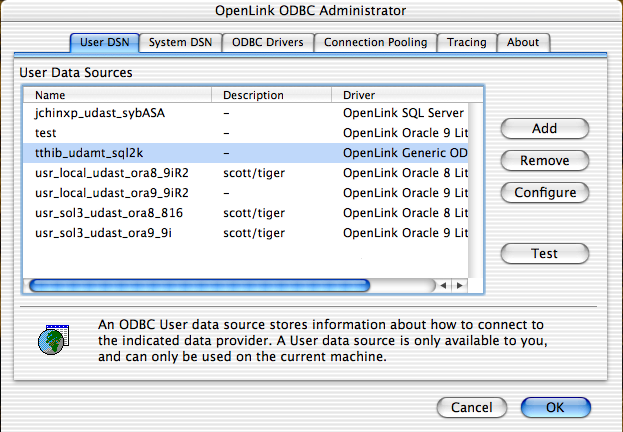
Click Finish to save your DSN, which will then be visible in the OpenLink ODBC Administrator's listing.
Figure3.90.OpenLink ODBC Administrator, User DSN tab
3.3.3.Testing Data Sources
Any DSN can be tested for basic connectivity, to ensure that the basic parameters have been set correctly, through the OpenLink ODBC Administrator.
-
Click anywhere on the graphic to dismiss the About box. Click OK to save your DSN, which will then be seen in the OpenLink ODBC Administrator's listing.
Figure3.91.OpenLink ODBC Administrator, User DSN tab
-
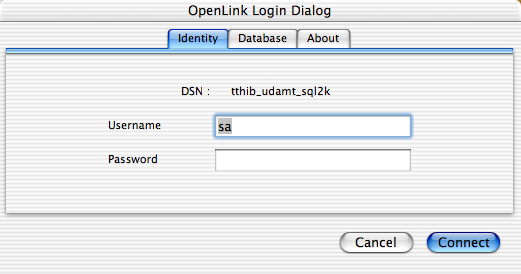
Now, to verify that your settings are correct and all is functional, select the new DSN, and click Test. You'll be presented with the following dialog:
Figure3.92.OpenLink Login Dialog, Identity tab
-
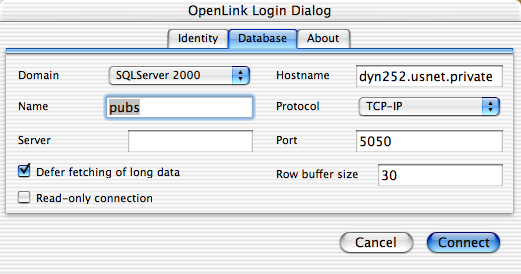
Input the correct password for the username shown. You can connect as another user, if you wish, by simply typing a different username in the field. To verify that your settings have all "stuck", you can click the Database tab:
Figure3.93.OpenLink Login Dialog, Database tab
-
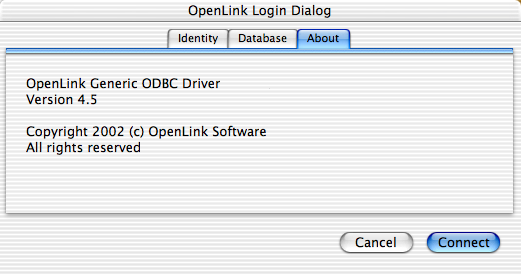
The "About" tab shows you basic information about the Driver on which the DSN is based.
Figure3.94.OpenLink Login Dialog, About tab
-
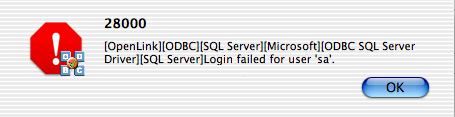
When you click OK, your Mac will think for a moment, while it makes a connection to the remote Data Source. If there is a problem with the connection, you will be presented with an error message, such as this, resulting from a bad password:
Figure3.95.OpenLink ODBC Administrator, DSN Test, Initial Error Message
-
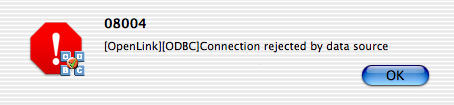
If you receive two error messages, the first will usually provide the clues to resolution; the second is typically a generic error, such as this rejected connection notice:
Figure3.96.OpenLink ODBC Administrator, DSN Test, Secondary Error Message
-
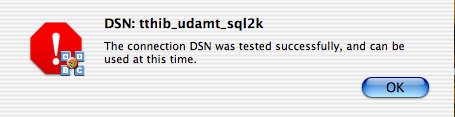
If the DSN connects as expected, you will be presented with this Success message:
Figure3.97.OpenLink ODBC Administrator, DSN Test, Success Message
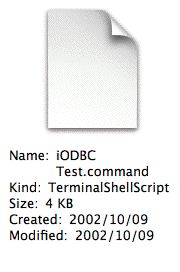
iODBC Test.command (or /usr/bin/odbctest)
For more thorough testing, you can use iODBC Test, a sample application installed along with the OpenLink Generic Driver for ODBC. iODBC Test is a simple command-line, ODBC compliant, Interactive SQL client.
Either double-click the /Applications/iODBC/iODBC Test.command
script or manually launch the Terminal application (found in
/Applications/Utilities/).
Figure3.98.
If you used the script, you can skip ahead to the next paragraph; otherwise, ensure that the environment variables ODBCINI and ODBCINSTINI are set correctly and enter the command /usr/bin/odbctest.
At the prompt, type a question-mark (?) followed by the ENTER key, to show a list of available DSNs. Enter a connect string at the next prompt, using the syntax:
DSN=<DSN Name>[;UID=<username>[;PWD=<password>]]
Text enclosed in angle brackets < > should be replaced by
your environment's specifics; text enclosed in square brackets [ ]
is optional. The only mandatory parameter is the "DSN=". All other connect parameters may be
set within the DSN itself. User authentication in the connect
string will override similar information stored in the DSN. The
following connect strings are all valid, assuming a DSN named
test_dsn exists:
DSN=test_dsn
DSN=test_dsn;UID=;PWD=
DSN=test_dsn;UID=fred
DSN=test_dsn;UID=fred;PWD=
DSN=test_dsn;UID=fred;PWD=derf
A successful connection will cause display of the Driver's full version string, as it reports to any client application, followed by a SQL> prompt.
Enter ODBC connect string (? shows list, or DSN=...):
DSN=test_dsn;UID=fred;PWD=derf
Driver: 04.20.0402 OpenLink SQL Server Lite Driver
SQL>
Once the connection is made, any valid SQL query conforming to ODBC syntax (where applicable) may be executed. Use the command "quit" to close the connection.
If the query executes successfully you will see a table of the data returned by the query; if unsuccessful, you will see the entire error message returned from the back-end DBMS.
Use the command "quit" to close the connection. The prompt Again (y/n)? is asking whether you wish to connect to another DSN. Respond y(es) or n(o) and hit <return>. Yes brings you back to the Enter ODBC string prompt; no returns "Have a nice day".
SQL>quit
Again (y/n) ? n
Have a nice day.
3.3.4.Troubleshooting ODBC Connections and Sessions
From the Tracing Tab of the OpenLink ODBC Administrator, the level of Tracing can be configured.
Figure3.99.OpenLink ODBC Administrator, Tracing tab
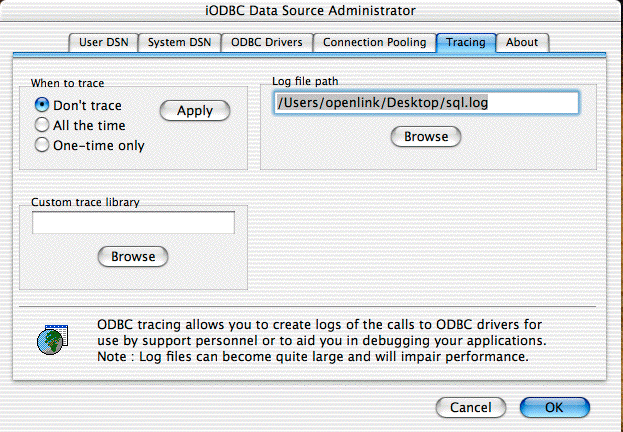
When to trace. Use this option to turn tracing off or on. For a One-time only trace, the trace is made for the duration of the next connection. Click the Apply button to make your selection active. This option corresponds to the Trace and TraceAutoStop parameters in the preference files.
Custom trace library. Use the Select
Library button to browse the machine for a library file that
contains the code to intercept the trace output. This field should
generally be left blank. When setting this parameter, you may use
the Browse button to locate the library, or specify it manually. If
specified manually, note that the location must be specified as it
would be in a Terminal session. You may use ~/ as a shortcut to your user Home
directory. This option corresponds to the TraceDLL parameter in the
preference files.
Log file path. Specify the complete location of the file to which you wish to write the trace. You may use the Browse button to locate or create the file, or specify it manually. If specified manually, note that the location must be specified as it would be in a Terminal session. You may use ~/ as a shortcut to your user Home directory. This option corresponds to the TraceFile parameter in the preference files.
Trace Parameters in Preference Files. When the ODBC tracing parameters are changed, they are saved in the [ODBC] section of the ODBC.preference or odbc.ini file, whichever is active on your system.
The following example shows the settings for a one-time trace to a sql.log on the active user's Desktop.
[ODBC]
Trace         = 1
TraceAutoStop = 1
TraceDLL      =
TraceFile     = ~/Desktop/sql.log
Once the tracing of a connection is complete, the Trace and TraceAutoStop parameters will both be set to 0.
Trace. This parameter corresponds to the When to trace option in the Tracing tab. Set to 1, tracing is on; set to 0, tracing is off.
TraceAutoStop. This parameter corresponds to the One-time only option in the tracing tab. Set to 1, tracing will automatically stop after the next connection is closed; set to 0, tracing must be manually stopped. When tracing is automatically stopped, the Driver Manager will set both Trace and TraceAutoStop parameters to 0.
TraceDLL. This parameter corresponds to
the Custom trace library option in the tracing tab. When setting
this parameter, note that the file must be fully specified as it
would be in a Terminal session. You may use ~/ as a shortcut to your user Home
directory.
TraceFile
This parameter corresponds to the Log file path option in the
tracing tab. When setting this parameter, note that the file must
be fully specified as it would be in a Terminal session. You may
use ~/ as a shortcut to your
user Home directory.
As of iODBC 3.51.0, there are now more variables that may be included in the filename:
$P. This is the process-id (pid) of the application invoking the driver manager - allowing for per-process log-files
$U. This is the user-id under which the process is currently running
$T. This is the timestamp in YYYYMMDDHHmmSS format
$H. This is the home-directory of the user as whom the process is running
These options are case-insensitive. Hence you can specify
TraceFile=/tmp/iodbc-$U-$T-$P.log
if you wish.