6.2.5. Internet Domains
HTTP Virtual Directories
From Virtual Domains & Directories you can define Virtual HTTP directories. Virtual Directories let you define multiple HTTP server listeners in Virtuoso for either the same network interface or another one. Virtual directories can respond logically to a name or directly by IP address. Both types as well as default responses can be defined here.
Each virtual directory can also have HTTP maps defined for it. This allow you to set logical paths on an HTTP directory to point to specific directories available to Virtuoso through the file system or DAV.
You can also publish stored procedures to a SOAP defined directory during the virtual directory definition.
Figure 6.83. Virtual Directories
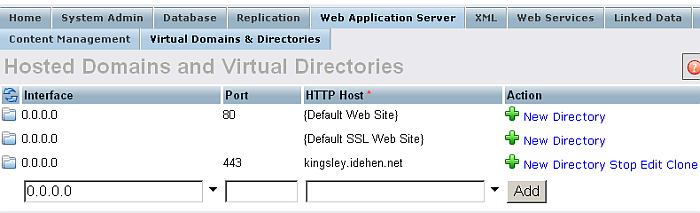
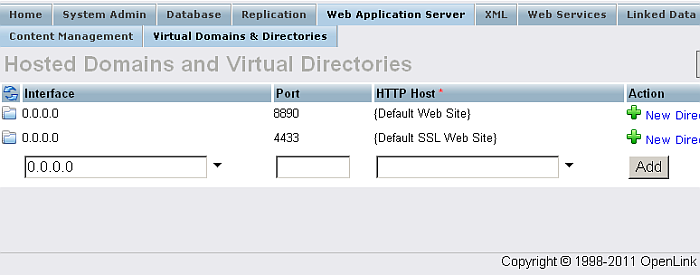
Click on the Add New Site button to start adding a new Virtual Web Site and its directories.
Figure 6.84. Virtual Directories: Site Details
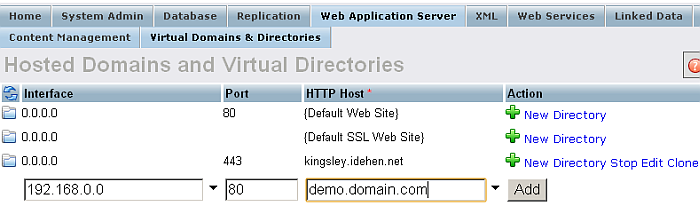
When adding or editing a web site you must supply a host.domain name, which will be used to match again incoming requests to produce the correct response, the IP address of the network interface, to set-up the listener on, and the TCP port number that will be used to listen for incoming requests. Although Virtuoso will be listening on the specified interface you can set up multiple sites on this interface. The site required by client web browsers will be determined by the host name specified in the request. This provides the virtual site.
Click on "New Directory" to continue.
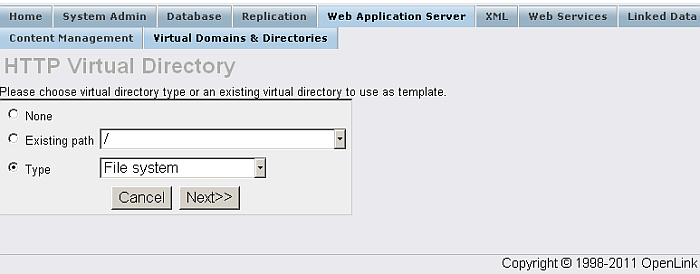
Figure 6.85. Virtual Directories Mappings
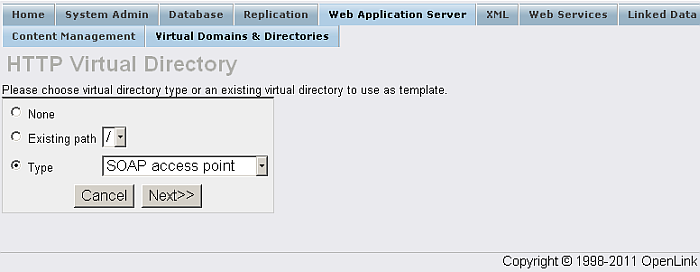
Before the directory settings are configured you can select from a few types to help configure the details to follow quicker and easier. For SOAP virtual directories this step is particular useful.
Select "Type" and then click "Next" to continue.
Figure 6.86. Virtual Directories
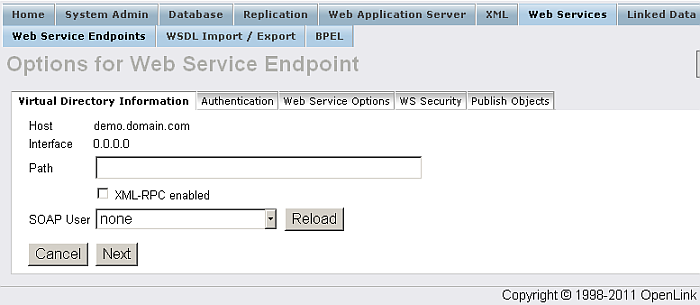
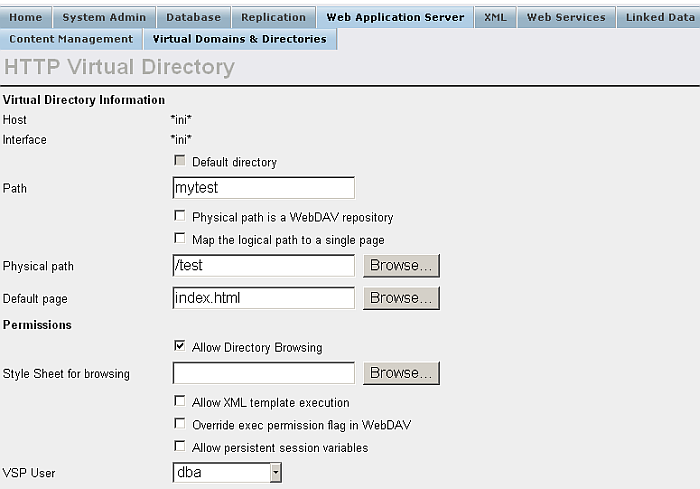
The "Virtual Directory Information" tab lets you configure most aspects of the virtual directory.
The default directory checkbox can be checked if you want the site being defined to act as the default site for the interface. This means that if a request is made to the interface that does not match a hostname defined for the interface, the default will be returned.
Logical Path will be the path that Virtuoso will respond to for this virtual directory mapping. This is what will be placed on the URL. Physical Path or URL is what Virtuoso will actually supply the content from. In either case you can use the Browse buttons to traverse the file systems graphically. Use the WebDAV Source Checkbox to instruct Virtuoso to use the WebDAV store for the physical location. "Default Page" will be returned if no page is specified in the incoming URL.
![[Note]](images/note.png)
|
Note: |
|---|---|
|
Virtual directories for SOAP must always use a physical path of /SOAP/. The physical path of /SOAP/ does not need to exist in the filesystem under the VSP-root directory for normal SOAP operation. If it does existing it can be used to answer non-SOAP requests. Thus, configuring the virtual directory for SOAP with a "Default Page" can be used to avoid SOAP clients receiving HTTP 404 errors when testing the SOAP endpoint using standard HTTP only. Some SOAP applications assume the SOAP endpoint is down if they received HTTP 404 without checking the SOAP endpoint itself. |
The permissions panel lets you choose whether to enable various abilities in the directory.
In the SOAP Options section you can publish or unpublish procedures and/or templates, both native and remote to the virtual directory using the Publish/Unpublish buttons respectively. The SOAP Options text-area allows you to specify other SOAP options such as DIME encapsulations and WS-security settings. These options are supplied as name=value pairs terminated with a semi-colon and a carriage-return. Here is an example of the options used for the default Interop test based demo virtual directory:
Namespace=http://soapinterop.org/;
MethodInSoapAction=no;
ServiceName=InteropTests;
HeaderNS=http://soapinterop.org/echoheader/;
CR-escape=yes;
![[Tip]](images/tip.png)
|
See Also: |
|---|---|
|
For a list of available SOAP Options review the end section of the SOAP chapter: Optional Parameters to the SOAP Endpoint . |
The Authentication Options panel lets you define the authentication rules for the Virtual Directory.
Once the form details have been completed press on the Add button to save the them and proceed to configure mappings for the directory.
Figure 6.87. Virtual Directories Mappings
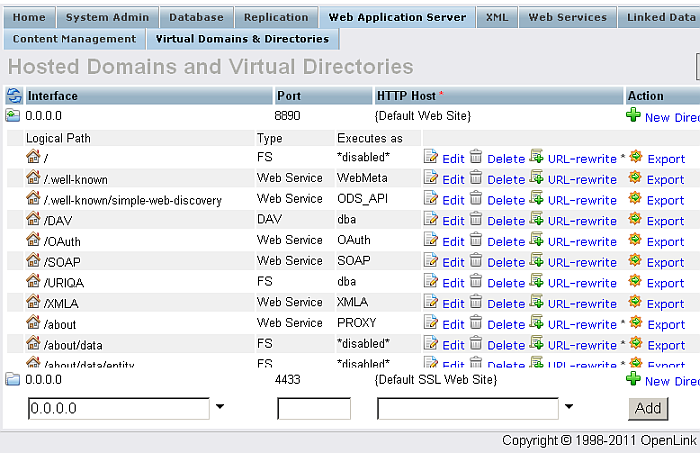
This screen lists mappings that have been defined for the virtual site. If you have just created a fresh site then only one line will be displayed. The "Add Virtual Directory" button will let you define more. Back returns you to the start page, Edit and Delete allow you to edit or remove existing mappings as their link suggests.
|
|
See Also: |
|---|---|
For example, here are the basic steps to be performed, in order to mount FS folder to DAV:
-
Suppose there is a folder with name "test" in your FS and it is under the root of the ServerRoot defined in your virtuoso ini file.
-
Also suppose in the folder "test" there is a file index.html with simple content:
<!DOCTYPE HTML PUBLIC "-//IETF//DTD HTML//EN"> <html> <head> <title>OpenLink Virtuoso Conductor Simple Test</title> </head> <body> <table cellspacing="0" cellpadding="0" border="1" width="50%"> <tr> <td><b>Name</b></td><td></b>State</b></td> </tr> <tr> <td>Simple test for mounting FS to DAV</td><td>Successful.</td> </tr> </table> </body> </html> -
Install the Conductor package
-
Go to http://host:port/conductor and login as dba user.
-
Go to Web Application Server -> Virtual Domains & Directories.
Figure 6.88. Mount FS to DAV
-
For your {Default Web Site} click the link "New Directory".
-
Check the check-box "Type" and select from the drop-down list "Filesystem".
Figure 6.89. Mount FS to DAV
-
Click "Next"
-
In the shown form: Enter for the field "Path": mytest; Enter for the field "Physical path": /test; Enter for the field "Default page": index.html; Check the check-box "Allow Directory Browsing"; Leave the rest of the fields with their default values.
-
Click "Save Changes"
Figure 6.90. Mount FS to DAV
-
From your browser access the url: http://host:port/mytest/
-
As result the content of the index.html file will be shown:
Figure 6.91. Mount FS to DAV
