7.3.1.Windows ODBC Driver Configuration
At installation time two ODBC data source names (DSN's) are created with default values by the Virtuoso installer, the first DSN named "Local Virtuoso" provides a link to a local default Virtuoso database server instance, while the other named "Local Virtuoso Demo" provides a link to a local Virtuoso server for the Virtuoso demonstration database.
The process of creating additional ODBC DSN's for you Virtuoso drivers for ODBC is explained in the steps that follow:
-
Go to the Windows Control panel .
-
Double click on the ODBC Administrator applet. On Windows 2000 / XP the ODBC Administrator applet may be called Data Source (ODBC) and may be found under Administrative tools icon of the Control Panel.
-
Once the ODBC Administrator has been loaded choose by selecting the appropriate panel whether you want a new User or System Data Source. User Data Sources will only be available to the user that created them. System Data Sources will be available to all users and applications on the system.
-
Click on the Add Data Source Name button
-
Select the Driver named OpenLink Virtuoso Driver
-
Enter values into the fields presented by the Virtuoso Driver's DSN configuration dialog:
Figure7.30.Virtuoso ODBC Driver Setup Dialogue for Windows
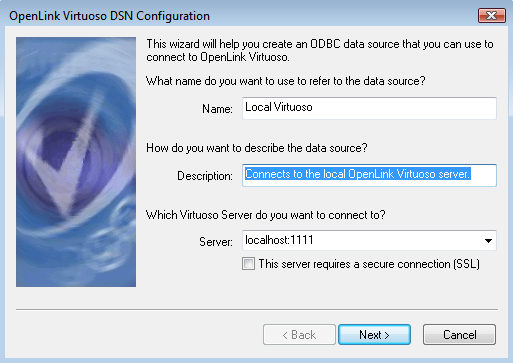
Name: provide a name that will act as a logical reference to the Virtuoso database server that you will be connecting to. Subsequent references to this database will be made to this value when ODBC compliant applications interact with your Virtuoso driver.
Description: allows you to provide a short description about the nature of the connection. This is optional.
Server: enter the hostname or IP address of the machine hosting your Virtuoso server and enter the port number that Virtuoso is listening at. This is configured in the Virtuoso ini file on the server.
-
Press the Next button to configure more details about the connection
Figure7.31.Virtuoso ODBC Driver Setup Dialogue for Windows
Connect to the Virtuoso Servet to obtain default settings for the additional configuration options: allows you to specify the default username and password for the connection.
Press the Next button
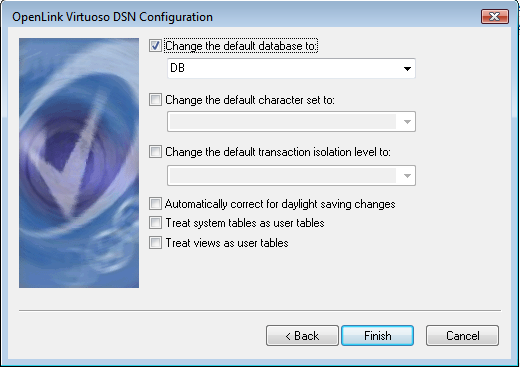
Database: allows you to select the default database for the connection. You will need to check the box above and supply a password to refresh this list. Objects created or selected without an explicit catalogue/database qualifier will automatically be sought from this select database.
Charset: lets you choose the default character set for the connection.
Figure7.32.Virtuoso ODBC Driver Setup Dialogue for Windows
-
When the configuration is complete, and indeed at any time you are satisfied with the configuration press the Finish button to save the DSN.