3.1.Generic Client for Windows
3.1.1.Installation (32-bit)
-
After downloading the OpenLink Data Access Driver Suite client components from our Website, Unzip the contents of the ZIP format archive into a temporary installation directory on your client machine.
-
Run the setup.exe installer program from the temporary installation directory and then follow the on screen prompts.
-
After installation you will be able to safely remove the files in the temporary directory.
3.1.2.Installation (64-bit)
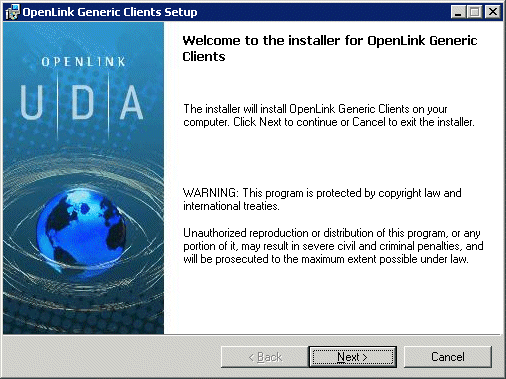
The OpenLink Multi-Tier Generic ODBC client is distributed in a single windows msi file. Simply run the required installer wao3zzzz.msi or wio3zzzz.msi for Opteron (AMD64) and Itanium (IA64) respectively, which will display the following Welcome message:
Figure3.1.win64instmt1.gif
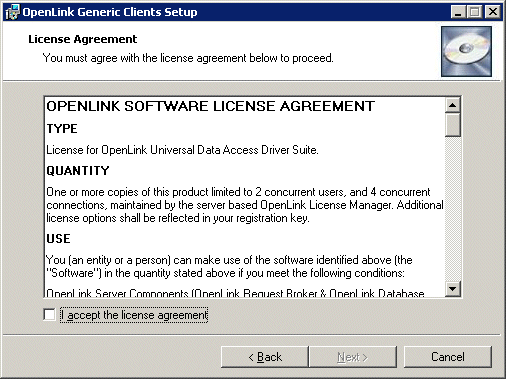
The next screen will display the License Agreement for use with the OpenLink Multi-Tier Driver product. Please read this. If you agree, then select the accept checkbox and continue:
Figure3.2.win64instmt2.gif
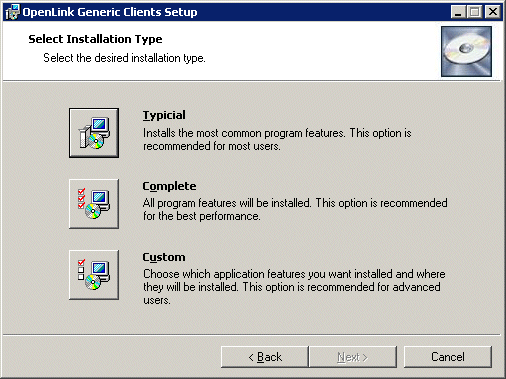
Chooses the type of installation to perform, noting that typical and complete will immediately install the default or complete components respectively, otherwise select the custom option which also the compenents to be installed to be chosen:
Figure3.3.win64instmt3.gif
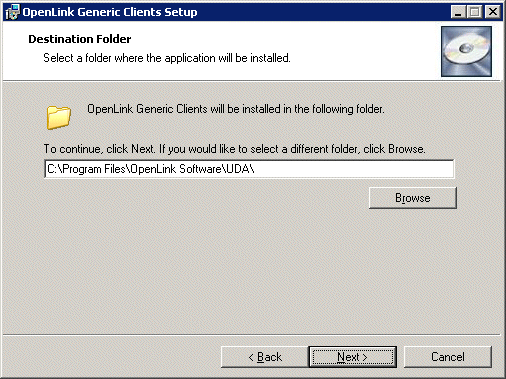
Assuming you chosen the custom installation option you will then be promptied with the option to change the installation directory if required:
Figure3.4.win64instmt4.gif
Next you have presented with the option to choose which components are to be installed:
Figure3.5.win64instmt5.gif
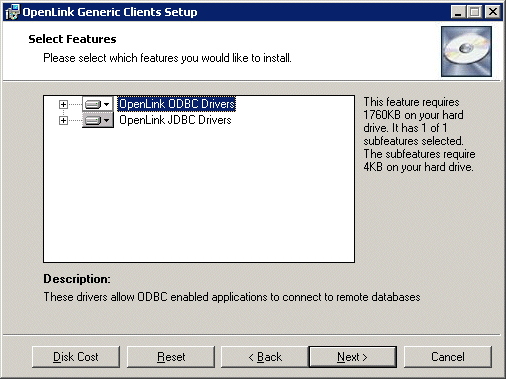
A final confirmation screen is displayed for review prior to performing the installation:
Figure3.6.win64instmt6.gif
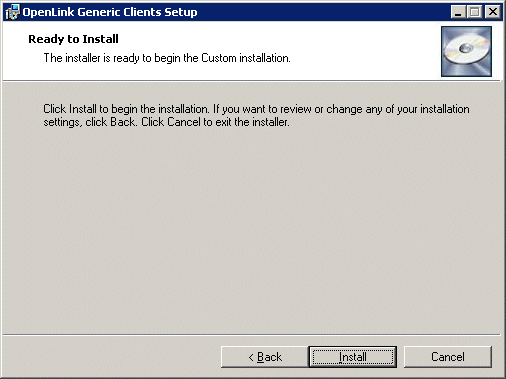
The installer status bar is then displayed indicating the progress and status of the the installation:
Figure3.7.win64instmt7.gif
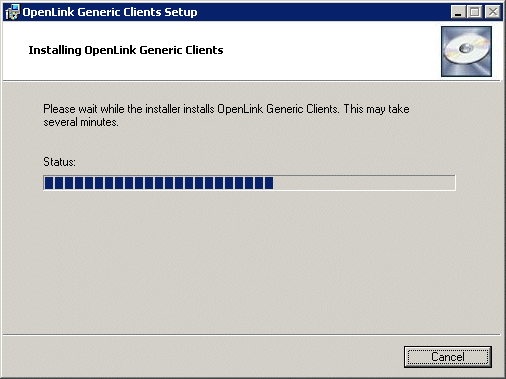
If the installation is successful a final dialog with be displayed indicating this:
Figure3.8.win64instmt8.gif
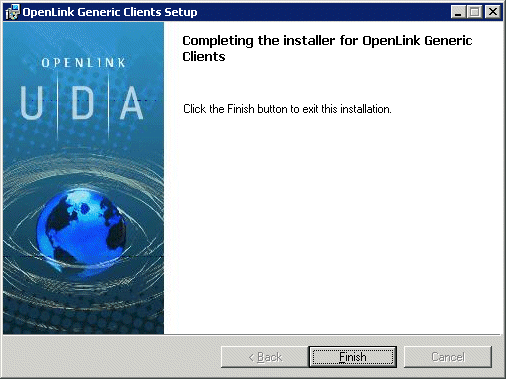
3.1.3.Data Source Configuration
Once you have completed the installation process, proceed to create a new ODBC Data Source Name (DSN) using the ODBC Driver Manager.
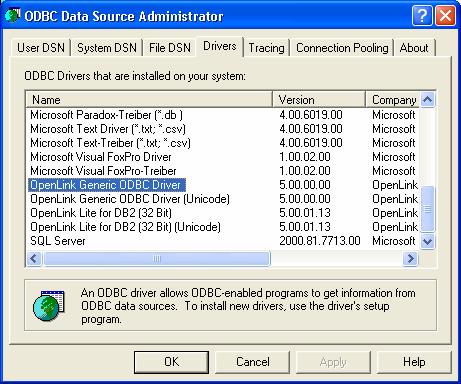
The ODBC Driver Manager is in the Windows Control panel. Windows 2000 and Windows XP have it within Administrative tools. The figure below depicts ODBC v3.5 Driver Manager displaying a list of installed ODBC Drivers.
Figure3.9.Data Source Configuration
3.1.4.ODBC System & User Data Sources
ODBC Driver Manager can create User, System, and File DSNs. Here are the steps for creating a User or System DSN:
-
Decide whether the DSN should be a USER DSN so that it is available for all users, or a USER DSN is required for access by the current user only.
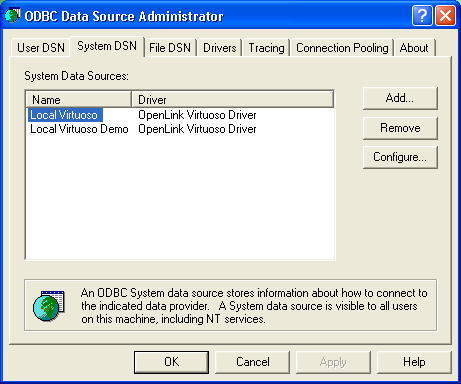
In the ODBC Driver Manager pick the SYSTEM or USER tab. In this example the SYSTEM tab is chosen, and the current System DSNs are shown:
Figure3.10.Data Source Configuration
-
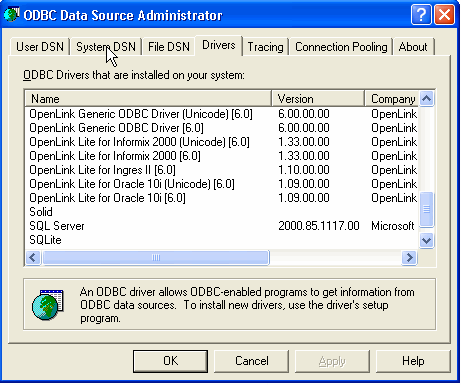
Pick the ODBC Driver to be used to create your ODBC DSN, in the case of the OpenLink Universal Data Access Driver Suite 5.0, this would be the Driver identified below as "OpenLink Generic ODBC Driver".
Figure3.11.Data Source Configuration
-
The ODBC Driver manager now launches the selected driver code so that the DSN may be configured. In this example it will present the OpenLink ODBC Data Source Configuration dialog (depicted below).
Figure3.12.Data Source Configuration
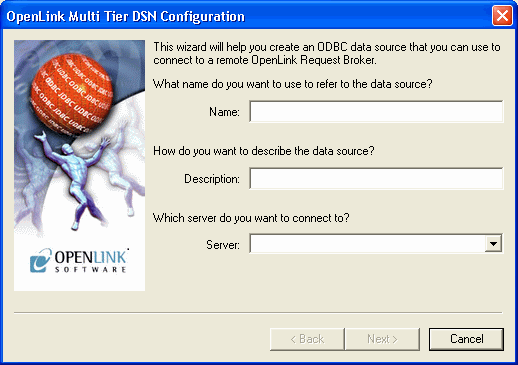
Configure the fields of the ODBC "System" or "User" DSN Configuration dialog in the manner explained below:
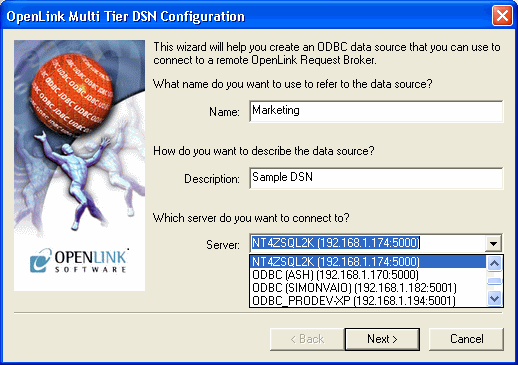
Name. (Datasource) The name of the ODBC DSN, this is how you will interact with the OpenLink ODBC Driver from within ODBC compliant applications once your ODBC DSN has been created.
Description. Additional information that further describes the ODBC DSN that you are creating.
Server. Selected Zero Configuration service name or
<hostname or IP
address>:<port>
of running Broker.The easiest way to complete this field is to select a machine from the drop-down list-box. This list of servers is automatically generated by the Zero Configuration service, so you only need to chose which machine you wish to reach.
Alternatively, enter the hostname or IP address that identifies a Server Machine running OpenLink Server Components, that speak the OpenLink Data Access Protocol. Follow this with a colon and the TCP/IP Port number of the Broker to contact. This corresponds to the Listen parameter on the target Broker.
This example shall now assume the selection of a server from a picklist.
Figure3.13.Data Source Configuration
-
Now select the database and configuration details:
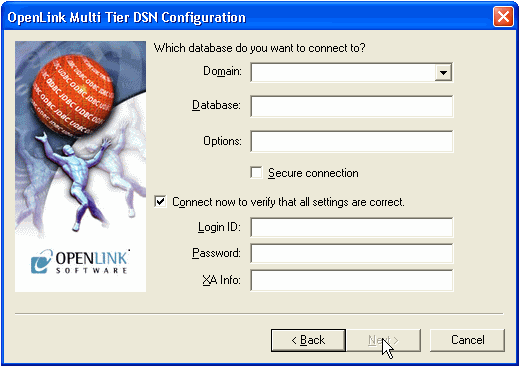
Domain
This is how you pick the Database Engine Type that your ODBC DSN is to be associated with e.g. Informix 7, Oracle 7, Progress 7 etc.
The default offered from the Zero Configuration is typically accepted. An alternative compatable Domain may be chosen for a specific customisation.
Database. This is how an actual database name within the Provider Type Domain is identified, for instance "stores7" indicates an "Informix 7" database called "stores7". This option corresponds to the Database parameter in the preference files.
Connection Options. This is where you place any database specific database connection options. This field in a majority of cases should be left blank by default.
Connect now..
When this tick box is checked, a test connection is made to verify the Data Source connection.
If there is no check then the Login ID and Password fields are ignored, and no test is performed.
Login ID. The default database UserID to use when logging on to a remote database engine (identified by the Domain above).
Password. The Password for the login of the above UserID.
Figure3.14.Data Source Configuration
-
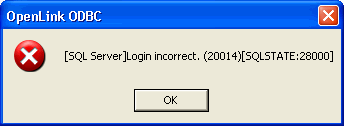
When a test connection fails, the error message is now displayed:
Figure3.15.Data Source Configuration
-
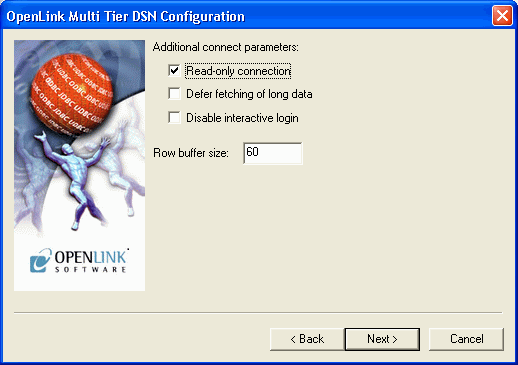
Now define additonal connection parameters:
Read-only connection. Specify whether the connection is to be "Read-only". Make sure the checkbox is unchecked to request a "Read/Write" connection.
Defer fetching of long data. Check this box to defer the fetching of long data.
Disable interactive login. Suppress the ODBC "Username" and "Password" login dialog box when interacting with your ODBC DSN from within an ODBC compliant application.
Row Buffer Size. This attribute specifies the number of records to be transported over the network in a single network hop. Values can range from 1 to 99.
Figure3.16.Data Source Configuration
-
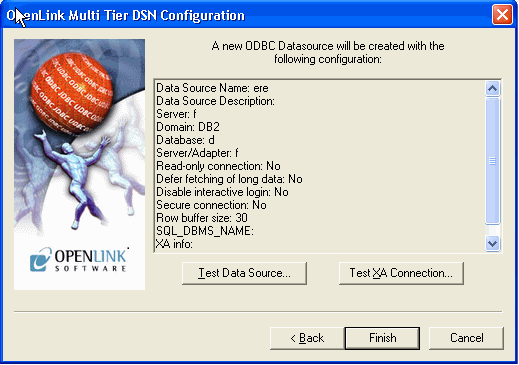
The list of parameters for the DSN are now shown. The Test Data Source button will trigger a test of the DSN using the existing login parameters.
Figure3.17.Data Source Configuration
-
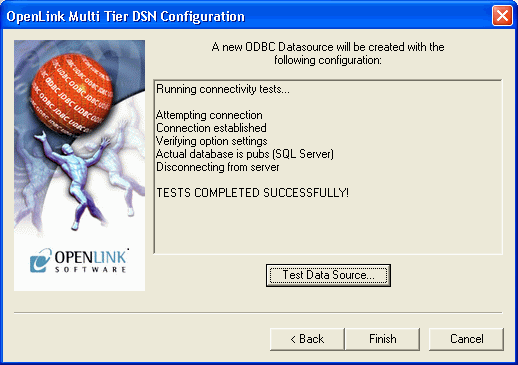
If a test is requested, the results are shown:
Figure3.18.Data Source Configuration
Press the Finish button to save the DSN.
-
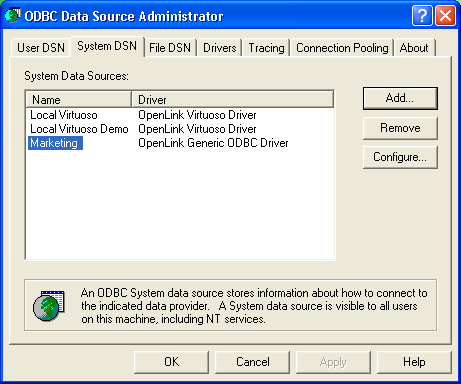
This completes the DSN configuration. It will be listed in the ODBC Driver Manager.
Figure3.19.Data Source Configuration
Manual Selection of Server
The previous example used a server that was picked from the list constructed by the zero configuration. The server you wish to use might not be in this list if it is not a local machine that can be discovered. In this case it is necessary to complete the server field manually with the host name or IP number, and the port number.
-
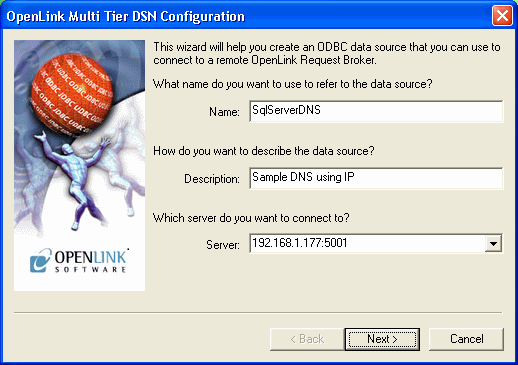
Complete the fields for Data Source Name and Description as before. In the server field, enter the TCPIP address and port of the server machine.
Figure3.20.Data Source Configuration
-
The connection parameter page will load without any fields completed.
Figure3.21.Data Source Configuration
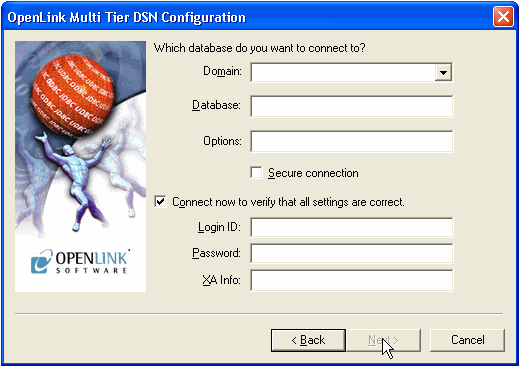
Complete the fields for database connection.
Figure3.22.Data Source Configuration
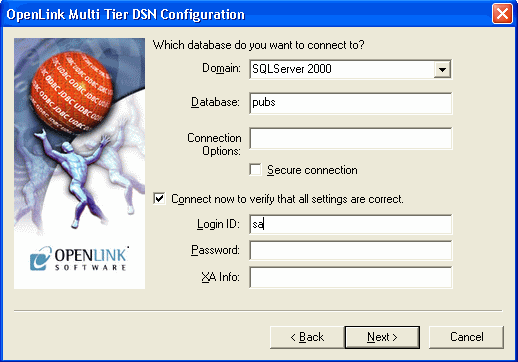
-
Complete the fields for additional connection parameters.
Figure3.23.Data Source Configuration
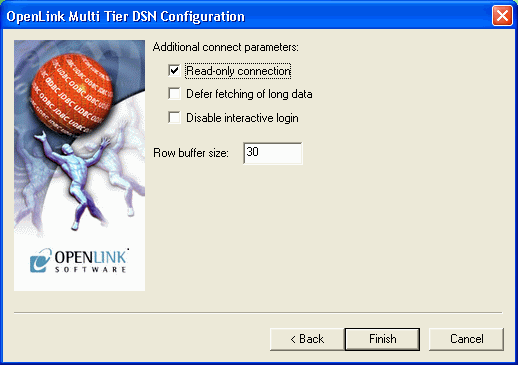
-
This completes the DSN configuration. It will be listed in the ODBC Driver Manager.
3.1.5.Creating a File Data Source
This format of ODBC DSN enables the creation of centralized ODBC DSNs on a designated NT or Windows 95 Server machine, thereby reducing the administrative overhead of ODBC DSN configuration for every single machine within your infrastructure.
The steps for creating an ODBC File DSN are as follows:
-
Select the File DSN Tab from the ODBC Driver Manger. Press the Add button.
Figure3.24.File Data Sources
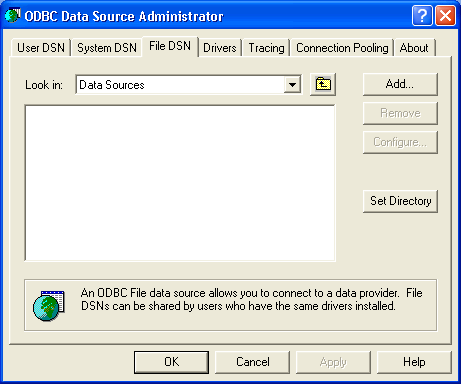
-
Pick the ODBC Driver to be used to create your ODBC DSN, in the case of the OpenLink Universal Data Access Driver Suite 5.0, this would be the Driver identified below as "OpenLink Generic ODBC Driver".
Figure3.25.Data Source Configuration

-
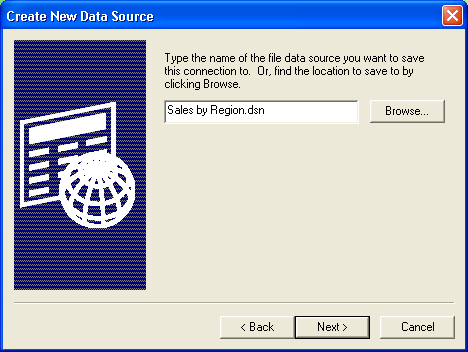
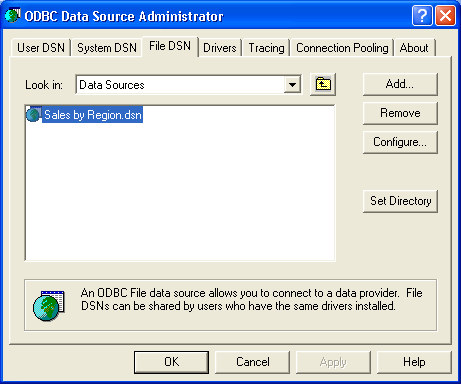
Enter a name that describes your File DSN (e.g. "Sales by Region" as depicted below) for future use when interacting with it from ODBC compliant application and environments. At present to get full compatability within the Admin Assistant, you must end your dsn name with the extension ".dsn". So for this example the DSN name would be "Sales by Region.dsn".
Figure3.26.File Data Sources
-
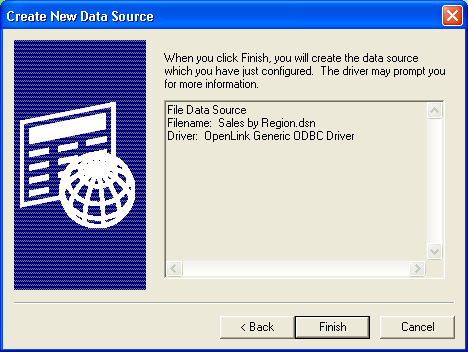
Verify the displayed paramters are correct, and confirm by hitting Finish button.
Figure3.27.File Data Sources
-
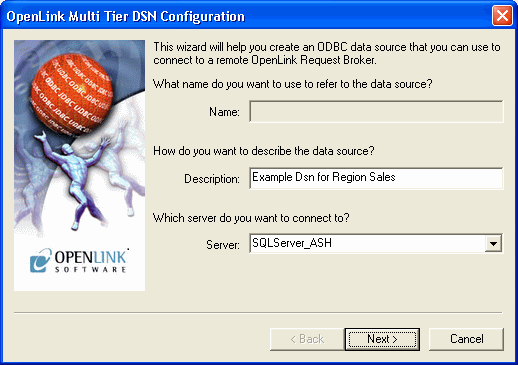
Enter a Description and define the location of the server either by selection, or enter it manually.
Note the name is not defined here as the filename defines the DSN.
Figure3.28.File Data Sources
-
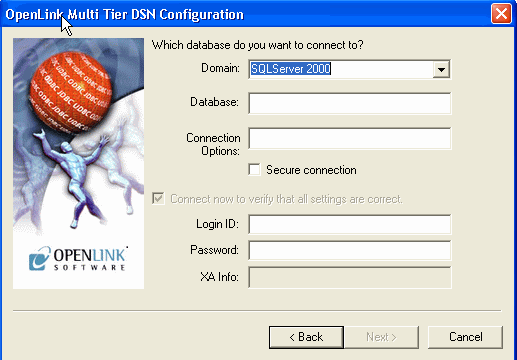
Complete the fields of the ODBC File DSN. Enter Domain, Database, Server. See above for details of each.
The File DSN must be verified immediately, so the Login ID and password are required. The Next button will be disabled until login details are provided.
Figure3.29.File Data Sources
-
Complete the fields for additional connection parameters.
Figure3.30.Data Source Configuration

-
This concludes the File DSN generation. The DSN will appear in the list under the File DSN Tab of the ODBC Driver Manger.
Figure3.31.File Data Sources
3.1.6.Advanced Settings
The settings in this section have default values which are recommended in most situations.
If you run a complex query through the database it may take a long time before any data is actually returned. In this situation you may need to increase the ReceiveTimeout value, described below, only to cater for it. 2 Minutes (default) is usually more than adequate.
32bit Client Advanced Settings.
Client global configuration information is contained in the sub section OPENLINK.INI of the registry. Windows 32bit platforms use the registry to store all configuration information. To edit or view to registry, run the regedit program. To view the OpenLink settings expand the following section:
HKEY_LOCAL_MACHINE\SOFTWARE\ODBC\OPENLINK.INI
Important values that you may need to change are listed in the table below. The default values are recommended in most cases:
Table3.1.
|
Sub Section |
Key |
Description |
|---|---|---|
|
Communications |
||
|
BrokerTimeout |
The amount of time the client will wait for a connection to an agent. The default value is 30. Value is measured in seconds. |
|
|
ReceiveTimeout |
The amount of time the client will wait for a query to return with data. The default value is 120. Value is measured in seconds. |
|
|
ShowErrors |
With this set to yes any OpenLink messages will be displayed in a dialog box. If this is set to no, OpenLink messages will not be displayed. |
|
|
ServerTypes |
||
|
<Name>= |
Each key name in this section represents a different provider type. To add a provider type simply add a new line using the same syntax as the default types. |