2.11.2. Creating the Application for Silverlight.
-
Open the ADO.Net Data Service project in
Visual Studio
-
In the
Solution Explorer
right click on the RDFWebDemo solution and add a new Project.
-
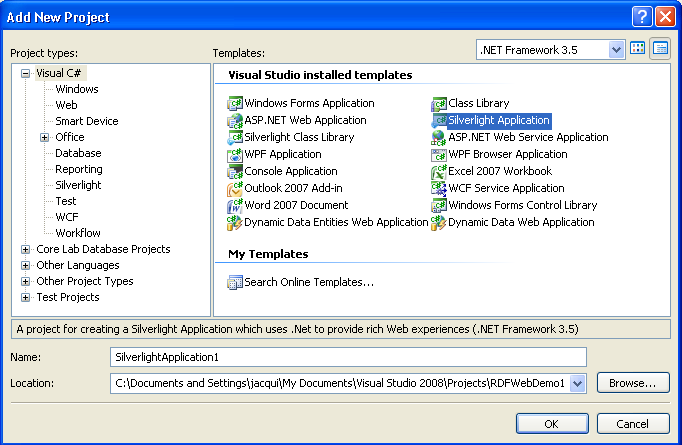
In the
Add New Project
dialog select
Silverlight Application
and click
OK
. This will open the
Add Silverlight Application
dialog.
Figure 2.167. Add Silverlight Application
-
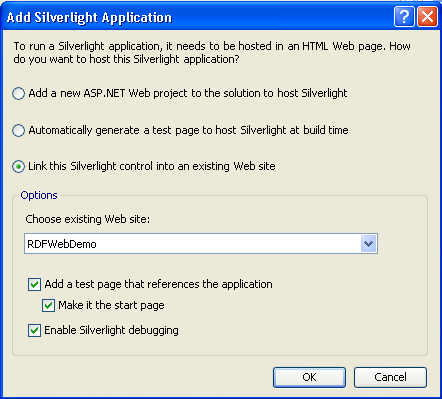
Select
Link this Silverlight Control into an existing Web Site
and make sure the Web Site selected is RDFWebDemo. Select
Add a test page that references the application
and
Make it the start page
.
Figure 2.168. Add a test page
-
In Solution Explorer, select RDFWebDemo, open the Project menu and select Properties.
-
Select the
Web
tab, and select
Specific Page
in the
Start Action
section. Click on the ellipsis and select SilverlightApplication1TestPage.html as the start page.
-
Add a reference to the data service. In the
Solution Explorer
right click on SilverlightApplication1 and select
Add Service Reference
-
In the
Add Service Reference
dialog click the
Discover
button. Your ADO.Net Data Service should appear in the Address box and the Services box.
-
Select the service and click
OK
. ServiceReference1 will now be added to the ServiceReferences.
-
Open page.xaml.cs and add references to the service and to the System.Data.Services.Client assembly by adding the following using statements at the top of the file:
using System.Data.Services.Client;
using SilverlightApplication1.ServiceReference1;
-
We need at create a data service context to reference the data from the service and to load data from the view, sparqlview, exposed by the service. Add the following lines to the page constructor after InitializeComponent()
DataServiceContext svcCtx = new DataServiceContext(new Uri("WebDataService1.svc", UriKind.Relative)); svcCtx.BeginExecute<sparqlview>(new Uri("sparqlview", UriKind.Relative), loadSCallback, svcCtx); -
Add the loadSCallback method to the page class. The method loads the data from sparqlview and puts it in a List. This List populates a list box on the page.
private void loadSCallback(IAsyncResult asyncResult) { List<Uri> uList = new List<Uri>(); DataServiceContext ctx = asyncResult.AsyncState as DataServiceContext; foreach (sparqlview sv in ctx.EndExecute<sparqlview>(asyncResult)) uList.Add(new Uri(sv.s)); listBox1.DataContext = uList; } -
Add the list box to the page. In the
Solution Explorer
double click on page.xaml to open it in the editor. Add the following code between the <grid> and </grid> tags.
<ListBox x:Name="listBox1" HorizontalAlignment="Stretch" Margin="25,8,26,-78" Grid.RowSpan="1" Grid.Row="0" VerticalAlignment="Stretch" ItemsSource="{Binding Mode=OneWay}" > <ListBox.ItemTemplate> <DataTemplate> <StackPanel x:Name="DisplayListData" Orientation="Horizontal" VerticalAlignment="Bottom" Margin="5" > <HyperlinkButton Content ="{Binding}" NavigateUri="{Binding}" Margin="5,0,0,0" VerticalAlignment="Bottom" HorizontalAlignment="Left" FontSize="12"> </HyperlinkButton> </StackPanel> </DataTemplate> </ListBox.ItemTemplate> </ListBox> -
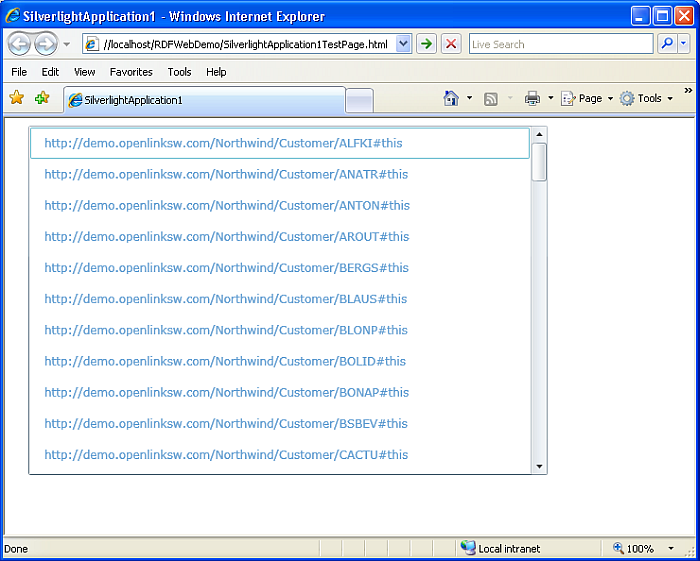
Build the Silverlight application and launch without debugging using
Ctrl F5
. This will launch the browser and open SilverlightApplication1TestPage.aspx.
Figure 2.169. SilverlightApplication1TestPage.aspx
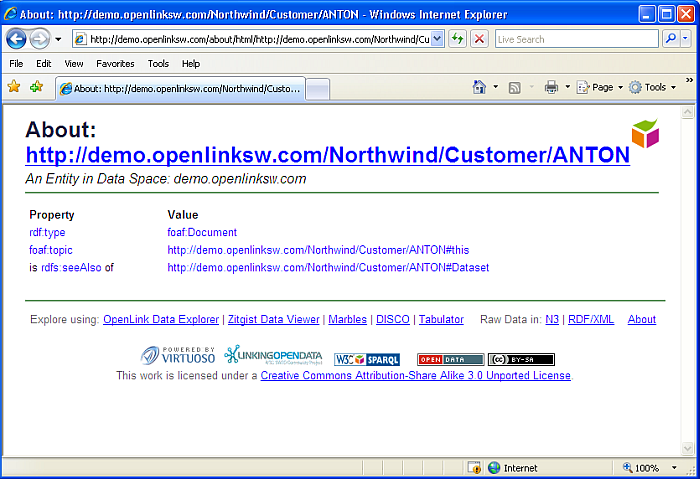
Clicking on one of the IRIs will open the page using description.vsp.
Figure 2.170. using description.vsp