2.7.3. Generating the School Entity Data Mode
Add the ADO.NET Entity Data Model item template
-
Select the CourseManager project in Solution Explorer, right-click, point to Add, and then click New Item.
-
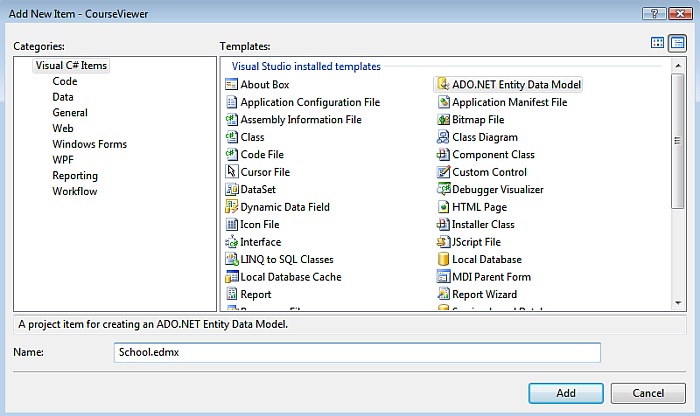
Select ADO.NET Entity Data Model in the Templates pane.
-
Type School.edmx for the model name and click Add. The opening page of the Entity Data Model Wizard is displayed.
Figure 2.103. School.edmx
Generate the EDM
-
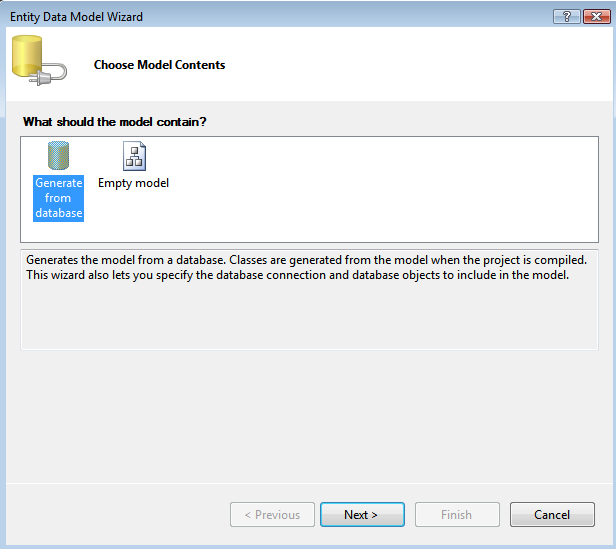
Select
Generate from database
in the
Choose Model Contents dialog box
. Then click
Next
.
Figure 2.104. Model Contents
-
Click the
New Connection
button.
Figure 2.105. New Connection
-
Choose the OpenLink
Virtuoso Data Source
and click
Continue
.
Figure 2.106. Virtuoso Data Source

-
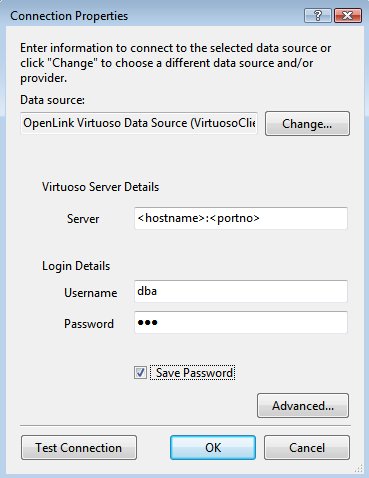
In the
Connection Properties
dialog specify the
hostname, portno, username and password
for the target Virtuoso Server and click the
Advanced
button.
Figure 2.107. Connection Properties
-
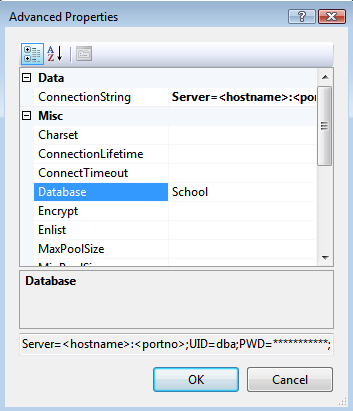
In the
Advanced Properties
dialog set the
Database parameter
to
School
and click OK.
Figure 2.108. Advanced Properties
-
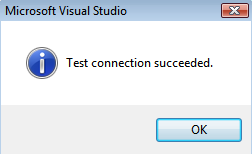
Press the
Test Connection
dialog to verify the database is accessible.
Figure 2.109. Test Connection
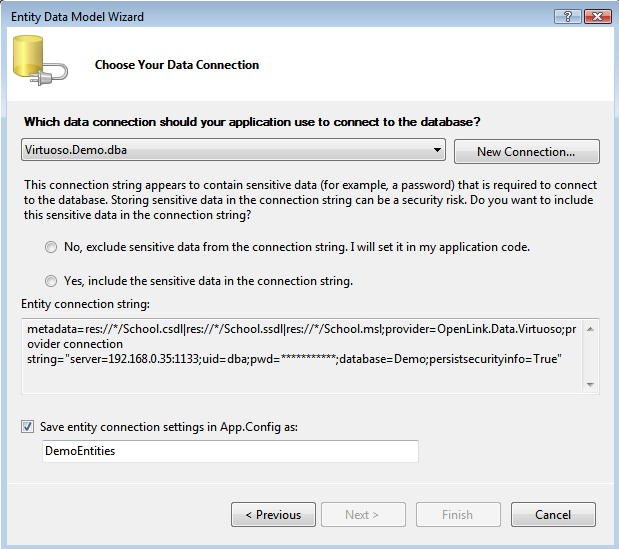
-
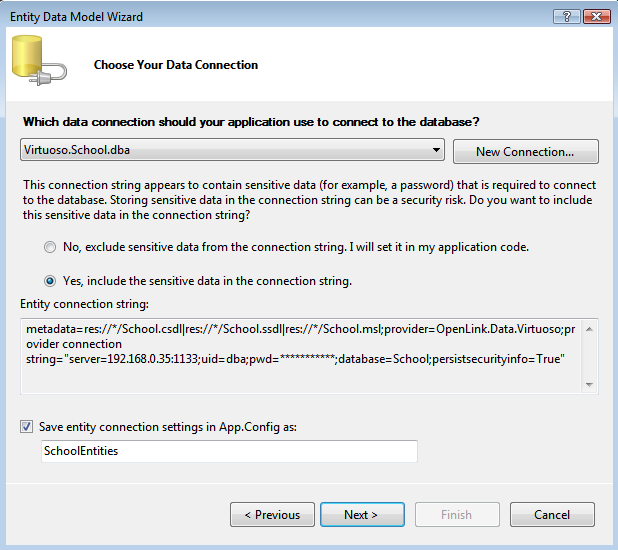
Set the
entity connect string name
to
SchoolEntities
and click
Next
.
Figure 2.110. entity connect string name
-
In the
Choose your Database Objects
page select the
Tables
check box to select all table in the
School database
for addition to the EDM, set the
Model Namespace
to
SchoolModel
and click
Finish
.
Figure 2.111. Database Objects

View the EDM in the ADO.NET Entity Data Model Designer
-
In the
Solution Explorer
, double-click the
School.edmx
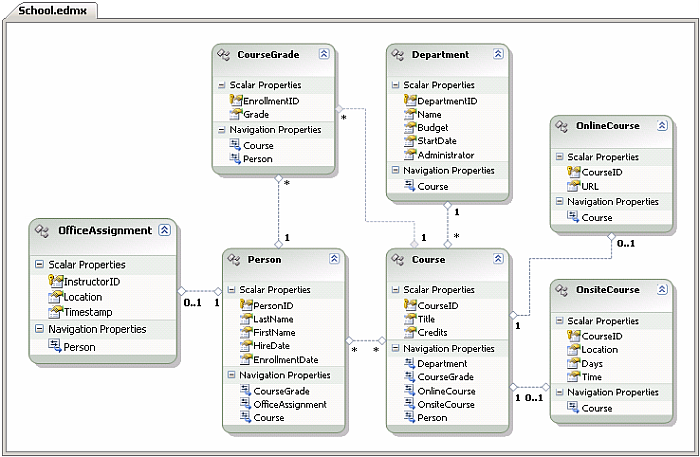
file. This displays the School model in the ADO.NET Entity Data Model Designer window.
Figure 2.112. Solution Explorer
-
From the
View
menu, select
Other Windows
, and then click
Model Browser
to display the
Entity Model Browser
window.
-
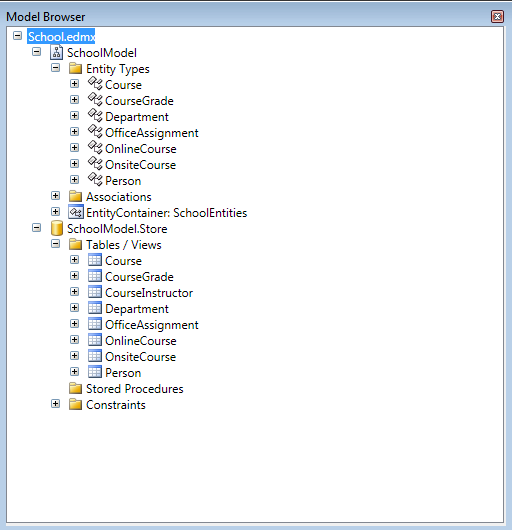
Expand the
SchoolModel
and
SchoolModel.Store
nodes to view conceptual and store definitions, respectively.
Figure 2.113. SchoolModel
-
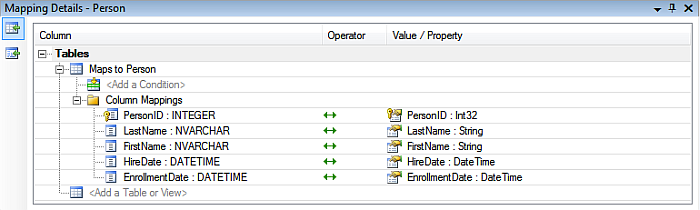
From the
View menu
, select
Other Windows
, click
Mapping Details
, and then click an entity (Person for example) or association in the Entity Designer.
-
This displays the Entity Mapping Details window with information about the object-relational mapping for the selected object.
Figure 2.114. View menu