16.6.2. One Click Linked Data Generation & Deployment
The following steps provide a one-click guide for publishing ODBC- or JDBC-accessible RDBMS data in RDF Linked Data form, using the "Generate & Publish" Conductor feature.
-
Go to http://<cname>:port/conductor ;
-
Log in as user dba (or another user with DBA privileges);
-
Follow menu path Linked Data -> Views;
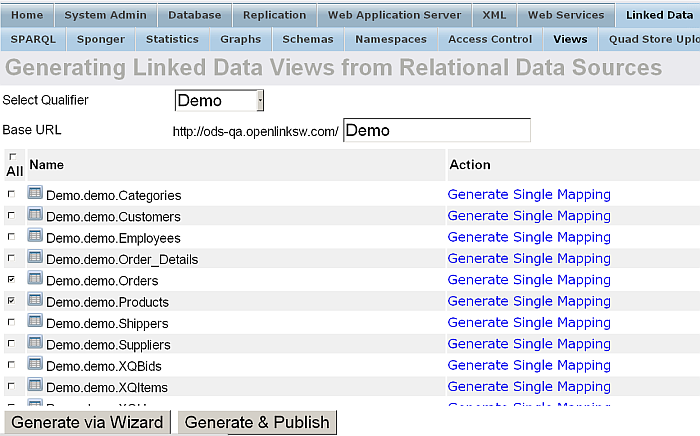
Figure 16.52. Linked Data Views

-
In the form presented, perform the following steps:
-
Select the Database Name Qualifier (e.g., "Demo") that exposes the Tables / Views for this exercise
-
Enter the Base URL to which your URL rewrite rules will be bound (e.g. http://<cname>:8890/Demo)
-
Select specific Tables containing the data to be published (e.g. Demo.demo.Orders and Demo.demo.Products)
-
Click the "Generate & Publish" button
Figure 16.53. Linked Data Views Generate and Publish
-
-
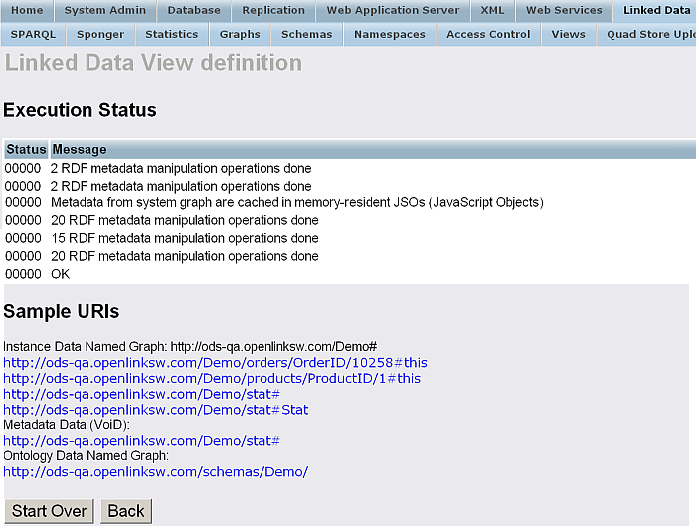
Virtuoso will perform the entire process of ontology generation, instance data generation, and linked data deployment (re-write rules generation and application).
-
Error messages will be presented if the Wizard encounters problems. If there are no error messages, your Linked Data View declarations and Linked Data publishing activities will have completed successfully.
Figure 16.54. Linked Data View declarations and Linked Data publishing activities
-
Optionally, you could also perform one of the following tasks:
-
Save Data Mappings: when clicked, offers to save the generated Definitions to local file system
-
Save Ontology Mappings: when clicked, offers to save the generated Ontology to local file system
-
Click on the "Cancel" should you want to return to the initial Linked Data View Generation form.
-