6.2.9. Database Administration
Users & Group Accounts
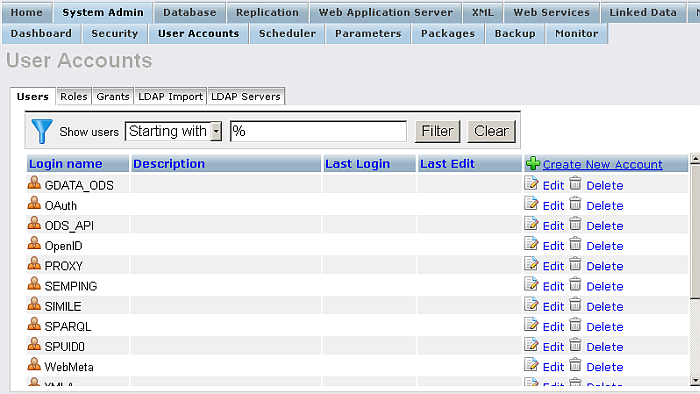
From System Admin / user Accounts you can alter the users that can access the Virtuoso database. You may add a new user by clicking the "Create New Account" link, edit an existing user, or delete users. You can associate users with groups or make new groups.
Groups are created and function like normal user accounts. To define a group you simply create a new user, and then to make use of the group you assign users to that group from the drop down which will contain available groups.
To create a new user or group you must enter a username, password and confirm the password by retyping it in the fields provided. You may optionally specify a group and default qualifier. You can use groups to control access to a set of users by maintaining the permissions granted to the group for which they are members. Specifying a default qualifier allows you to specify the catalog or database for which queries will be run against that do not explicitly refer to a particular catalog or database.
You can import users by adding LDAP Servers(s) from the "LDAP Servers" tab, and then from the "LDAP Import" to specify from which LDAP server the import should be done:
Figure 6.117. Users Accounts
Configuring and import from LDAP server
The following steps describe how to configure LDAP server and then import user(s) using the Conducor UI:
-
Go to http://cname:port/conductor
-
Enter user dba credentials
-
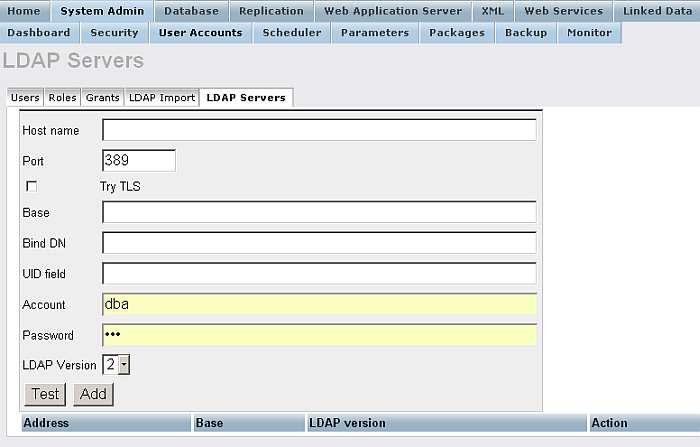
Go to System Admin -> User Accounts -> LDAP Servers
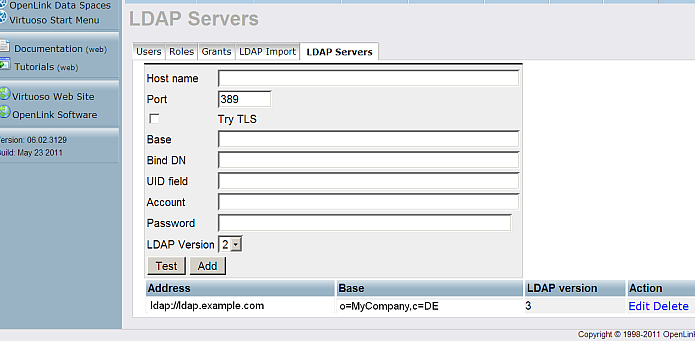
Figure 6.118. LDAP Servers Configure and Import
-
Enter in the LDAP servers form respectively:
-
Host Name: for ex.: ldap.example.com
Note: you can also use ldap:// or ldaps:// in front of Host name
-
Base: for ex.: o=MyCompany,c=DE
-
Base DN: for ex: ou=Accounts,o=MyCompany,c=DE
-
UID field: uid
-
Account: for ex: joe
-
Password: *******
-
LDAP version: choose for ex. 3
-
-
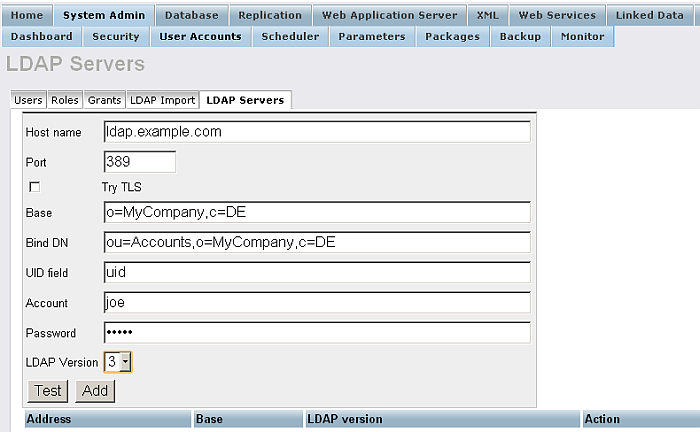
Check the connection by pressing "Test":
Figure 6.119. LDAP Servers Configure and Import
-
If the test connection is successful, click "Add".
Figure 6.120. LDAP Servers Configure and Import
-
Next you can import various data from your LDAP server.
-
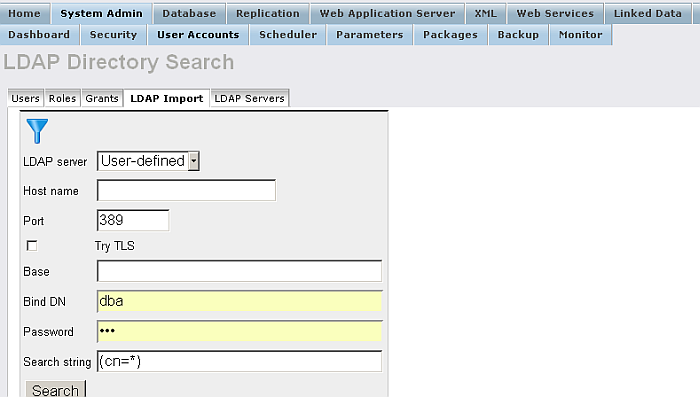
Go to System Admin -> User Accounts -> LDAP Import
Figure 6.121. LDAP Servers Configure and Import
-
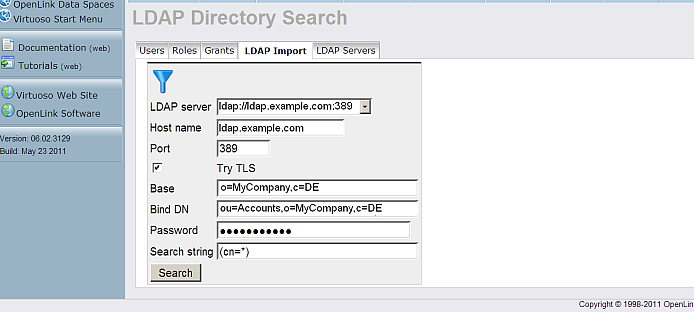
Select the LDAP server added from above:
Figure 6.122. LDAP Servers Configure and Import
-
Click "Search".
Figure 6.123. LDAP Servers Configure and Import
-
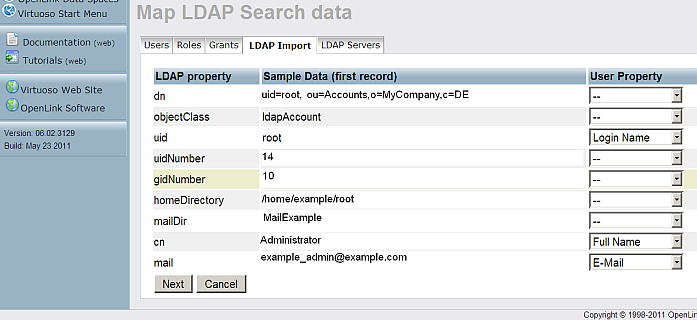
Click "Next".
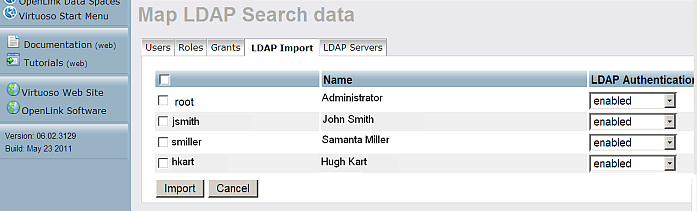
Figure 6.124. LDAP Servers Configure and Import
-
Select the desired profiles to be imported and set prefered "LDAP Authentication" for selected user:
-
If set to "enabled", then on an attempt to log in into Virtuoso, the system tries to log in into the LDAP server with the given username and password. If this succeeds, then the user logs in successfully in Virtuoso.
-
If set to "account check", then on an attempt to log in into Virtuoso, the system performs a check if there is such an user on the LDAP server. If yes, then the user logs in successfully in Virtuoso.
Figure 6.125. LDAP Servers Configure and Import
-
-
Click "Import".
Note: By default an importing LDAP user has "User type" set to "WebDAV". To log in into iSQL with an imported LDAP user credentials you should:
-
Make sure you have set in Virtuoso ini the SQL_ENCRYPTION_ON_PASSWORD parameter to 1 in the [Client] section, i.e.:
;virtuoso.ini
....
[Client]
SQL_ENCRYPTION_ON_PASSWORD  = 1
...
-
Set the "User type" of the imported LDAP user to be "SQL/ODBC" by going to Virtuoso Conductor -> System Admin -> User Accounts -> user -> Edit -> field "User type".
-
Log in into iSQL:
isql host:port ldap-user-name ldap-user-password
-
-
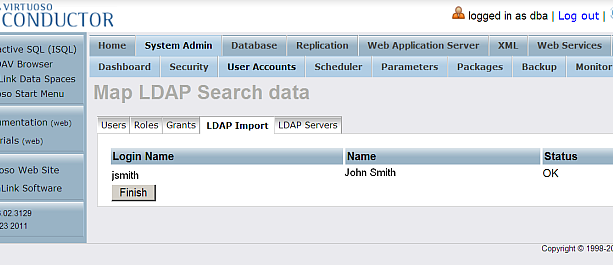
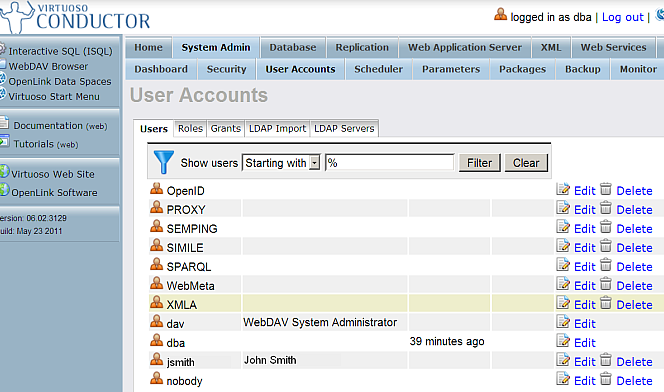
Click "Finish".
-
The imported profile(s) should be displayed in the Users tab:
Figure 6.126. LDAP Servers Configure and Import
Databases
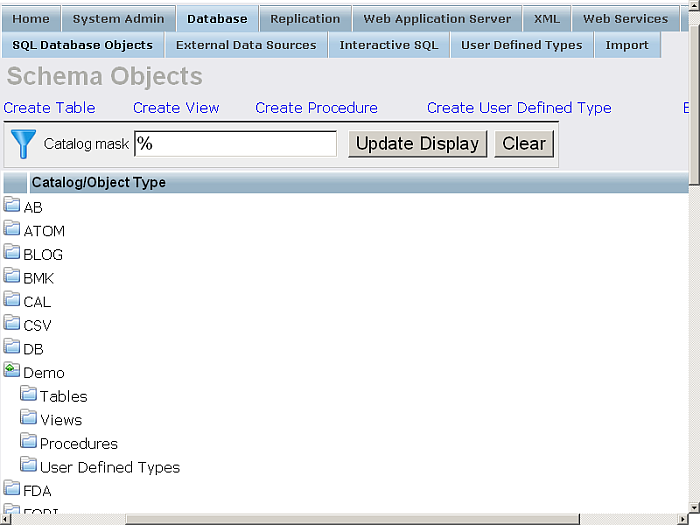
Each catalog (database) within Virtuoso will be listed under the Databases /Schema Objects. For each catalog you will be able to view and in some cases edit details about the tables, views, triggers, and store procedures stored within that catalog.
Figure 6.127. Viewing Tables details for the Demo catalogue in the Demo Database
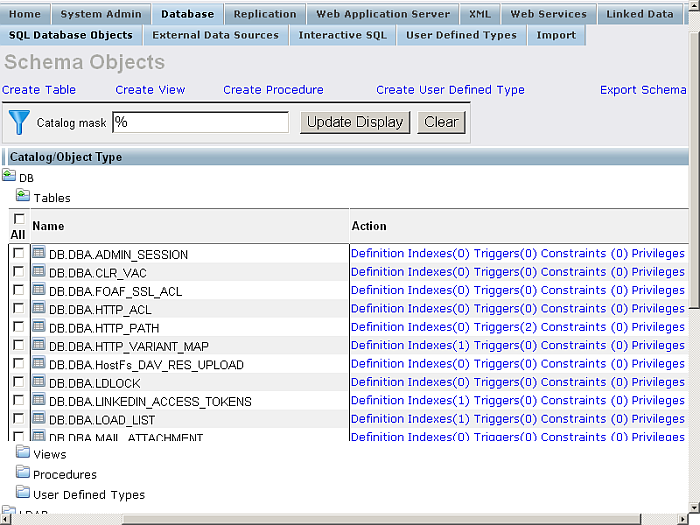
Figure 6.128. Viewing Views details for the Demo catalogue in the Demo Database
Demo Database Installation
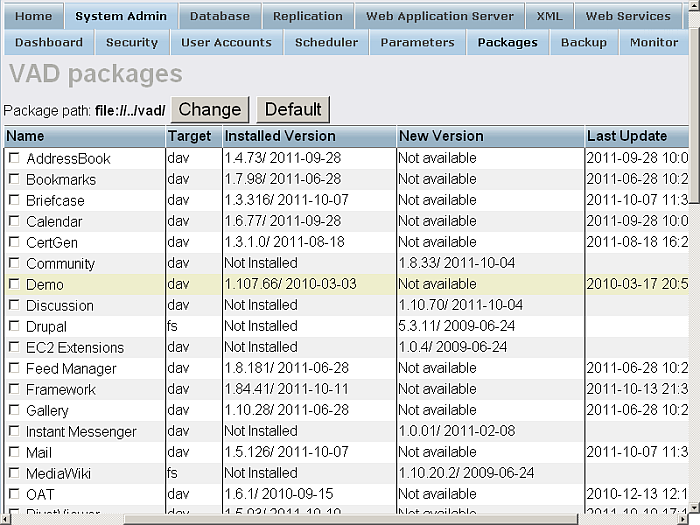
The Virtuoso Demonstration database can be installed with the Conductor by navigating to the "System Admin" -> "Packages" tab where a list of available Virtuoso applications are displayed, one of which is for the "Demo" database package as shown below:
Figure 6.129. Install Demo db using Conductor UI: "System Admin" -> "Packages"
Select the "Demo" package and click on the "Install" button to commence the installation process:
Figure 6.130. Install Demo db: confirmation
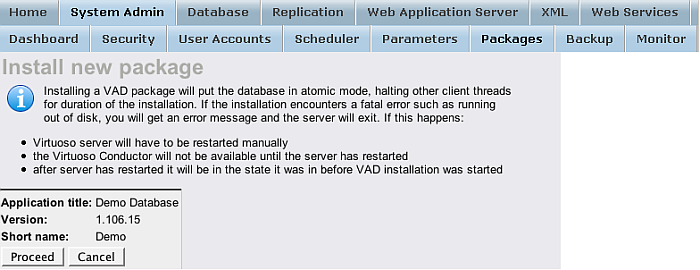
Click on the "proceed" button to install the indicated "Demo Database" application package:
Figure 6.131. Install Demo db: proceed
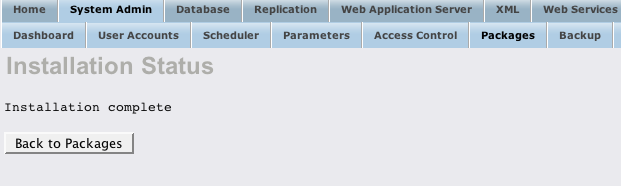
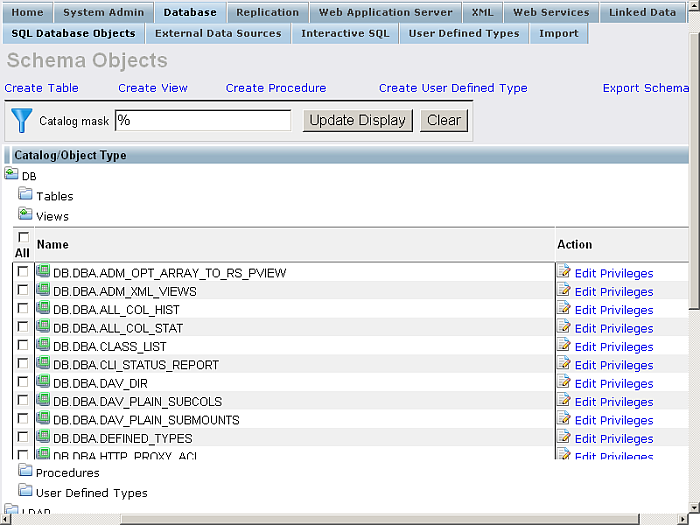
Once installed the demo database schema can be viewed from the "Database" -> "Schema Objects" tab of the Conductor:
Figure 6.132. Install Demo db: view schema objects
Editing Triggers
For each table, Virtuoso gives you the ability to edit the triggers linked to that table, as well as adding new triggers. The link text "Triggers" is followed by a number in parentheses that tells you how many triggers exist associated with that table. If no number is shown, there are no triggers. Clicking on the text takes you to the trigger edit page.
The triggers page shows you the name of each trigger, an excerpt from the text of the trigger, and permits you to edit or drop the triggers. In the last column of the shown form there is a "New Trigger" link for creation of a new trigger.
Editing Stored Procedures
The stored procedures link shows a page of information about existing stored procedures for the database you are viewing. If there are stored procedures, you can see their names and text excerpts, and you may edit or drop them. Adding new stored procedures can be done via the ISQL command-line interface or from the "Create Procedure" link shown above the list of objects for the relevant database.
Figure 6.133. Viewing Stored Procedures details for the DB catalogue
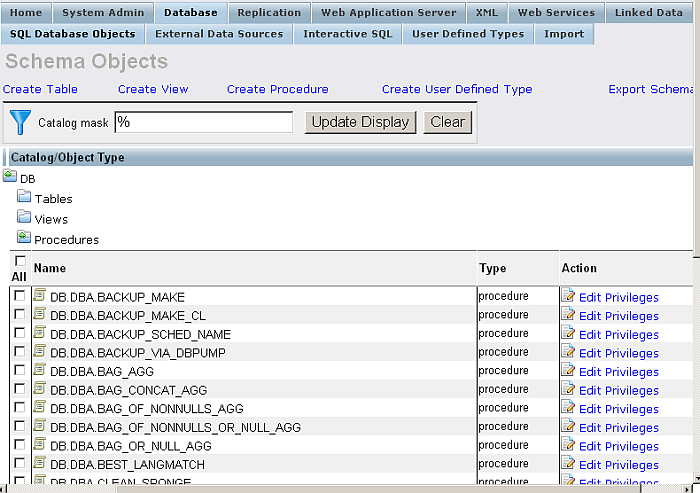
Stored procedures may also refer to modules that contain a group of related stored procedures. These are created and edited as a group, rather than individually. An example of this is the module DB.DBA.AmazonSearchService, which contains procedures such as KeywordSearchRequest() and BrowseNodeSearchRequest().
External Data Sources
From Database / External Data Sources you will be able to manage the Virtual Database feature of Virtuoso. You are able to administer ODBC Data Sources, how to link remote tables and view, and already linked remote connections.
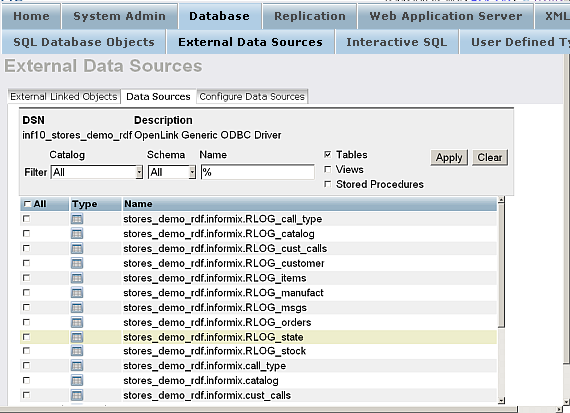
Data Sources
This tab shows you the available Data Sources. For these one, to which there is no connection, will be shown the link"Connect". For the datasource for which there is already established connection, will be shown the links "Link objects", "Change Credentials" and "Disconnect".
Figure 6.134. Remote Datasources connected to Virtuoso
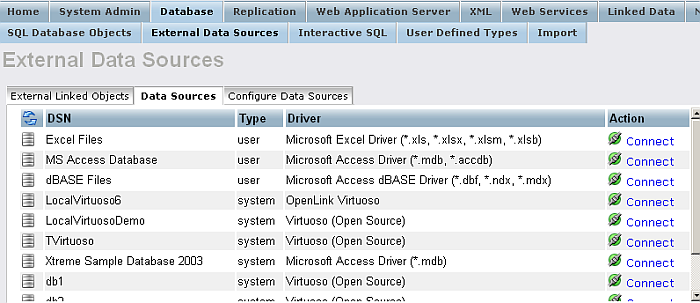
If you need to alter the authentication details of a particular Data Source then select the "Change Credentials" link. If you want to link new objects, select the "Link objects" link.
Configure Data Sources
This section will allow you to configure the data sources themselves on the remote machine. The table that will be presented to you will contain both User and System data sources. You will be able to edit and create either User or System data sources, however, Virtuoso will only be able to use the User data sources that belong to the user that started the Virtuoso Server.
Figure 6.135. Configuring ODBC Datasources
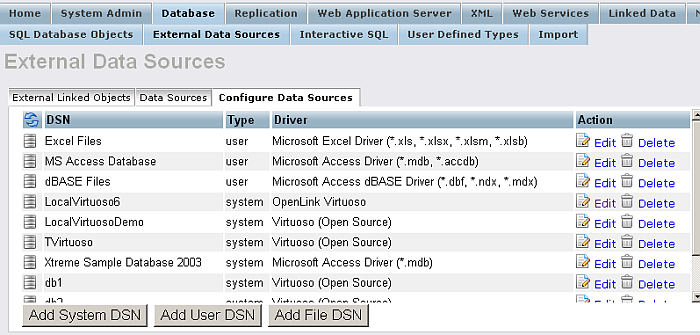
Follow the buttons on the screen as to how you want to manage a data source. You can create new, edit or remove existing data sources.
Figure 6.136. Configuring A Virtuoso ODBC Datasources
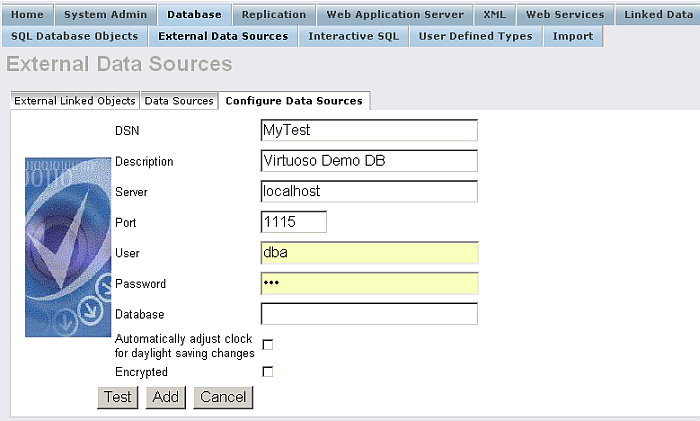
The Virtuoso Server can make use of File Data Sources too. This provides the usual associated conveniences. These enable you to migrate a Virtuoso database to another machine hosting the same ODBC Driver, Virtuoso then has enough information to connect using the installed driver to a remote data source, the tables would not need to be relinked. File DSN's are read from server's root directory. File DSN's can only be read if this directory is contained in the Virtuoso INI file parameter DirsAllows.
![[Note]](images/note.png)
|
Note: |
|---|---|
|
Windows NT or 2000 services by default start as the LocalSystem special user account. This account will not contain the same User DSNs as your own user. The Virtuoso service can be started with other users but you must be aware of any possible system permission problems. It is recommended that Virtuoso make use of System or File DSNs wherever possible. |
External Linked Objects
This page will allow you to manage the remote objects that are linked into Virtuoso. You can unlink objects by selecting them and pressing the "Unlink selected" button.
Figure 6.137. Linking Tables from Remote Datasources
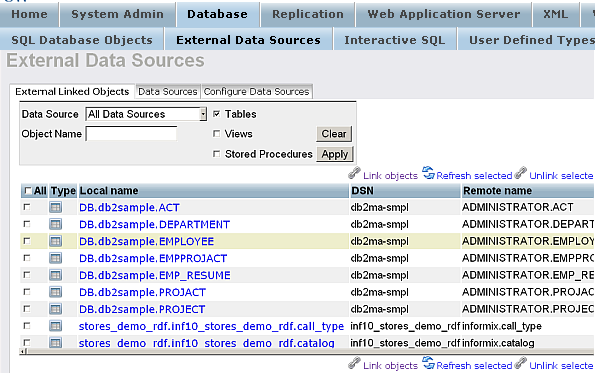
To link new tables into Virtuoso select "Link objects" link or go to the "Data Sources" tab. Click the "Connect" link for a data source. If this data source has been used before then the existing authentication details will automatically be provided. Otherwise you will have to provide these details in the username and password fields provided. When you are ready press the "Link objects" link.
As results you should be presented with list of available remote tables and optionally views and procedures. If the connection fails then an error will be returned to the top of the page instead. You should be able to link any of the listed tables or views into Virtuoso. In order for Virtuoso to be able to correctly query the underlying table it needs to be able to uniquely identify each row (record) within the table or view. Tables should always be created with a primary key, and details of which should be available from the data source. With a primary key available Virtuoso will be able to link the table in to the server easily. In some cases and certainly in the case of views Virtuoso may not be able to determine a primary key or what constitutes uniqueness in the table. On the right most column will be an action link to a page that allows you to alter the primary key information about the table or view that is to be linked. Some primary key information is italized to indicate the explicit definition of a primary key.
You will be required to enter primary key information for views before they can be linked.
Select the tables that you want to link into the Virtuoso Server by checking the check box on the left most column of the list for table or view in question. When you are ready press the Link ... button at the bottom of the page.
As result the selected tables will be linked and listed in the first list as Currently Linked.
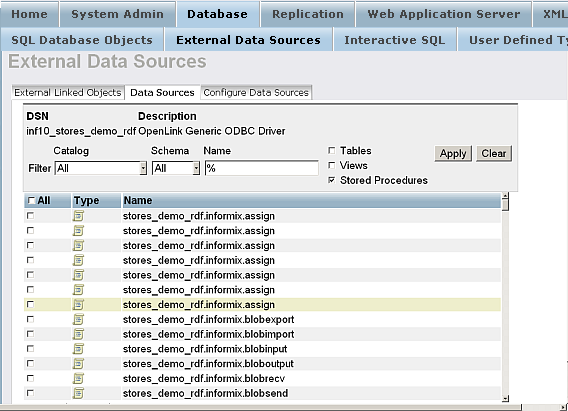
Remote Procedures
In order to view the list of remote procedures, you should check the "Stored Procedures" check-box and click the button "Apply". As result the procedures that are already connected to Virtuoso will be shown with checked check-box. You can unlink these by selecting them and pressing the Unlink button.
To link new procedures into Virtuoso select the Data Source from the list of available n t ab "Data Sources". If this data source has been used before then the existing authentication details will automatically be provided. Otherwise you will have to provide these details in the username and password fields provided. When you are ready press the Link Objects link. The page will next require you to select the catalog/owner combination to refine the search list of procedures on the remote datasource. Check the check-box "Stored procedures" and click the "Apply" button to list the available stored procedures.
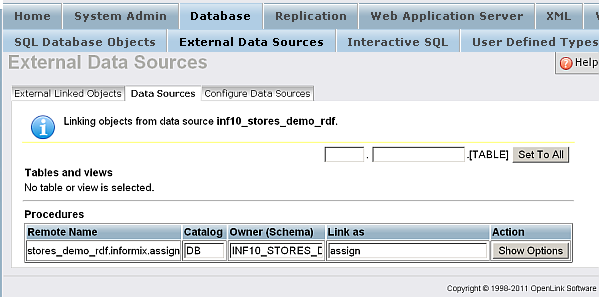
Figure 6.138. Linking Procedures from Remote Datasources
When the page returns you will be presented with a list of available remote procedures. You should be able to link any of the listed procedures into Virtuoso.
Figure 6.139. Linking Procedures from Remote Datasources
Select the procedures that you want to link into the Virtuoso Server by checking the check box on the left most column of the list for the procedure in question. When you are ready press the Link ... button at the bottom of the page.
You will be presented with a new page that lists the procedures chosen and the data type information regarding them. This gives you an opportunity to alter the data type mappings that Virtuoso will use both internally and for any future interactions with the SOAP server. If you do not want to specify any special type information the details can be left as default.
Figure 6.140. Linking Procedures from Remote Datasources
For each remote procedure you have the option to change how they will be referenced within Virtuoso by making changes to the fields for Local Name , Database , and Schema . These fields define how you will find the linked procedure locally to Virtuoso only and do not affect the remote data source.
For each procedure there are radio buttons for selecting the PL Wrapper Requirements . This option is of particular importance for remote procedures capable of returning a resultset. Remote procedures can be linked using a Virtuoso PL wrapper meaning that Virtuoso procedure language code provides a mechanism for negotiating the result set. The available options are:
| Soap Execution - Generates a PL wrapper that can be published to Web Services. |
| SQL Execution - Generates a PL Wrapper that is more suitable for general SQL use. |
| None - Does not generate and PL Wrapper code and simply links the procedure by reference. |
There is a description input box for you to write a description or comment for the linked procedure. This comment will only be applicable to procedures that are linked using a PL Wrapper, and is only directly applicable for PL Wrappers for SOAP execution.
Event Scheduler
The System Admin / Scheduler tab allows you to view, edit and remove events that can be scheduled to run from a particular time at a defined interval.
Figure 6.141. Event Scheduler
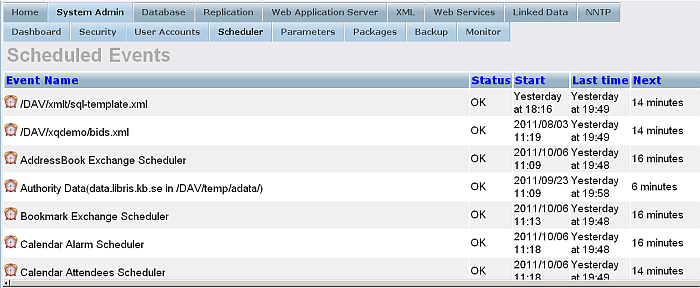
To add a new scheduled event click the "Create New Event" link in tha last column of the shown form. The Event Name is a unique name required to uniquely identify each event. Start Time is when the event will be run for the first time and takes the form of a normal SQL timestamp value. Interval(minutes) is the length of time in minutes to wait to run the event again. SQL is a valid piece of SQL that you want to schedule to run. You can also check for "Enable Error Notification" and enter E-Mail for error notification.
Figure 6.142. Event Scheduler
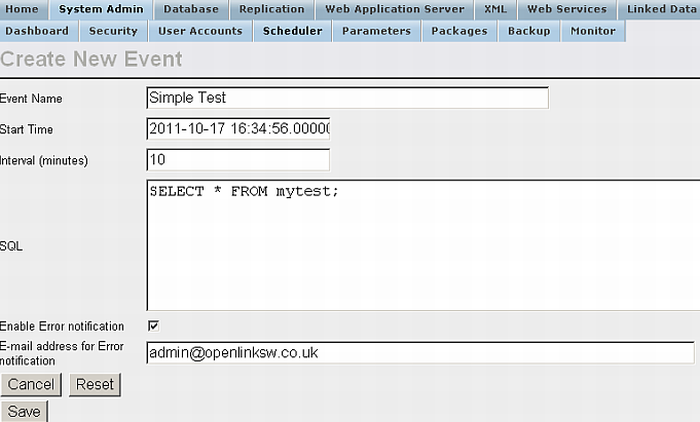
Events write possible error messages into the Virtuoso log file.
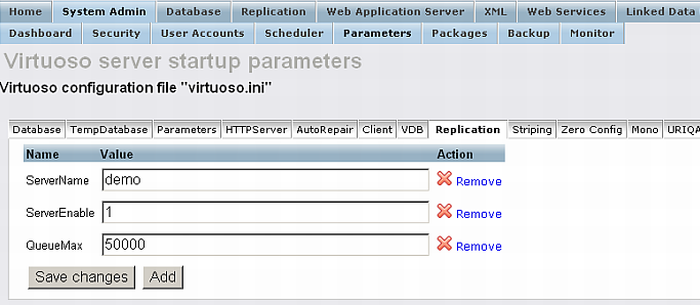
Virtuoso Configuration Editor
From System Admin/Parameters you can change the Virtuoso Configuration settings:
Figure 6.143. Virtuoso (virtuoso.ini) Configuration File Editor
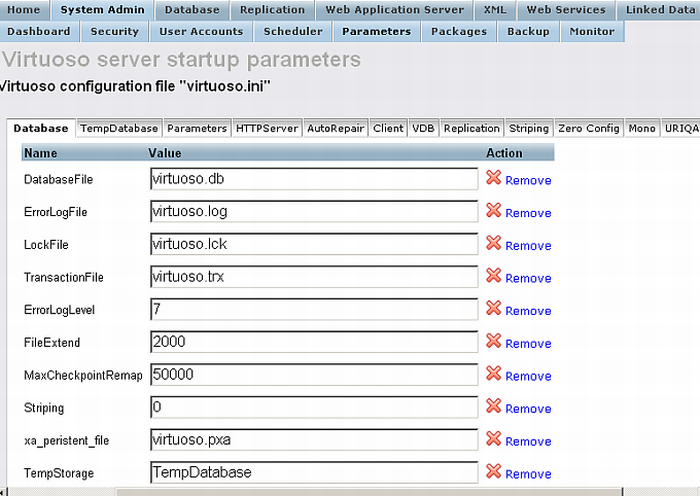
Figure 6.144. Virtuoso (virtuoso.ini) Configuration File Editor
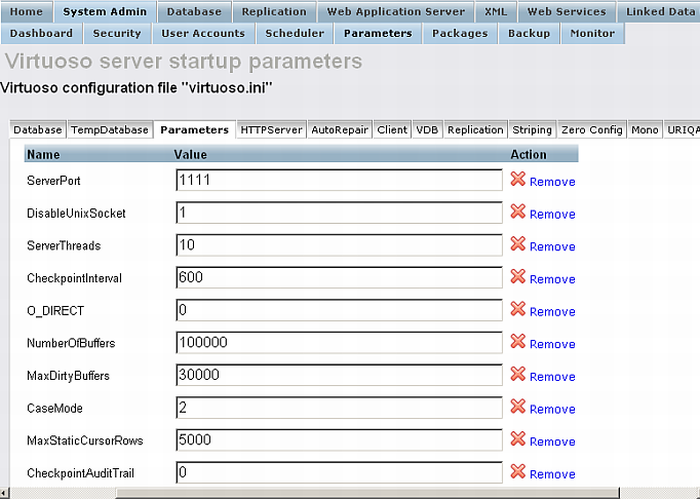
Figure 6.145. Virtuoso (virtuoso.ini) Configuration File Editor
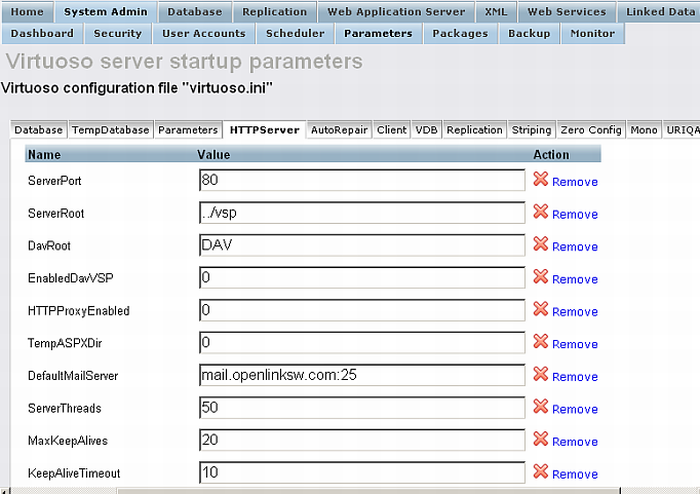
Figure 6.146. Virtuoso (virtuoso.ini) Configuration File Editor
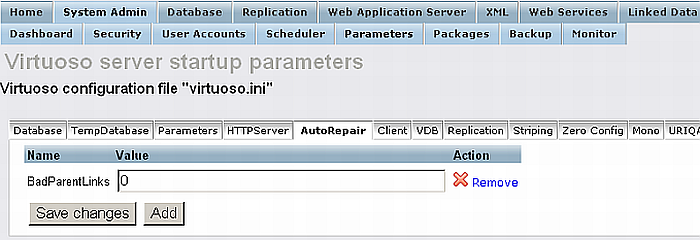
Figure 6.147. Virtuoso (virtuoso.ini) Configuration File Editor
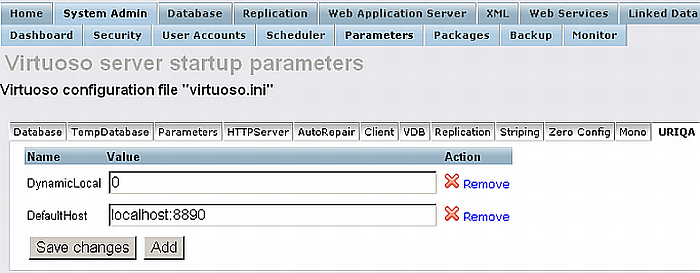
Figure 6.148. Virtuoso (virtuoso.ini) Configuration File Editor
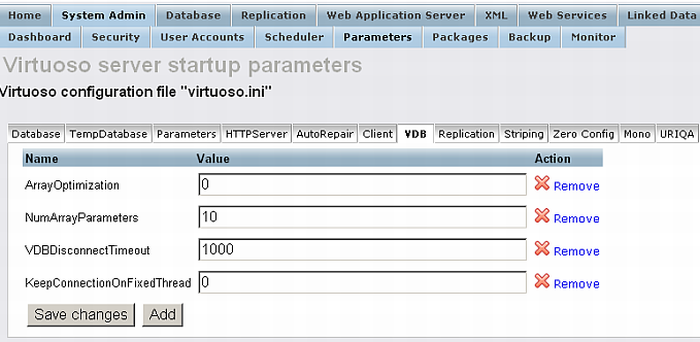
Figure 6.149. Virtuoso (virtuoso.ini) Configuration File Editor
Dashboard and Monitor
The System Admin/Dashboard consists of a collection of statistical information about your Virtuoso server. This includes general licensing information, locking, webserver hits statistics and more.
Figure 6.150. Dashboard

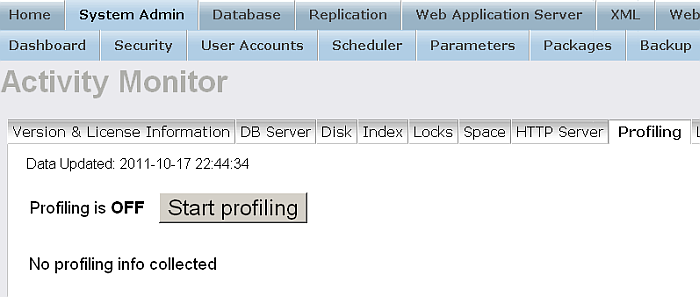
The System Admin/Monitor shows in details statistical information about your server.
Figure 6.151. Monitor - General Information
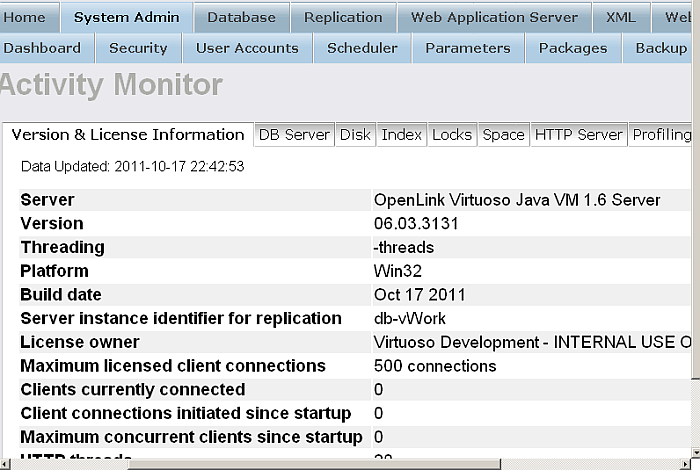
Figure 6.152. Monitor - HTTP Usage
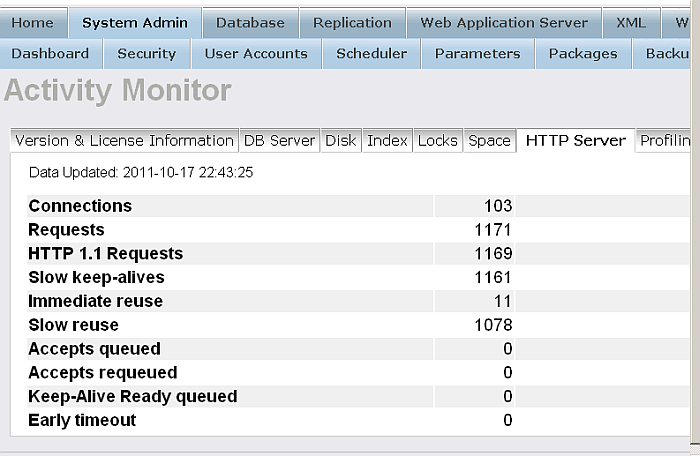
Figure 6.153. Monitor - Index Usage
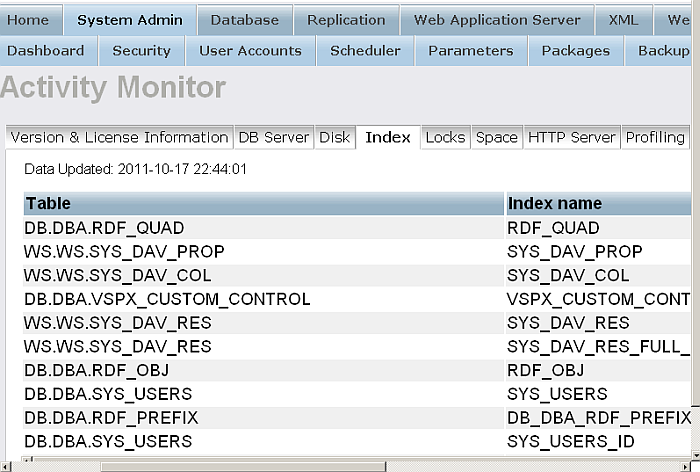
Figure 6.154. Monitor - Profiling