14.1.11.Setting Up the Virtuoso HTTPS Listener
The Setting up of the Virtuoso HTTPS Listener can be done by using the file system or using the Virtuoso conductor.
Note that when you want to change from Virtuoso hosted Cert and Public Key to File System and vice versa, first should be stopped the listener for either setup.
Setting Up the Virtuoso HTTPS Listener to host Certificate and Public Key using File System
-
X.509 certificate Generation
The WebID Protocol consumer needs an x509 certificate with v3 extension "Subject Alternate Name". This attribute is used for the owner's Web ID. For testing purposes we used OpenSSL demo CA to generate such certificates. If you are not using the OpenSSL demo CA, you must first setup a self-signed CA; read OpenSSL documents on how to do this.
-
Add the following line to the
[usr_cert]section of theopenssl.cnffile:subjectAltName=$ENV::ALTNAME
-
Set the environment variable
ALTNAMEto the owner's Web ID, e.g.,export ALTNAME=URI:http://example.com/dataspace/person/myname#this
-
Make a self-signed certificate, e.g.,
$ CA.pl -newreq (follow the dialog)
$ CA.pl -sign
-
When asked to commit the certificate, make sure you see several lines above, like
X509v3 Subject Alternative Name: URI:http://example.com/dataspace/person/myname#this -
If your browser wants a
PKCS#12bundle, you must make one$ openssl pkcs12 -export -in newcert.pem -inkey newkey.pem -out mycert.p12
-
Rename
newcert.pemandnewkey.pem, tomycert.pemandmykey.pemfor example.
-
-
Move
newcert.pem,newkey.pem, andcacert.peminto the server's working directory. In our test case, we put the keys in a 'keys' sub-directory, and added the following lines to the[HTTPServer]section of the Virtuoso INI file,virtuoso.ini:SSLPort = 4443 SSLCertificate = ./keys/localhost.cert.pem SSLPrivateKey = ./keys/localhost.key.pem X509ClientVerifyCAFile = ./keys/localhost.ca.pem X509ClientVerify = 1 X509ClientVerifyDepth = 15
-
Also in the Virtuoso INI file, in the
[URIQA]section,DefaultHost(example.com:8890below) must be edited to correspond to the DNS-resolvable host name ("CNAME") of the Virtuoso host, combined with theServerPortas set in the[HTTPServer]section of the same INI file.[URIQA] DynamicLocal = 1 DefaultHost = example.com:8890
For example, if the CNAME of the host is
virtuoso.example.com, and theServerPortis4321, theDefaultHostshould be set tovirtuoso.example.com:4321[URIQA] DynamicLocal = 1 DefaultHost = virtuoso.example.com:4321
-
Start the Virtuoso server, and look at the log file. Once HTTPS is up, you should see something like:
HTTPS Using X509 Client CA ....
HTTPS/X509 server online at 4443
-
Setting Up Firefox:
-
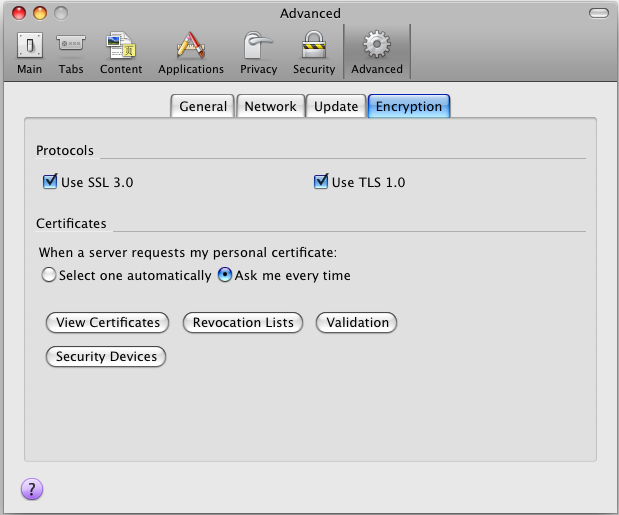
In the Preferences dialog, open the Advanced tab, and click the "View certificates" button.
Figure14.3.HTTPS Listener
-
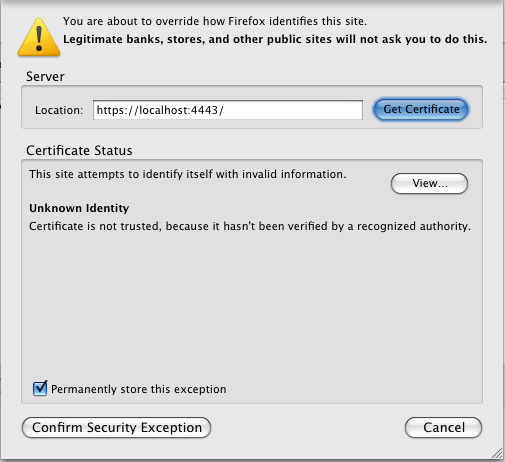
Click the "Add exception" button ,and enter the address of the HTTPS server you've just configured, i.e. https://virtuoso.example.com:4443/
-
Click OK, and confirm the exception.
Figure14.4.HTTPS Listener
-
Click to the "Your Certificates" tab, and import
mycert.p12.
-
Setting Up the Virtuoso HTTPS Listener to host Certificate and Public Key using Virtuoso Conductor
-
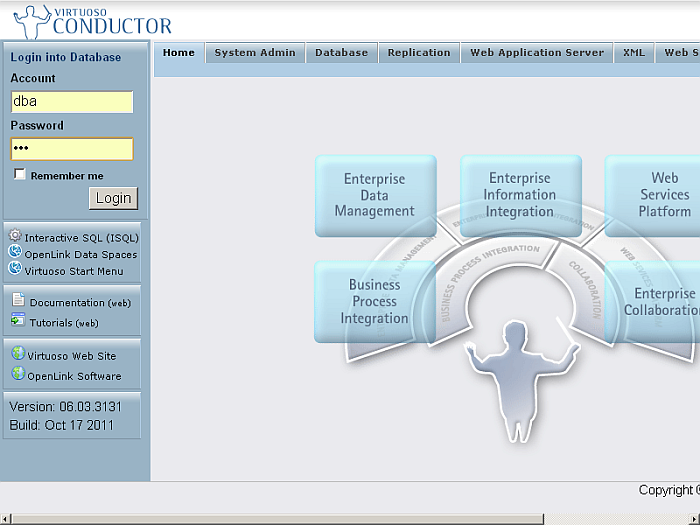
Go to the
http://cname:port/conductorURL, enter the DBA user credentials.Figure14.5.HTTPS Listener
-
Go to System Admin->Security
Figure14.6.HTTPS Listener
-
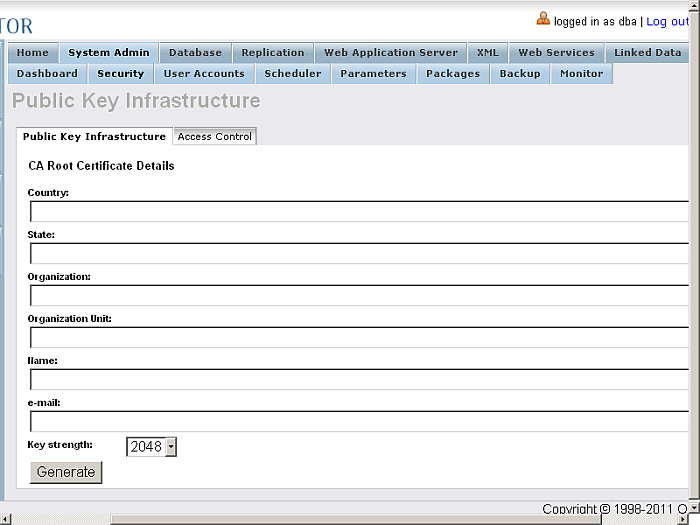
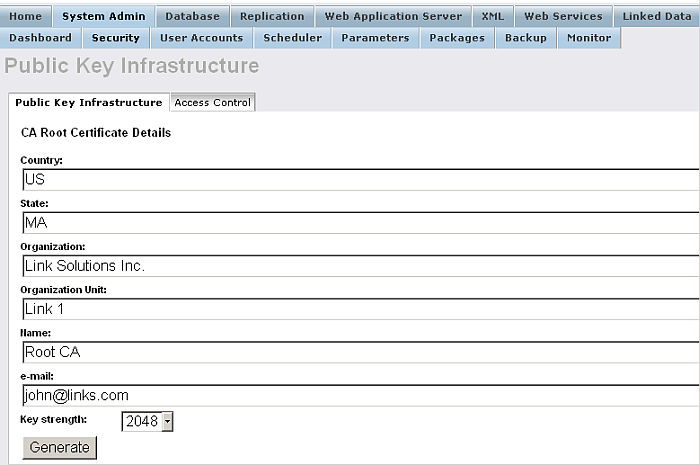
Enter the Issuer details:
Figure14.7.HTTPS Listener
-
Click Generate
Figure14.8.HTTPS Listener
-
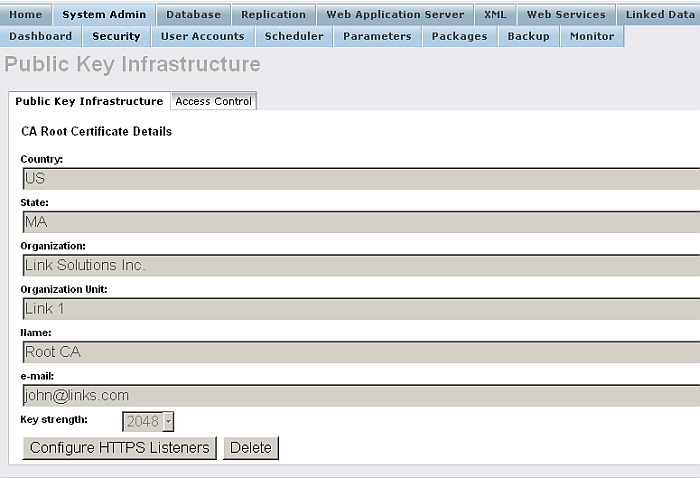
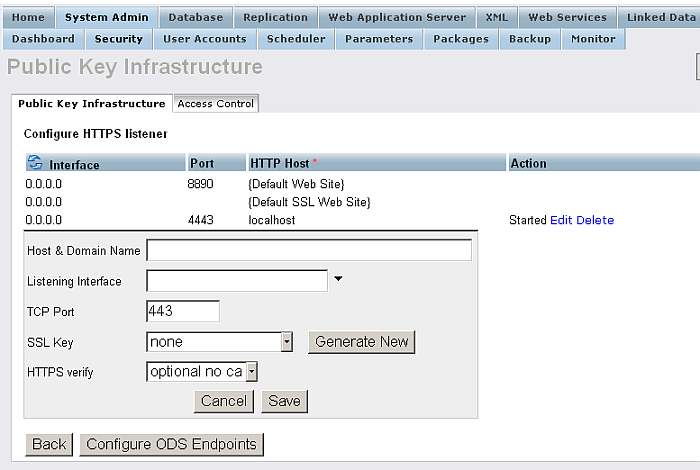
Click Configure HTTPS Listeners
Figure14.9.HTTPS Listener
-
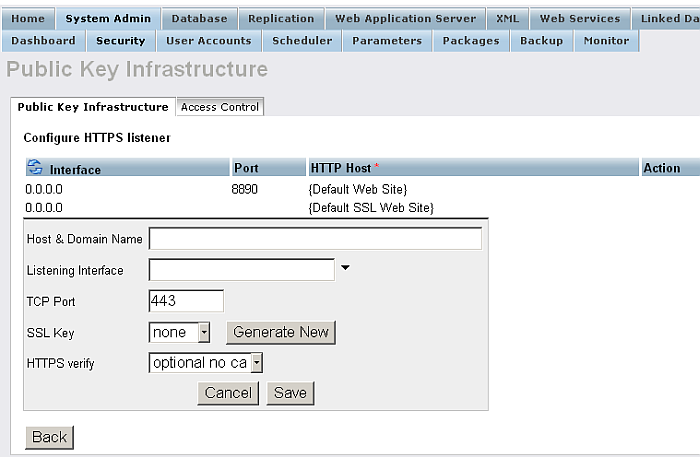
Edit the new listener, and click "Generate New" key.
Figure14.10.HTTPS Listener
-
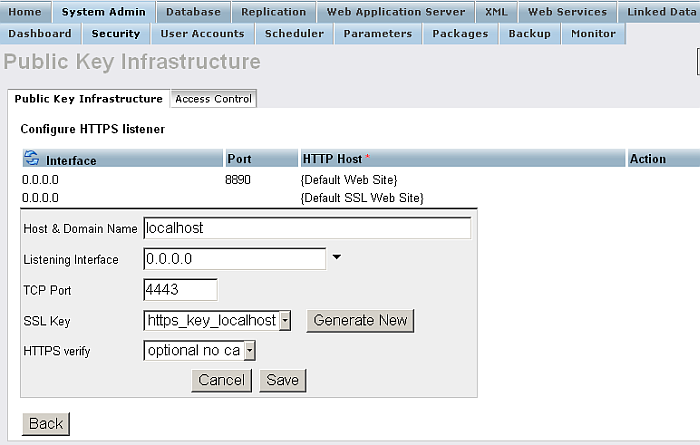
Click Save
Figure14.11.HTTPS Listener
-
Setting Up Firefox:
-
In the Preferences dialog, open the Advanced tab, and click the "View certificates" button.
-
Click the "Add exception" button and enter the address of the HTTPS server you've just configured, i.e. https://virtuoso.example.com:443/
-
Click OK, and confirm the exception.
Figure14.12.HTTPS Listener

-