2.10.2. Creating the Web Service
Step 1 - Create a view of the RDF data
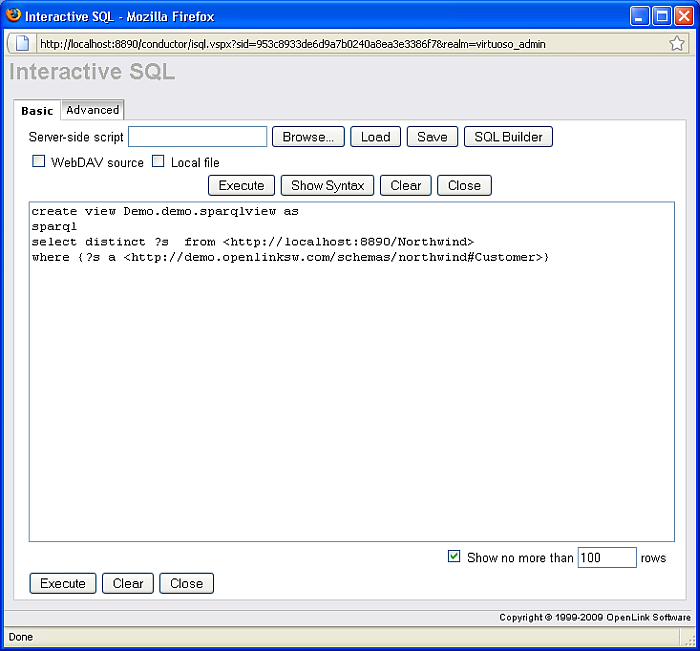
To create a view of the customers in the Northwind first open the Virtuoso Conductor and log in as dba. Then open iSQL from the menu on the left and execute the following statement.
create view Demo.demo.sparqlview as
sparql
select distinct ?s  from <http://example.com/Northwind>
where {?s a <http://demo.openlinksw.com/schemas/northwind#Customer>}
Note:
-
If the view is added to the Visual Studio project as user "demo" (or any other than "dba'), then it must be ensured that the "SPARQL_SELECT" and "SPARQL_SPONGE" roles are assigned to this user, which can be done via the Virtuoso Conductor in the "System Admin" -> "User Accounts" tab.
-
Execute permissions will also need to be granted to the following procedure:
grant execute on DB.DBA.RDF_MAKE_LONG_OF_SQLVAL to "demo"
Figure 2.160. create a view
Step 2 - Create the Visual Studio Project and Add the Model
-
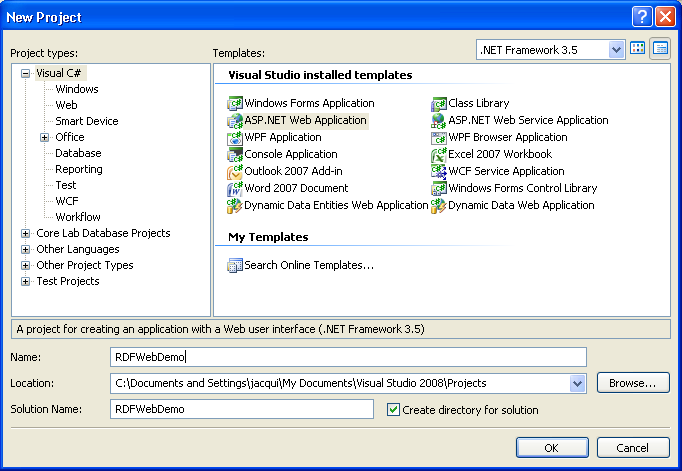
Open
Visual Studio
and create a new
ASP .NET Web Application
called RDFWebDemo.
Figure 2.161. create new application
-
Right click RDFWebDemo in the
Solution Explorer
and add a new
ADO.NET Entity Data Model
called Model1.edmx. This will open the Entity Data Model Wizard.
-
Choose
Generate From Database
and click
Next
.
-
Set up a connection to the Demo database on your local Virtuoso Server, select
Yes, include the sensitive data in the connection string
and set the name of the entities to DemoEntities. Click
Next
.
-
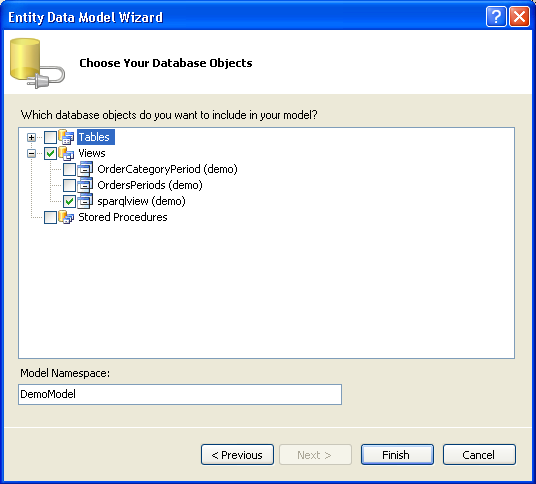
On the
Choose Your Database Objects
page expand
Views
and select sparqlview. Check that the Model Namespace is DemoModel and click Finish.
Figure 2.162. Model Namespace
Step 3 - Add the Web Service
-
Right click RDFWebDemo in the
Solution Explorer
and add a new
ADO.NET Data Service
called WebDataService1.svc. Click
Add
.
-
In the class definition of WebDataService1 in the newly created file WebDataService1.svc.cs replace /* TODO: put your data source class name here */ with the name of our model, DemoEntities.
public class WebDataService1 : DataService<DemoEntities>
-
In the InitializeService method add the line:
config.SetEntitySetAccessRule("*", EntitySetRights.All);The method should look like this:
 public static void InitializeService(IDataServiceConfiguration config)
   {
       // TODO: set rules to indicate which entity sets and service operations are visible, updatable, etc.
       // Examples:
       // config.SetEntitySetAccessRule("MyEntityset", EntitySetRights.AllRead);
       // config.SetServiceOperationAccessRule("MyServiceOperation", ServiceOperationRights.All);

       config.SetEntitySetAccessRule("*", EntitySetRights.All);
   }
Step 4 - Compile and Run
Hit F5 to compile and run the service. Select OK when prompted to enable debugging. The default browser will be launched showing a page like:
  <?xml version="1.0" encoding="utf-8" standalone="yes" ?>
- <service xml:base="http://example.com/WebDataService1.svc/" xmlns:atom="http://www.w3.org/2005/Atom" xmlns:app="http://www.w3.org/2007/app" xmlns="http://www.w3.org/2007/app">
- <workspace>
  <atom:title>Default</atom:title>
- <collection href="sparqlview">
  <atom:title>sparqlview</atom:title>
  </collection>
  </workspace>
  </service>
The service is now running.
Note the address on which the service is made available. You will need to know this when creating the app to consume the service. Look in the Address Bar of the browser. It will be something like: http://example.com/WebDataService1.svc/