2.8.3. Creating a Data Service using the ADO.NET Entity Framework
ADO.NET Data Services are a specialized form of Windows Communication Foundation services, and thus can be hosted in various environments. The below example will create an ADO.NET Data Service which is hosted inside an ASP.NET site. In order to create a data service, you must first create a web project; you will then need to establish a connection with the database that will be exposed by the service, and then create the data service itself within the web application. Below is a step-by-step description of this process.
The following steps can be used for creating a Data Service using the Virtuoso ADO.Net Provider for accessing the sample Northwind Demo database:
-
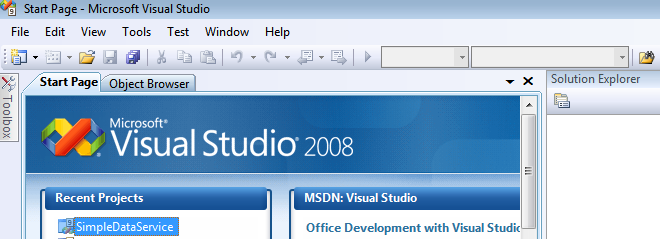
Launch the Visual Studio 2008 SP1 IDE.
Figure 2.117. Visual Studio 2008 SP1 IDE.
-
Create a
Web Application
project by going to the
File
menu in Visual Studio and choosing
New Project
.
-
When the New Project window appears, choose either
Visual Basic
or
Visual C#
as the programming language.
-
Within the language category click on
Web
, and select
ASP.NET Web Application
from the right-hand panel.
-
Choose a name for the project, for example
VirtuosoDataService
, and click
OK
.
Figure 2.118. Name project

-
This will create a new project called
VirtuosoDataService
.
Figure 2.119. Create project

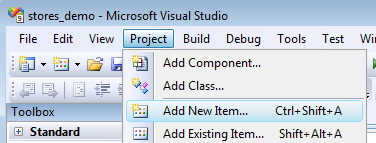
-
Right click on the
VirtuosoDataService
project name of the Solution Explorer pane, then select the
Add -> New Item
menu options.
Figure 2.120. New Item
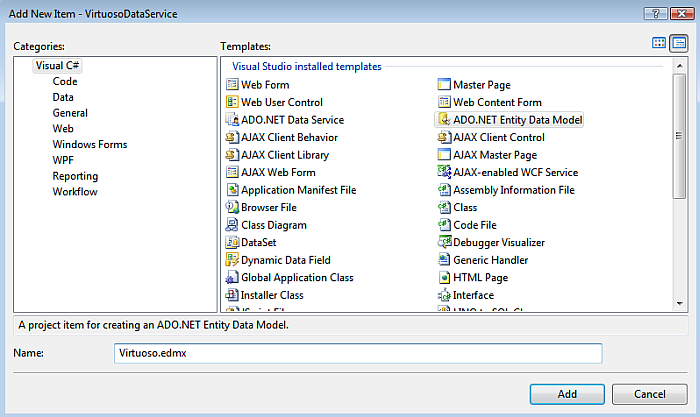
-
The
Add
New Item dialog will appear, choose the
ADO.NET Entity Data Model
template, give it the name
Virtuoso.edmx
and click
Add
to start the creation of the ADO.Net Entity Data Model.
Figure 2.121. Entity Model
-
In the
Entity Data Model Wizard
dialog
Choose Model Contents
page select the
Generate from Database
model type and click
Next
.
Figure 2.122. Model Contents

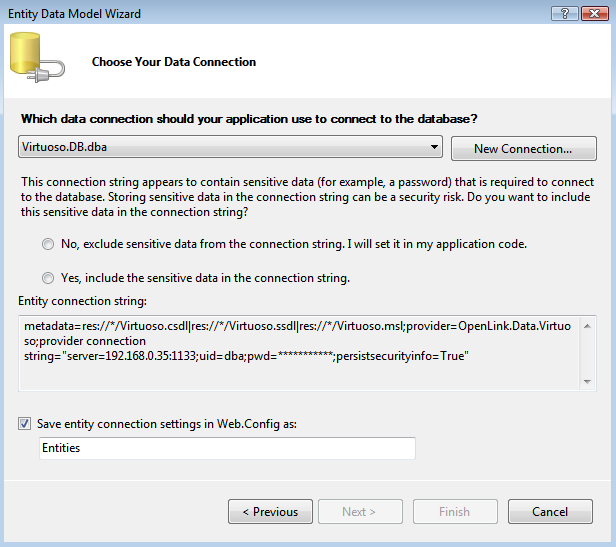
-
In the
Entity Data Model Wizard
dialog
Choose your Data Connection
page select the
New Connection
button
Figure 2.123. Data Connection
-
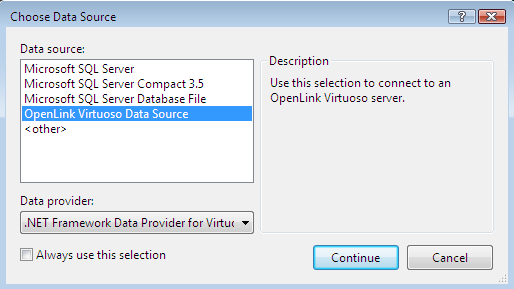
In the
Choose Data Source
dialog, select the OpenLink
Virtuoso Data Source
from the list displayed and click
Continue
.
Figure 2.124. Data Source
-
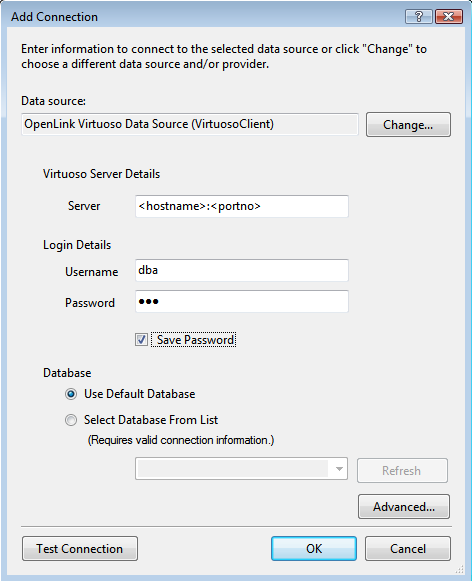
In the
Add Connection
dialog, specify the
hostname, portno, username and password
for the target Virtuoso Server and check the
Save Password
check box.
Figure 2.125. Connection Properties
-
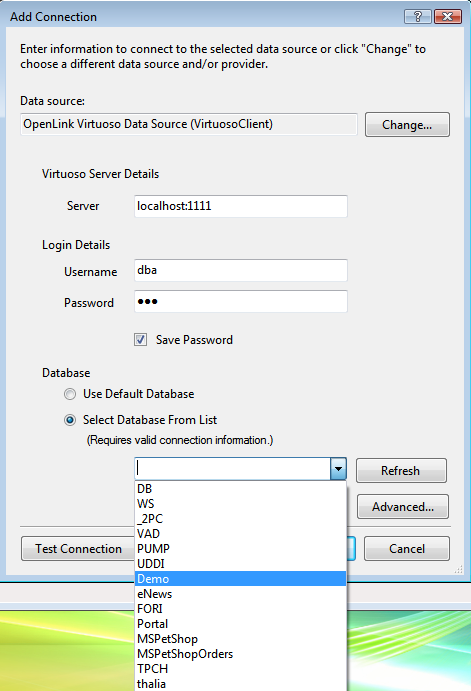
Select the
Select Database From List
radio button and choose
Demo
from the drop down list, assuming the Virtuoso Demo Database is installed.
Figure 2.126. Advanced Properties
-
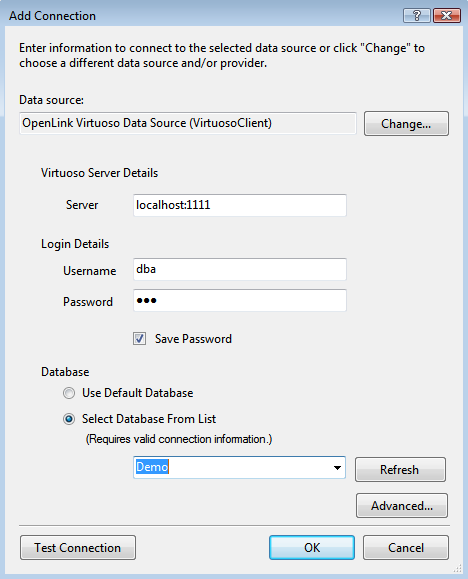
Click the
Test Connection
button to verify the connection is successful and then click OK to add the connection.
Figure 2.127. Test Connection
-
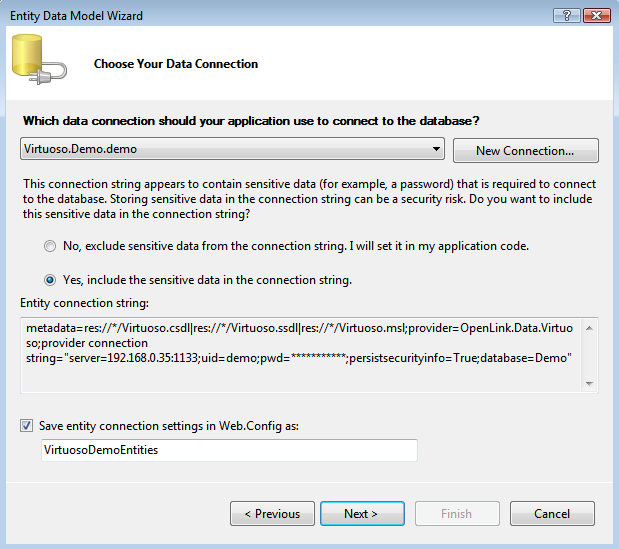
Set the
entity connect string
name to
VirtuosoDemoEntities
(note this name as it is required in step 17 below) and click
Next
.
Figure 2.128. entity connect string
-
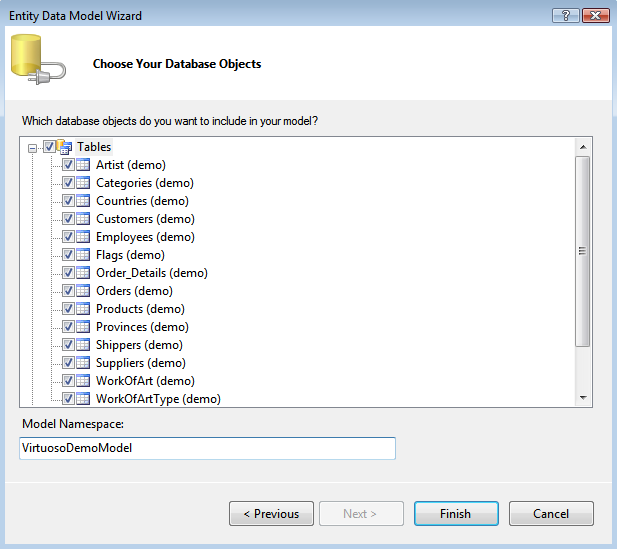
In the
Choose your Database Objects
page select the
Tables
check box to select all tables in the Demo database for addition to the Entity Data Model, set the
Model Namespace
to
VirtuosoDemoModel
and click
Finish
.
Figure 2.129. Database Objects
-
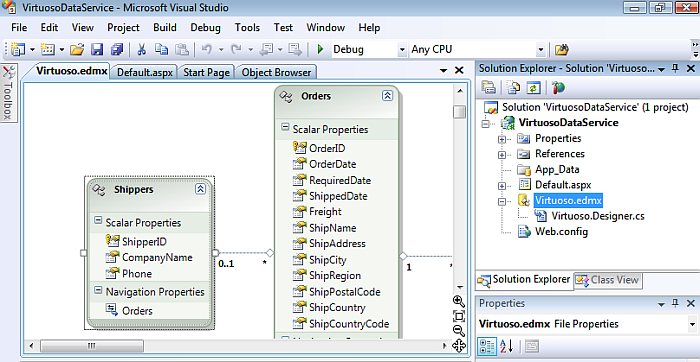
The
Virtuoso.edmx
EDM will be created with the tables and relationships displayed in the Visual Studio IDE
Figure 2.130. Virtuoso.edmx
-
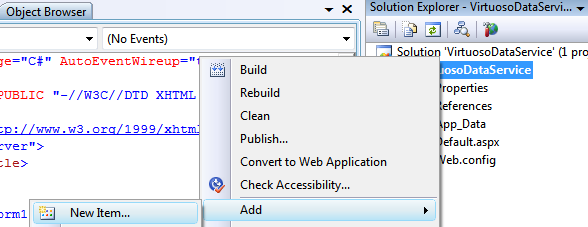
Right click on the
VirtuosoDataService
project name of the
Solution Explorer pane
, then select the
Add -> New Item
menu options.
Figure 2.131. New Item
-
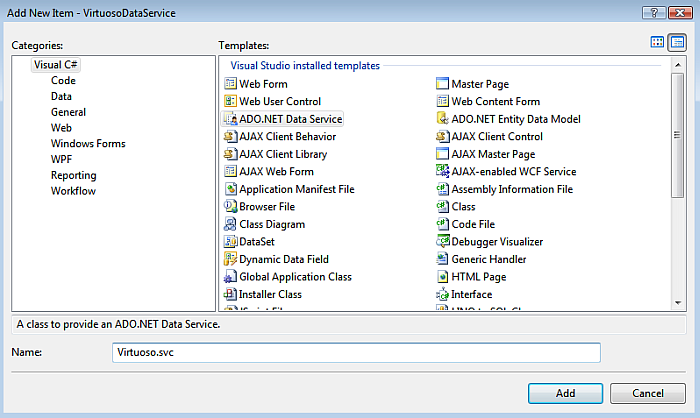
The
Add New Item
dialog will appear, choose the
ADO.NET Data Service
template, give it the name
Virtuoso.svc
and click
Add
to create the ADO.Net Data Service.
Figure 2.132. ADO.NET Data Service
-
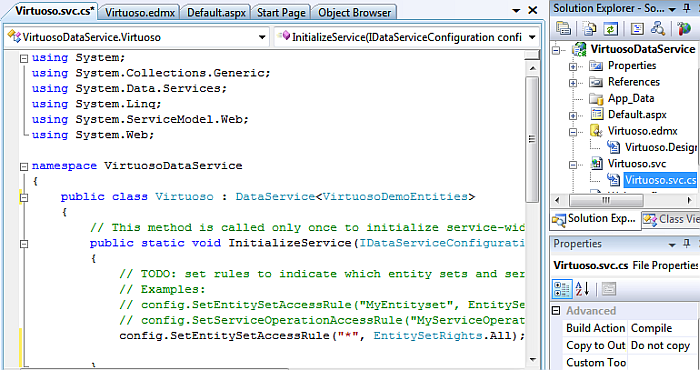
In the
Virtuoso.svc.cs
Data Service file created add the data source class name of
VirtuosoDemoEntities
(note this is the name set in step 12) as the
DataService
name and enable the access to the Data Service by adding the entry
config.SetEntitySetAccessRule("*", EntitySetRights.All);
in the
InitializeService
method.
// C#

using System;
using System.Web;
using System.Collections.Generic;
using System.ServiceModel.Web;
using System.Linq;
using System.Data.Services;

namespace SimpleDataService
{
    public class Northwind : DataService<VirtuosoDemoEntities>
    {
        public static void InitializeService(IDataServiceConfiguration  config)
        {
            config.SetEntitySetAccessRule("*", EntitySetRights.All);
        }
    }
}
Figure 2.133. Data Service
-
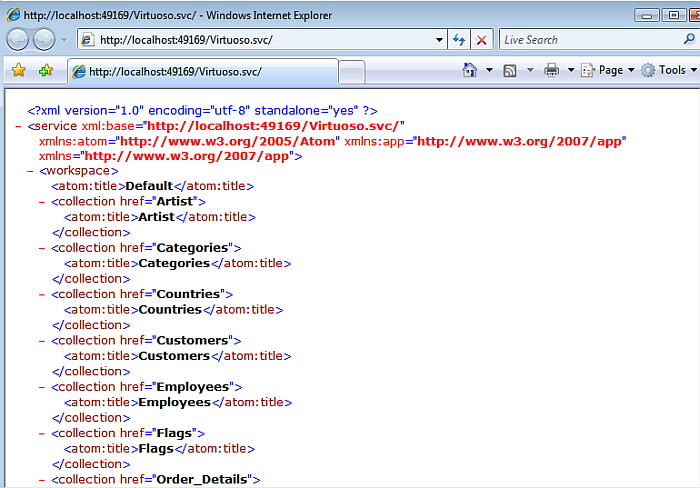
To test the Data Service, simply hit
Ctrl+F5
within Visual Studio, which will start the development web server, run the Data Services server inside and load a Web browser page displaying the list of available tables/entities of the Demo database.
Figure 2.134. test the Data Service
-
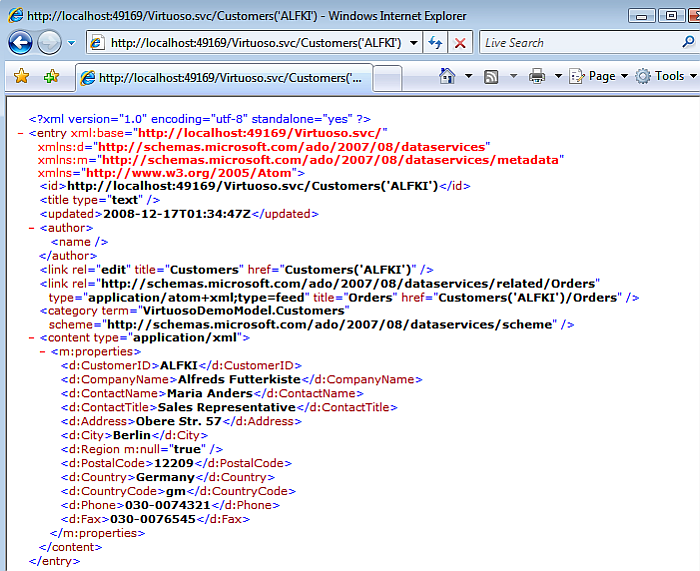
To access a specific entity instance like the
Customers
table
ALFKI
record, this would be specified as http://host/vdir/Virtuoso.svc/Customers('ALFKI') .
Figure 2.135. Access a specific entity instance
NOTES
-
Important
- To view
Atom
(the default format returned by an ADO.NET Data Service) in Internet Explorer, you must first ensure that
Feed Reading View
is turned
off
. This can be done on the
Content tab
of
Tools in Internet Options
.
-
If a Data Services entity instance URI page fails to load you can turn
Verbose
errors on by adding
config.UseVerboseErrors = true;
in the
virtuoso.svc.cs InitializeService
method to obtain more detailed information from the server as to why the page failed to load:
public static void InitializeService(IDataServiceConfiguration config)

{

config.UseVerboseErrors = true;

config.SetEntitySetAccessRule("*", EntitySetRights.All);

}