16.6.3. Manual Linked Data Generation & Deployment using the Conductor's HTML-based wizard
The following step-by guide will lead you through manually publishing ODBC- or JDBC-accessible RDBMS data in RDF Linked Data form, using the Conductor's HTML-based wizard:
-
Go to http://<cname>:port/conductor
-
Log in as user dba (or another user with DBA privileges)
-
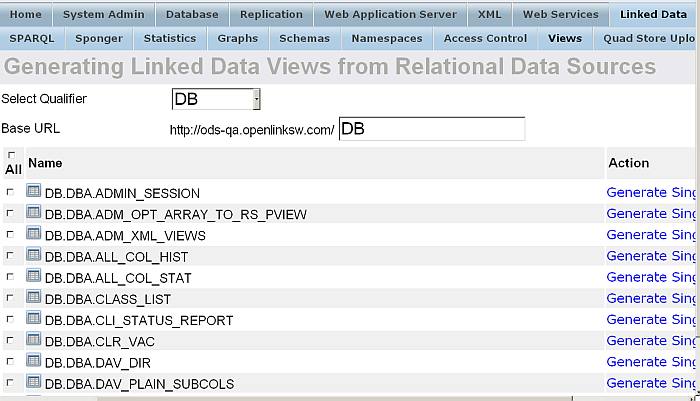
Follow menu path Linked Data -> Views
Figure 16.55. Linked Data Views
-
In the form presented, perform the following steps:
-
Select the Database Name Qualifier (e.g., "Demo") that exposes the Tables / Views for this exercise
-
Enter the Base URL to which your URL rewrite rules will be bound (e.g. http://<cname>:8890/Demo)
-
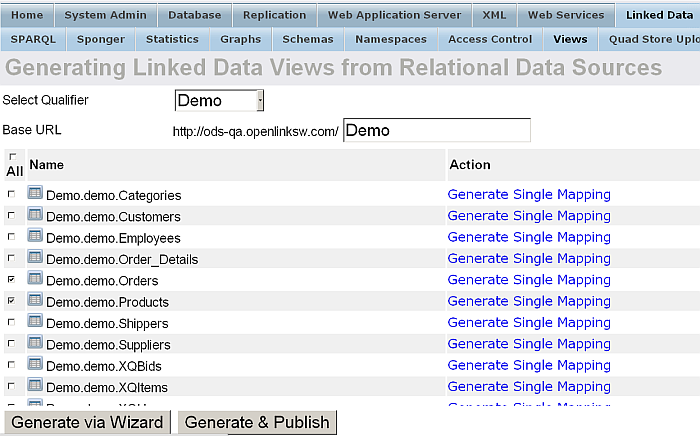
Select specific Tables containing the data to be published (e.g., Demo.demo.Orders and Demo.demo.Products)
-
Click the "Generate via Wizard" button
Figure 16.56. Generate via Wizard
-
-
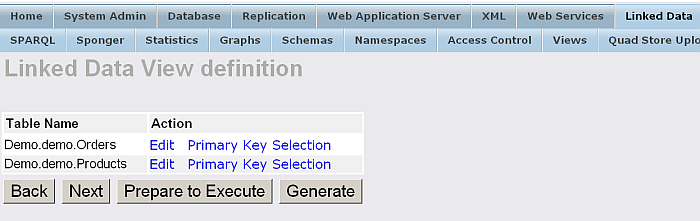
At this point, you are presented with the option to edit your column selection. Select the "Edit" link, for example, for table Demo.demo.Products.
Figure 16.57. Column Selection
-
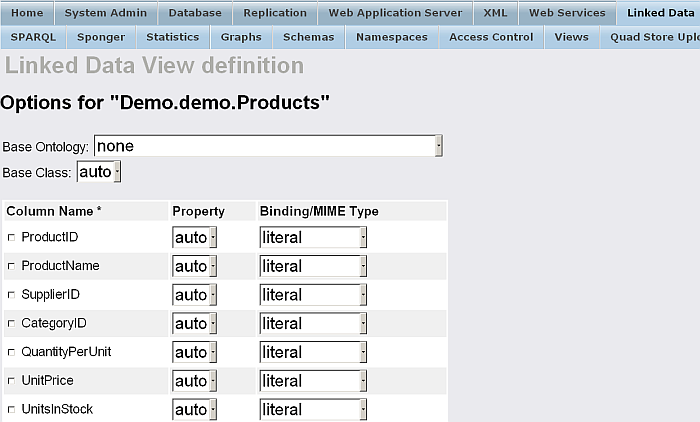
For images or other binary data in MIME formats to be revealed as anything other than generic "binary objects", you must map large varbinary types to the appropriate MIME types like image/gif. To do so, select the Edit link for Binding/MIME Type of the relevant table columns. You can:
-
Leave the Binding/MIME Type literal; or
-
Set to skip, such that the column will not be used in RDF generation; or
-
Select the binary object value in order for the column to be referenced as binary.
Figure 16.58. Binding/MIME Types
-
-
After finishing with your changes click the Save button, or cancel the changes and go back by clicking the Cancel button.
-
Make sure you click the "Next" button.
-
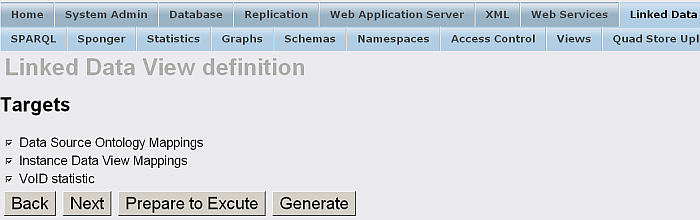
At this point, the Linked Data View Definition form will let you Select Generation Targets options:
-
Data Source Ontology Mappings
-
Instance Data View Mappings
-
VoID statistic
Figure 16.59. Generation Targets options
-
-
Make sure you click the "Next" button.
-
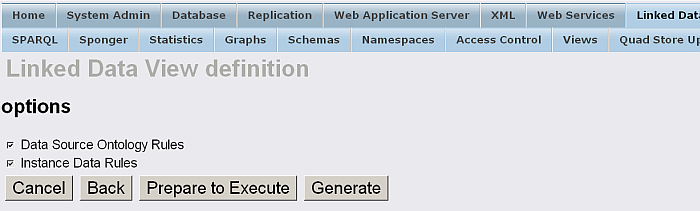
Based on your selections in the prior form, the Linked Data View Definition Deployment Options form will be offered:
-
Data Source Ontology Rules
-
Instance Data Rules
Figure 16.60. Generation Targets options
-
-
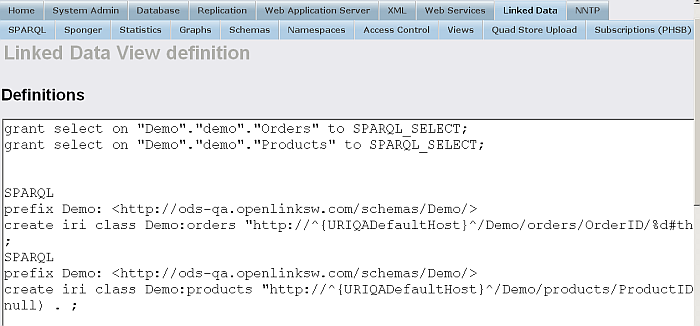
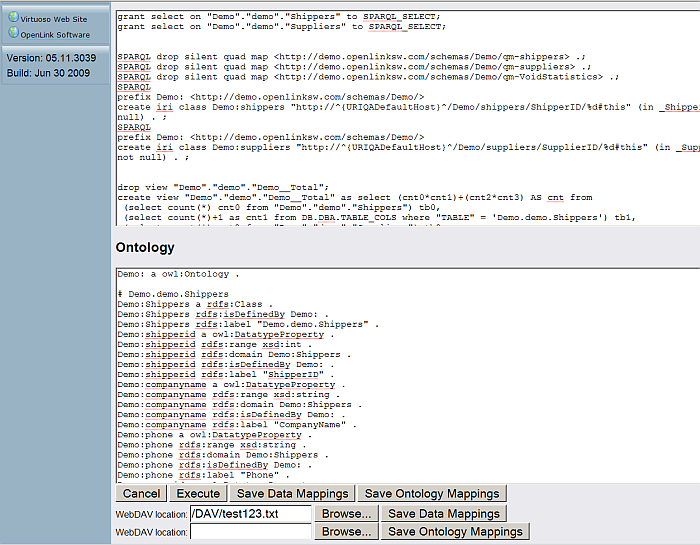
Select the desired option(s) and click the "Prepare to Execute" button which unveils a generated Instance Data and/or Ontology form.
Figure 16.61. Instance Data and/or Ontology
-
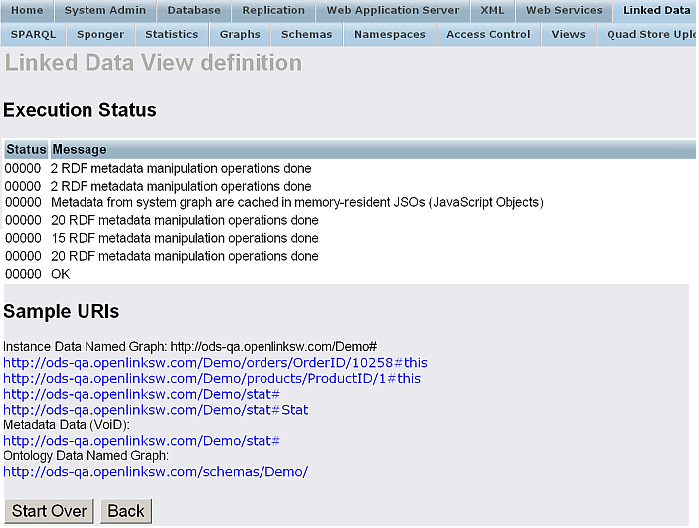
Click the Execute button and Virtuoso will:
-
Apply the generated declarations (instance data and ontology) to your Virtuoso instance
-
Publish / Deploy declarations that expose the Wizard-generated Rewrite Rules and associated endpoints.
Figure 16.62. Publishing / Deployment declarations
-
-
Optionally, you can also perform one of the following tasks:
-
Save Data Mappings: when clicked, offers to save the generated Definitions to local file system
-
Save Ontology Mappings: when clicked, offers to save the generated Ontology to local file system
-
Export as WebDAV resource: exports the selected objects/items as a WebDAV resource:
-
Click "Browse"
-
Enter a WebDAV resource and click the "Select" button.
Figure 16.63. WebDAV resource
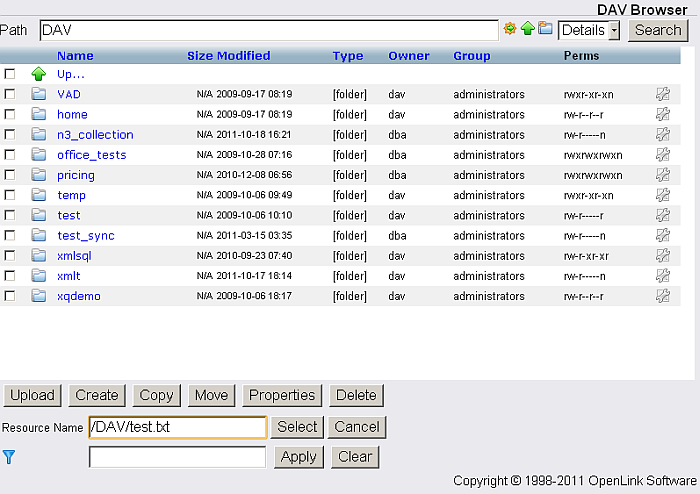
-
Note, the WebDAV resource path value will be shown in the WebDAV location field.
-
-
Then click the "Save Data Mappings" or "Save Ontology Mappings" button, to complete the option task of saving your generated (or edited) view declarations.
Figure 16.64. WebDAV resource
-
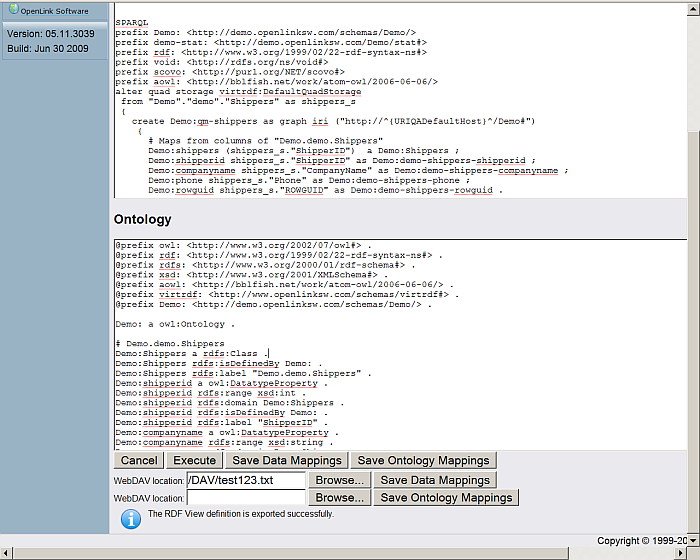
Error messages will be presented if the Wizard encounters problems. If there are no error messages, your Linked Data View declarations and Linked Data publishing activities will have completed successfully.
Figure 16.65. Linked Data View declarations and Linked Data publishing activities Finish
-
Click on Cancel to return to the initial Linked Data View Generation form.