14.3.1.Mac OS Classic
The package provided for this platform is a compressed Macintosh format (.sit.hqx). After uncompressing it on your hard drive, you will find below the tree of the iODBC SDK as installed on Mac OS Classic :
Figure14.3.iODBC SDK Tree for Mac OS Classic
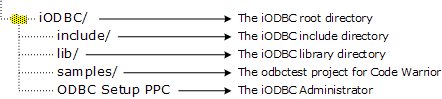
iODBC is cut down in three parts, and each one has its proper set of include files and libraries.
| The iODBC Driver Manager is the core of the ODBC driver manager. Its main task is to load run the right function with the right ODBC driver. |
| The iODBC Configuration Manager is the ODBC configuration manager. Its main task is to access and manage the DSN configuration files. |
| The iODBC GUI Manager is the GUI manager. Its main task is to give to the user the ability to access all the ODBC functionality through a GUI. |
Under the include directory, you will find all the iODBC header
files that can be used in your source. The following are the main
header files: isql.h, isqlext.h,
isqltypes.h, iodbcadm.h, iodbcinst.h
These are generally only a proxy for the other header files
provided in the same directory: sql.h,
sqlext.h, sqltypes.h, odbcinst.h
To access all these include files, simply add to your compiler
an include path that points to iODBC/include. This is compiler dependent,
so you may have to look into your compiler's documentation. For
Code Warrior, you can do this via the Project Preferences
panel.
Under the lib directory, you will find all the iODBC libraries needed to link against your application. All the parts explained before, are shipped through three different forms: CFM shared library, static object file, and static object file with debugging information.
Figure14.4.iODBC SDK libraries on Mac

You will have to link your application with only one set of libraries. If you choose the CFM shared library set, ensure that at runtime these files are in the System-Extensions folder of your Mac Classic system.
To access the right set of library files, add a library path
that points to iODBC/lib. This
is compiler dependent, consult your compiler documentation. For
Code Warrior, you can do this through the Project Preferences
panel.