16.19.2. Replication Topologies
Typical replication topologies are Chains, Stars and Bi-directional. They can be achieved with Virtuoso, by repeating the "Publish" and/or "Subscribe" steps on each relevant node.
Star Replication Topology
In a Star, there is one Publisher, and many Subscribers.
Figure 16.202. Star Replication Topology
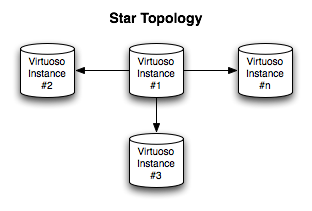
To set up a Star, follow the scenario:
-
Configure Instance #1 to Publish.
-
Configure Instance #2 to Subscribe to #1.
-
Repeat as necessary.
Star Replication Topology Example
The following How-To walks you through setting up Virtuoso RDF Graph Replication in a Star Topology.
Prerequisites
Database INI Parameters
Suppose there are 3 Virtuoso instances respectively with the following ini parameters values:
-
virtuoso1.ini:
...
[Database]
DatabaseFile    = virtuoso1.db
TransactionFile = virtuoso1.trx
ErrorLogFile     = virtuoso1.log
...
[Parameters]
ServerPort               = 1111
SchedulerInterval        = 1
...
[HTTPServer]
ServerPort                  = 8891
...
[URIQA]
DefaultHost = example.com:8891
...
[Replication]
ServerName   = db1
...
-
virtuoso2.ini:
...
[Database]
DatabaseFile    = virtuoso2.db
TransactionFile = virtuoso2.trx
ErrorLogFile     = virtuoso2.log
...
[Parameters]
ServerPort               = 1112
SchedulerInterval        = 1
...
[HTTPServer]
ServerPort                  = 8892
...
[URIQA]
DefaultHost = localhost:8892
...
[Replication]
ServerName   = db2
...
-
virtuoso3.ini:
...
[Database]
DatabaseFile    = virtuoso3.db
TransactionFile = virtuoso3.trx
ErrorLogFile     = virtuoso3.log
...
[Parameters]
ServerPort               = 1113
SchedulerInterval        = 1
...
[HTTPServer]
ServerPort                  = 8893
...
[URIQA]
DefaultHost = example.com:8893
...
[Replication]
ServerName   = db3
...
Database DSNs
Use the ODBC Administrator on your Virtuoso host (e.g., on Windows, Start menu -> Control Panel -> Administrative Tools -> Data Sources (ODBC); on Mac OS X, /Applications/Utilities/OpenLink ODBC Administrator.app) to create a System DSN for each of db1, db2, db3, with names db1, db2 and db3, respectively.
Install Conductor package
On each of the 3 Virtuoso instances install the conductor_dav.vad package.
Create a Publication on the Host Virtuoso Instance db1
-
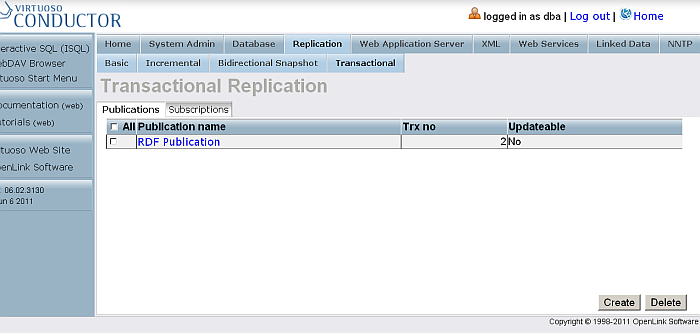
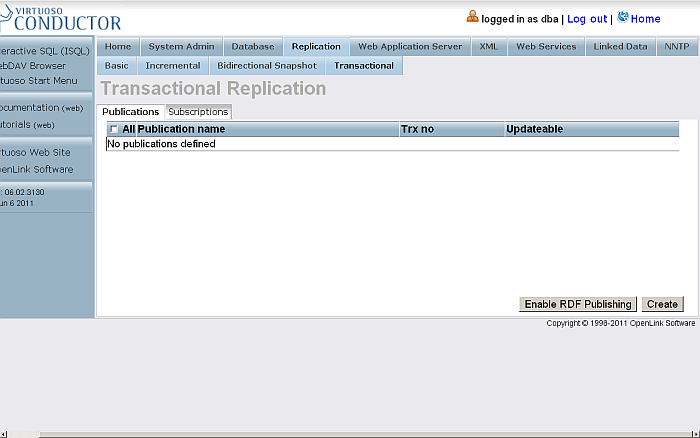
Go to Conductor -> Replication -> Transactional -> Publications
Figure 16.203. Star Replication Topology

-
Click Enable RDF Publishing
-
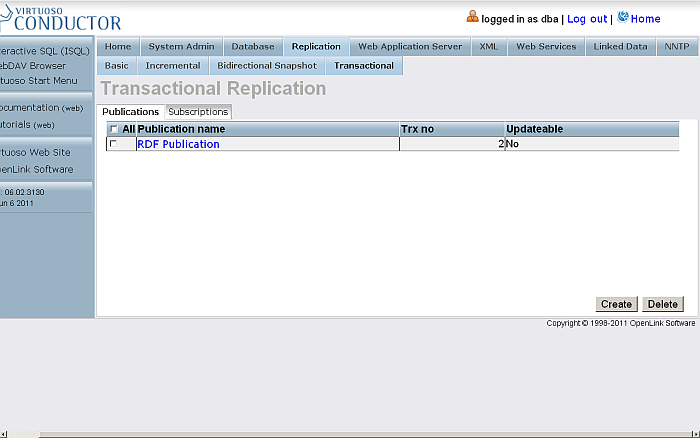
A publication with the name RDF Publication should be created:
Figure 16.204. Star Replication Topology

-
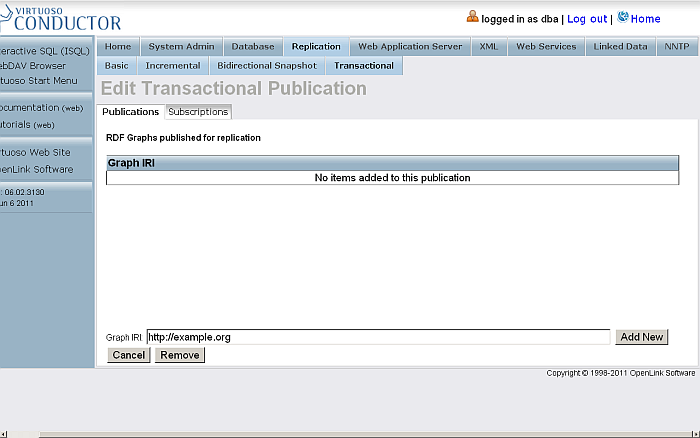
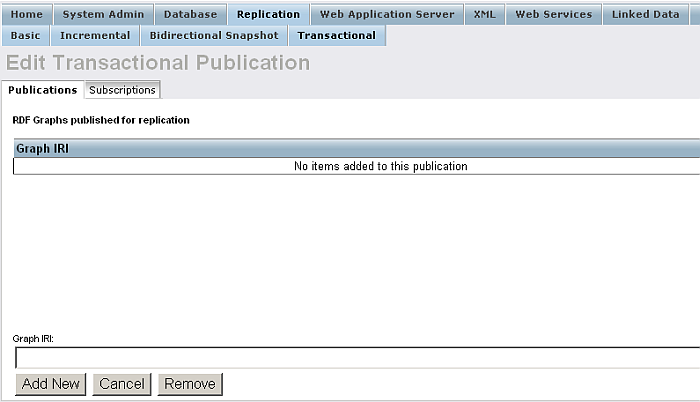
Click the link which is the publication name.
-
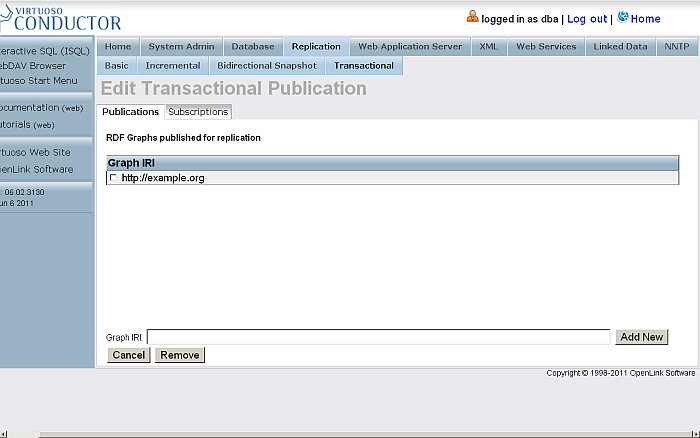
You will be shown the publication items page:
Figure 16.205. Star Replication Topology

-
Enter for Graph IRI:
http://example.org
Figure 16.206. Star Replication Topology

-
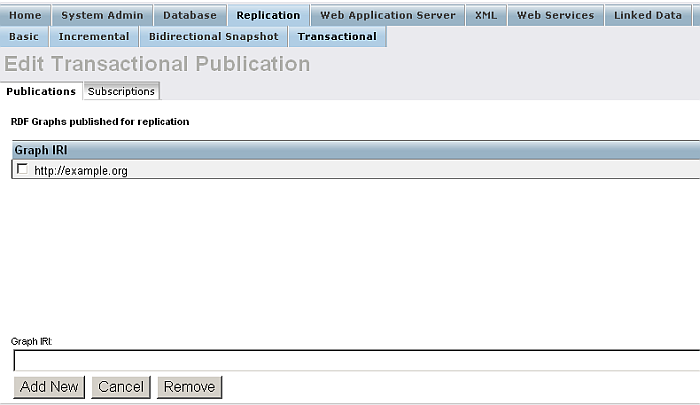
Click Add New
-
The item will be created and shown in the list of items for the currently viewed publication.
Figure 16.207. Star Replication Topology

Insert Data into a Named Graph on the Host Virtuoso Instance
There are several ways to insert data into a Virtuoso Named Graph. In this example, we will use the Virtuoso Conductor's Import RDF feature:
-
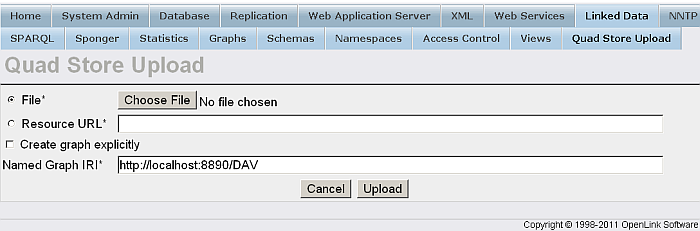
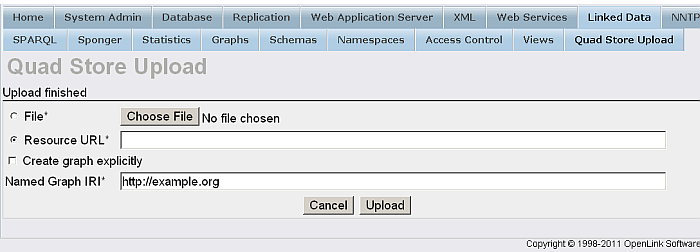
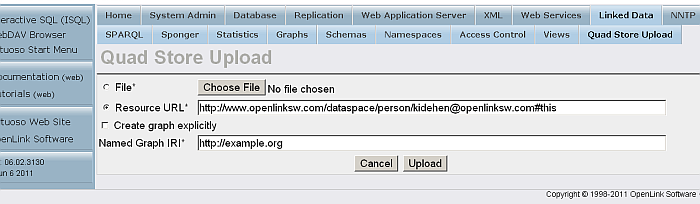
In the Virtuoso Conductor, go to Linked Data -> Quad Store Upload:
Figure 16.208. Replication Topology
-
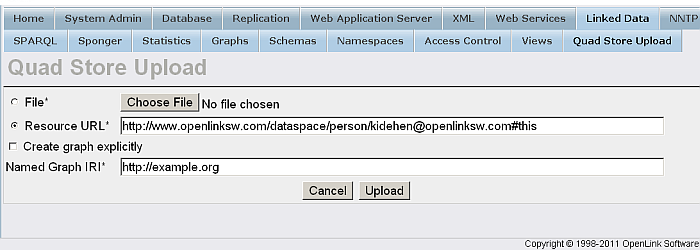
In the form:
-
Tick the box for Resource URL and enter your resource URL, for e.g.:
http://www.openlinksw.com/dataspace/person/kidehen@openlinksw.com#this
-
Enter for Named Graph IRI:
http://example.org
Figure 16.209. Replication Topology
-
-
Click Upload
-
A successful upload will result in this message:
Figure 16.210. Star Replication Topology

-
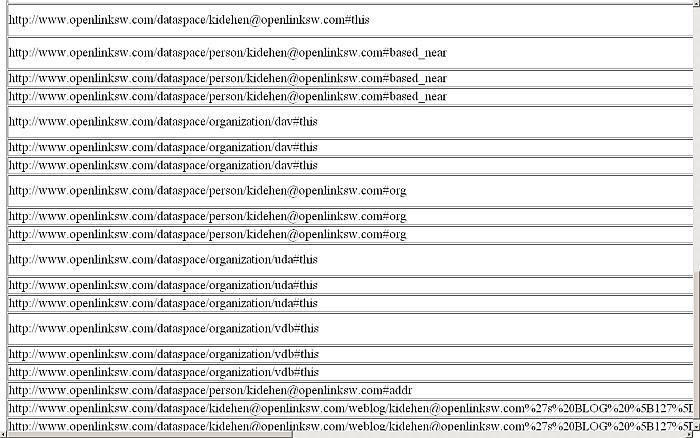
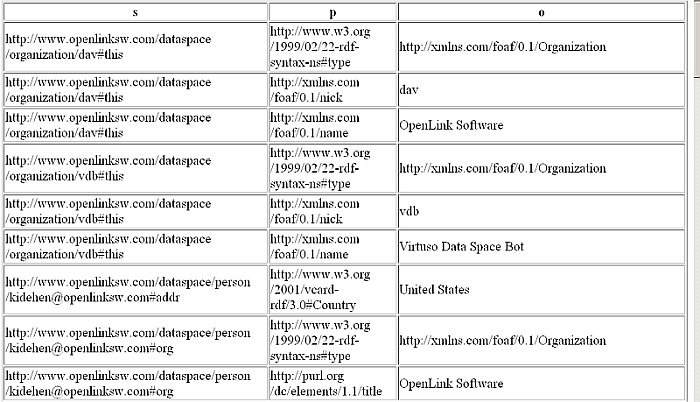
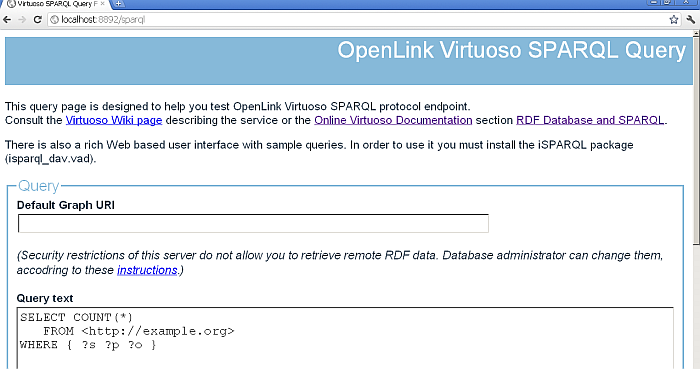
Check the inserted triples by executing a query like the following against the SPARQL endpoint, http://cname:port/sparql:
SELECT *
  FROM <http://example.org>
 WHERE { ?s ?p ?o }
Figure 16.211. Star Replication Topology
-
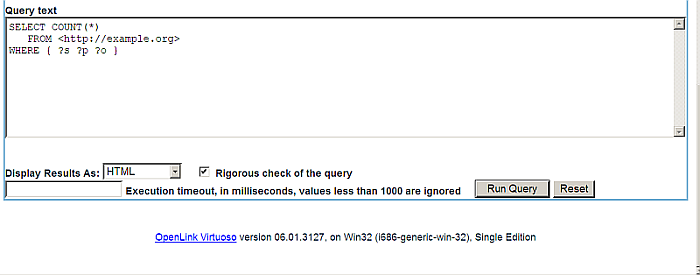
See how many triples have been inserted in your graph:
SELECT COUNT(*)
  FROM <http://example.org>
 WHERE { ?s ?p ?o }
Figure 16.212. Star Replication Topology

Subscribe to the Publication on the a Destination Virtuoso Instance db2, db3, etc.
-
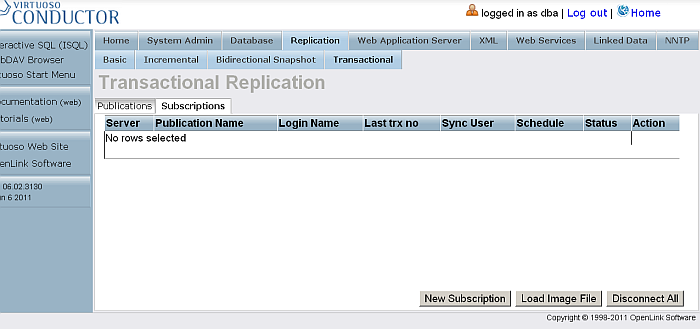
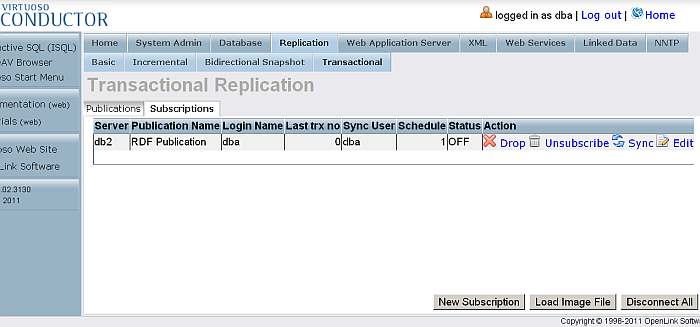
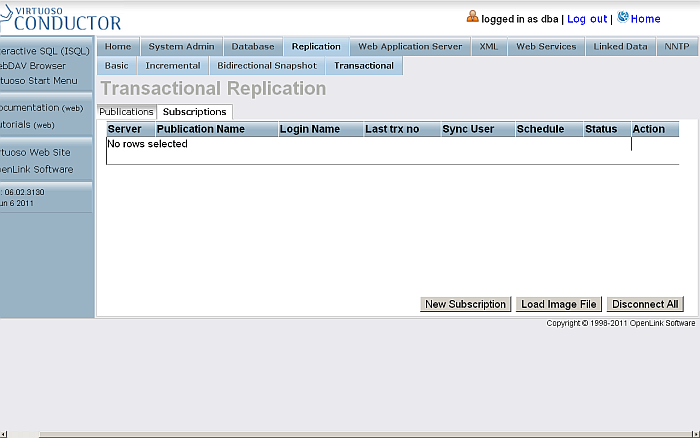
Go to Conductor -> Replication -> Transactional -> Subscriptions
Figure 16.213. Star Replication Topology

-
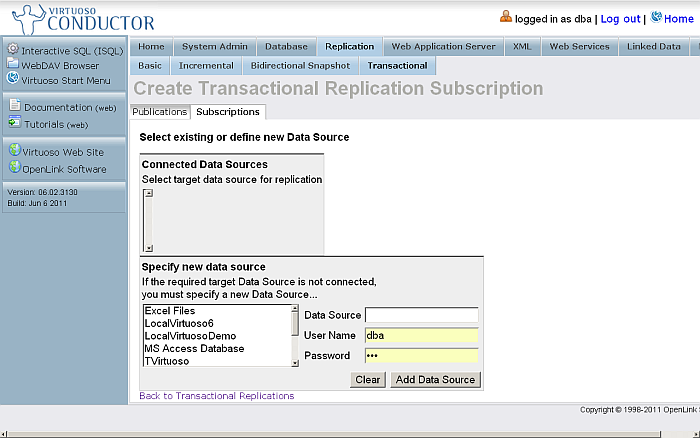
Click New Subscription
Figure 16.214. Star Replication Topology

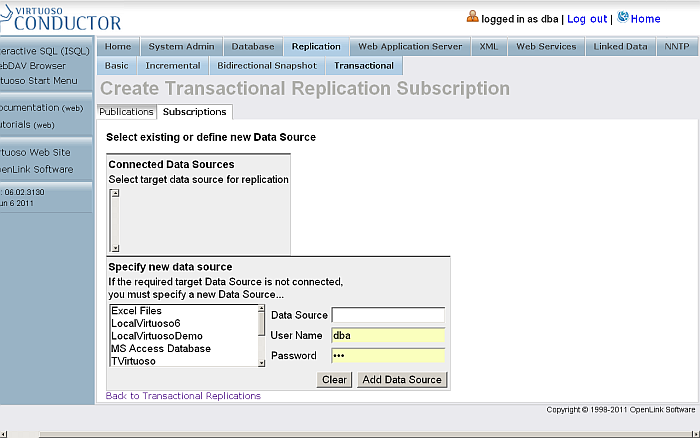
-
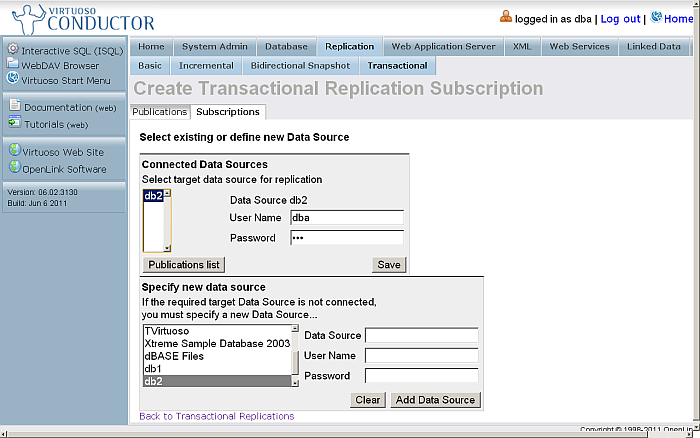
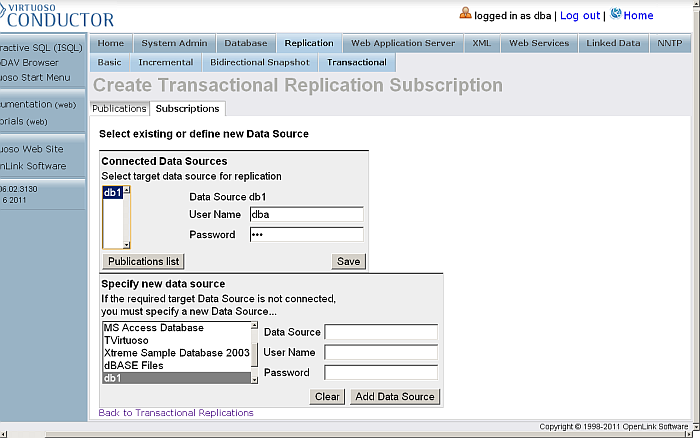
Specify a new Data Source Enter or selected target data source from the available connected Data Sources:
Figure 16.215. Star Replication Topology
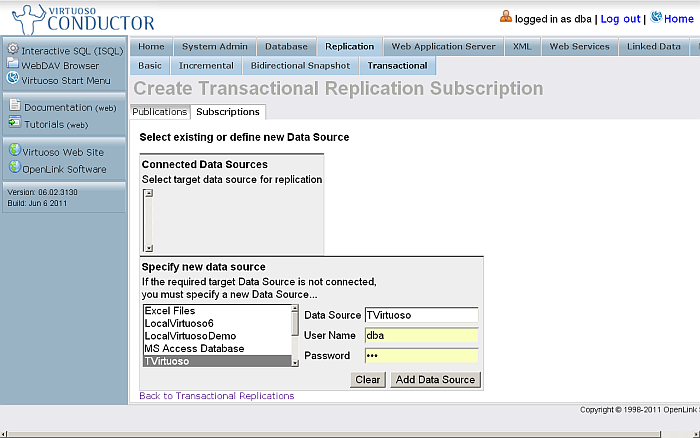
Figure 16.216. Star Replication Topology
-
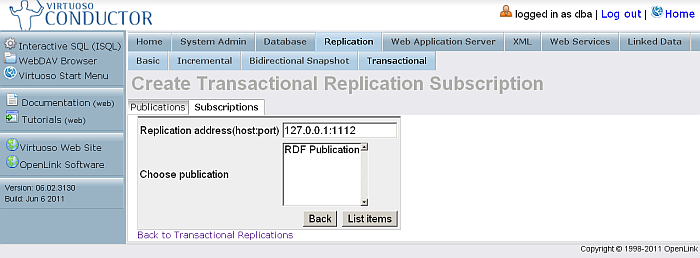
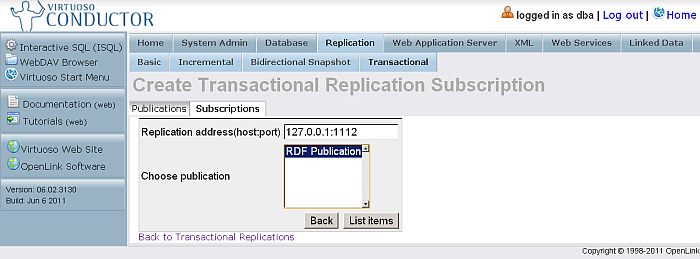
Click Publications list
Figure 16.217. Star Replication Topology
-
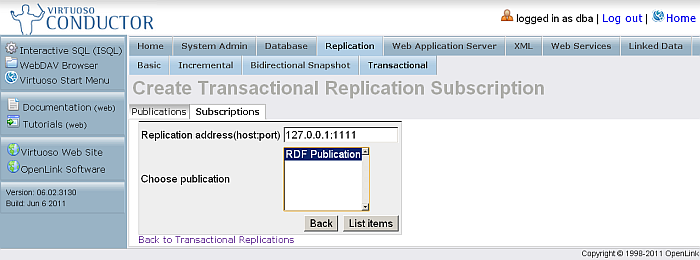
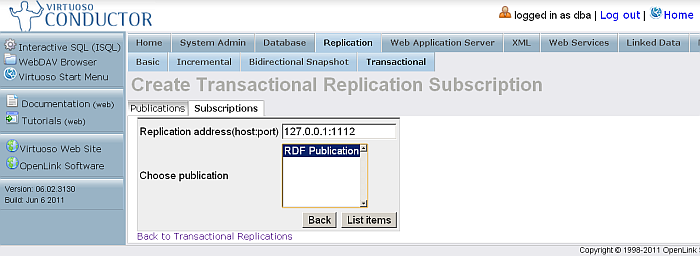
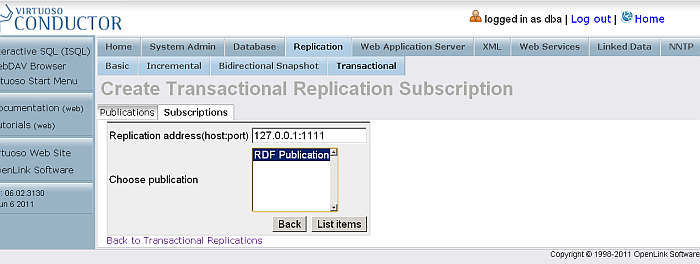
Select the RDF Publication and click List Items
Figure 16.218. Star Replication Topology
-
Click Subscribe
-
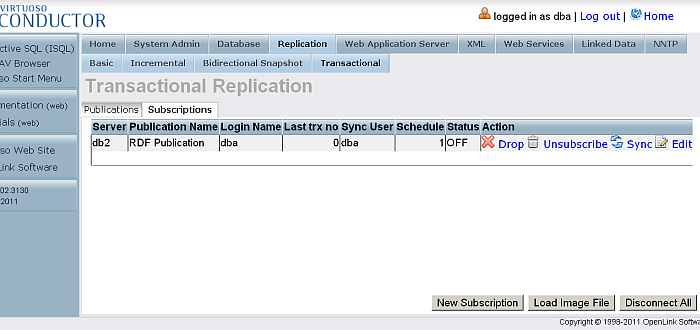
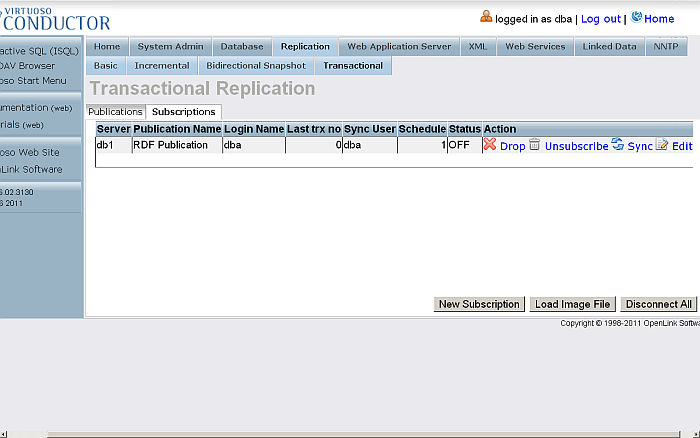
The subscription will be created
Figure 16.219. Star Replication Topology
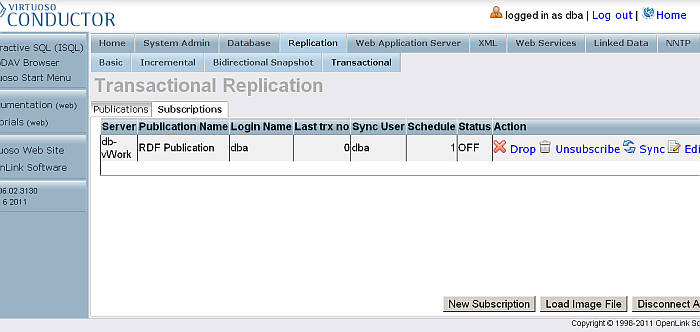
-
Click Sync
-
Check the retrieved triples by executing the following query
SELECT *
  FROM <http://example.org>
 WHERE {?s ?p ?o}
Figure 16.220. Star Replication Topology
-
See how many triples have been inserted into your graph by executing the following query:
SELECT COUNT(*)
  FROM <http://example.org>
 WHERE {?s ?p ?o}
Figure 16.221. Star Replication Topology
These steps may be repeated for any number of Subscriber.
Insert Triples into the Host Virtuoso Instance Graph and check availability at Destination Virtuoso Instance Graph
-
To check the starting count, on the Destination Virtuoso Instance SPARQL Endpoint, execute:
SELECT COUNT(*) FROM <http://example.org> WHERE { ?s ?p ?o } -
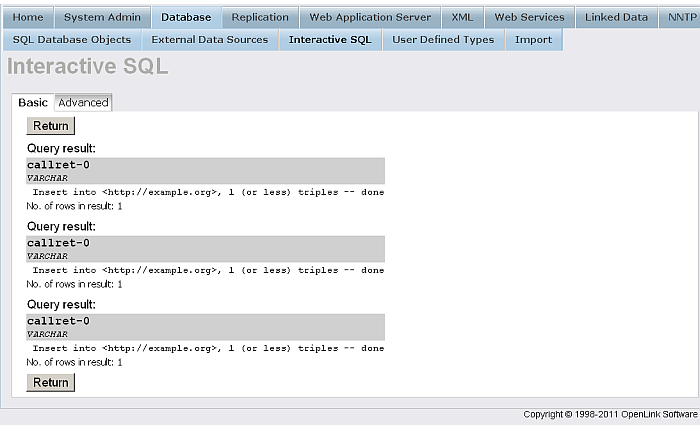
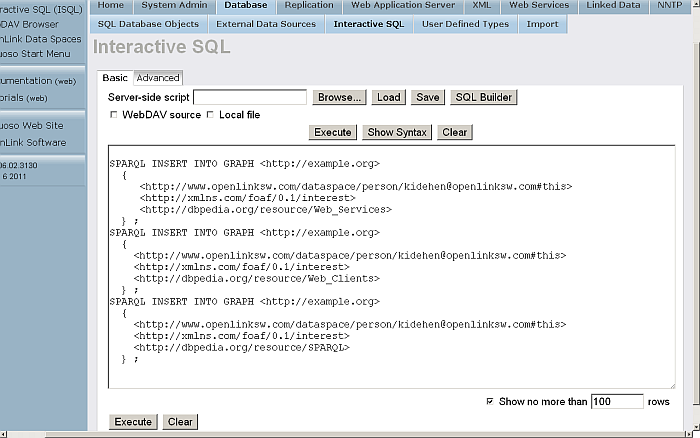
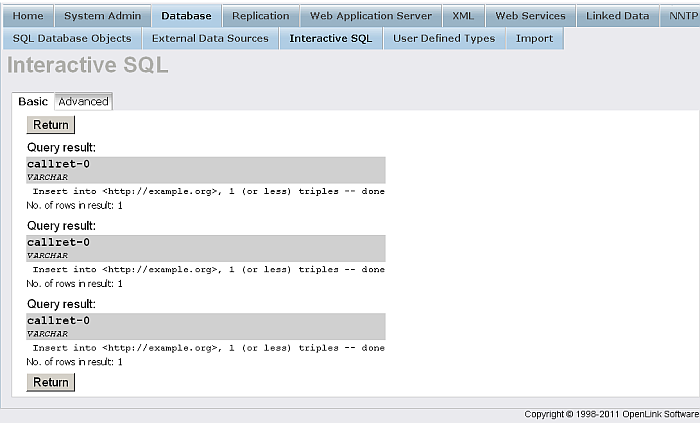
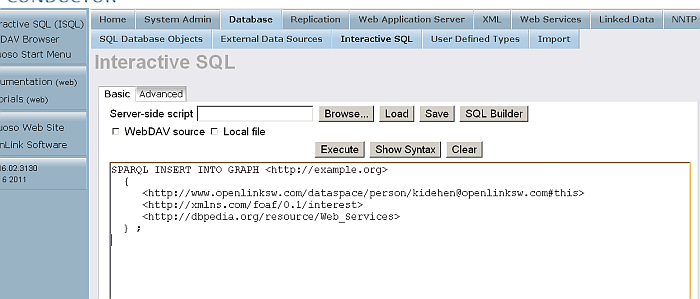
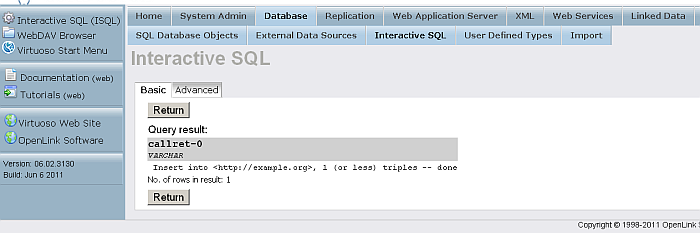
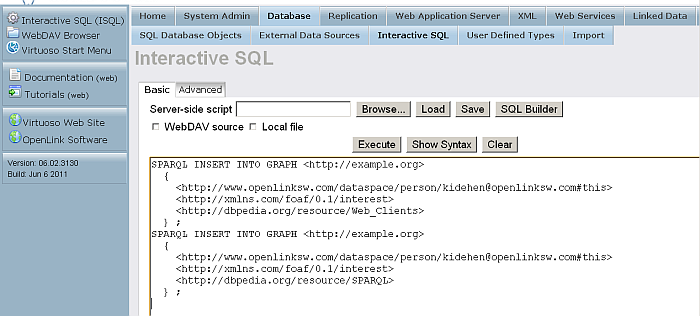
On the Host Virtuoso Instance go to Conductor -> Database -> Interactive SQL and execute the following statement:
SPARQL INSERT INTO GRAPH <http://example.org>
  {
     <http://www.openlinksw.com/dataspace/person/kidehen@openlinksw.com#this>
     <http://xmlns.com/foaf/0.1/interest>
     <http://dbpedia.org/resource/Web_Services>
  } ;
SPARQL INSERT INTO GRAPH <http://example.org>
  {
    <http://www.openlinksw.com/dataspace/person/kidehen@openlinksw.com#this>
    <http://xmlns.com/foaf/0.1/interest>
    <http://dbpedia.org/resource/Web_Clients>
  } ;
SPARQL INSERT INTO GRAPH <http://example.org>
  {
    <http://www.openlinksw.com/dataspace/person/kidehen@openlinksw.com#this>
    <http://xmlns.com/foaf/0.1/interest>
    <http://dbpedia.org/resource/SPARQL>
  } ;
Figure 16.222. Star Replication Topology

Figure 16.223. Star Replication Topology
-
To confirm that the triple count has increased by the number of inserted triples, execute the following on the Destination Virtuoso Instance SPARQL Endpoint:
SELECT COUNT(*)
  FROM <http://example.org>
 WHERE { ?s ?p ?o }
Figure 16.224. Star Replication Topology

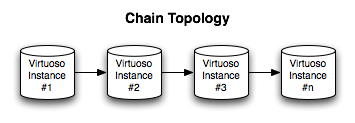
Chain Replication Topology
In a Chain, there is one original Publisher, to which there is only one Subscriber. That Subscriber may also serve as a Publisher, again with only one Subscriber. The chain ends with a Subscriber which does not Publish.
Figure 16.225. Chain Replication Topology
To set up a Chain, follow the scenario:
-
Configure Instance #1 to Publish.
-
Configure Instance #2 to Subscribe to #1.
-
Configure Instance #2 to Publish.
-
Configure Instance #3 to Subscribe to #2.
-
Repeat as necessary.
Chain Replication Topology Example
The following How-To walks you through setting up Virtuoso RDF Graph Replication in a Chain Topology.
Prerequisites
Database INI Parameters
Suppose there are 3 Virtuoso instances respectively with the following ini parameters values:
-
virtuoso1.ini:
...
[Database]
DatabaseFile    = virtuoso1.db
TransactionFile = virtuoso1.trx
ErrorLogFile     = virtuoso1.log
...
[Parameters]
ServerPort               = 1111
SchedulerInterval        = 1
...
[HTTPServer]
ServerPort                  = 8891
...
[URIQA]
DefaultHost = example.com:8891
...
[Replication]
ServerName   = db1
...
-
virtuoso2.ini:
...
[Database]
DatabaseFile    = virtuoso2.db
TransactionFile = virtuoso2.trx
ErrorLogFile     = virtuoso2.log
...
[Parameters]
ServerPort               = 1112
SchedulerInterval        = 1
...
[HTTPServer]
ServerPort                  = 8892
...
[URIQA]
DefaultHost = localhost:8892
...
[Replication]
ServerName   = db2
...
-
virtuoso3.ini:
...
[Database]
DatabaseFile    = virtuoso3.db
TransactionFile = virtuoso3.trx
ErrorLogFile     = virtuoso3.log
...
[Parameters]
ServerPort               = 1113
SchedulerInterval        = 1
...
[HTTPServer]
ServerPort                  = 8893
...
[URIQA]
DefaultHost = example.com:8893
...
[Replication]
ServerName   = db3
...
Database DSNs
Use the ODBC Administrator on your Virtuoso host (e.g., on Windows, Start menu -> Control Panel -> Administrative Tools -> Data Sources (ODBC); on Mac OS X, /Applications/Utilities/OpenLink ODBC Administrator.app) to create a System DSN for each of db1, db2, db3, with names db1, db2 and db3, respectively.
Install Conductor package
On each of the 3 Virtuoso instances install the conductor_dav.vad package.
Create Publication on db1
-
Go to http://example.com:8891/conductor and log in as dba
-
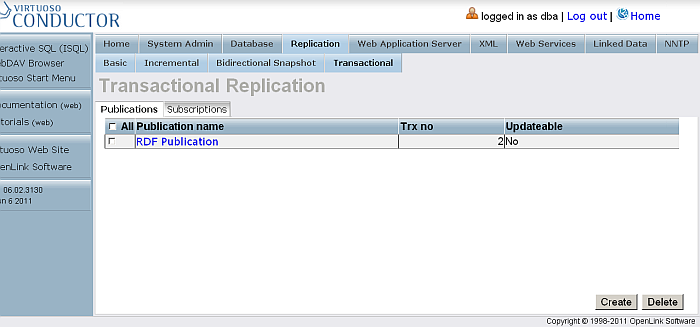
Go to Conductor - > Replication - > Transactional - > Publications
Figure 16.226. Chain Replication Topology

-
Click
Enable RDF Publishing
-
As result publication with the name
RDF Publication
should be created
Figure 16.227. Chain Replication Topology
-
Click the link which is the publication name.
-
You will be shown the publication items page
Figure 16.228. Chain Replication Topology

-
Enter for Graph IRI:
http://example.org
Figure 16.229. Chain Replication Topology

-
Click Add New
-
The item will be created and shown in the list of items for the currently viewed publication.
Figure 16.230. Chain Replication Topology
Create subscription from db2 to db1's Publication
-
Log in at http://example.com:8892/conductor
-
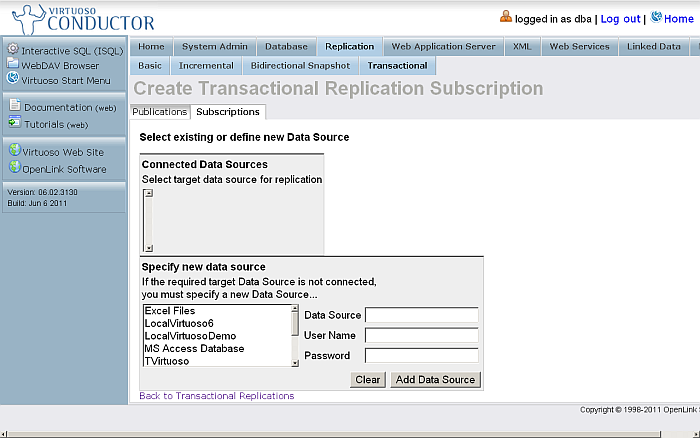
Go to Replication - > Transactional - > Subscriptions
Figure 16.231. Chain Replication Topology

-
Click
New Subscription
Figure 16.232. Chain Replication Topology
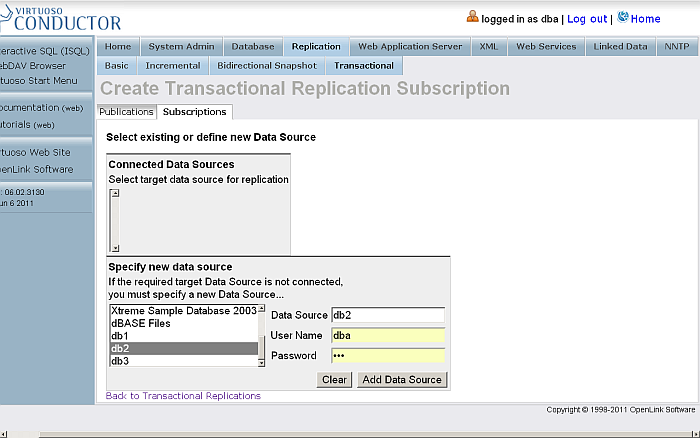
-
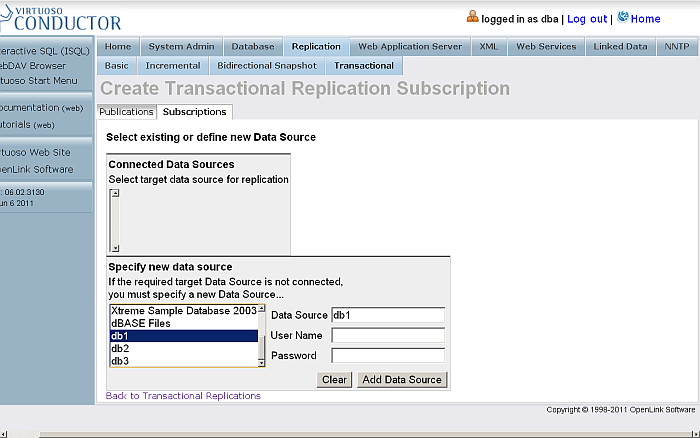
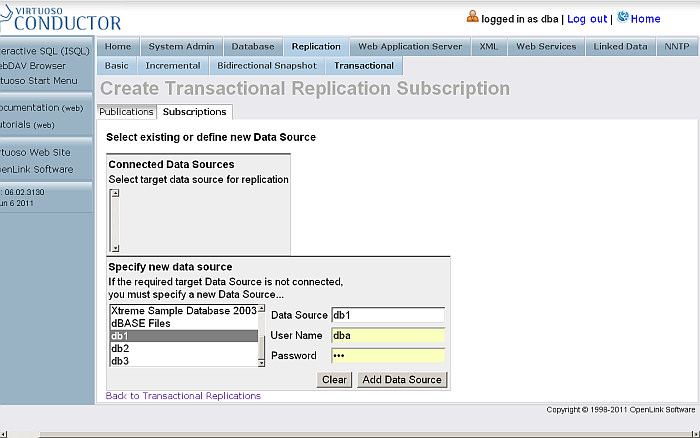
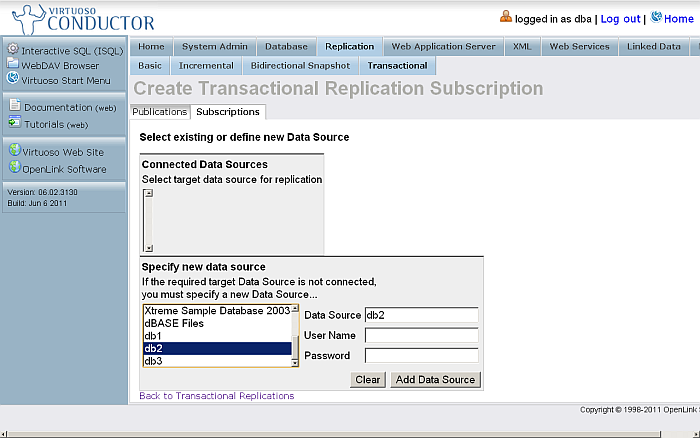
From the list of "Specify new data source" select Data Source db1
Figure 16.233. Chain Replication Topology
-
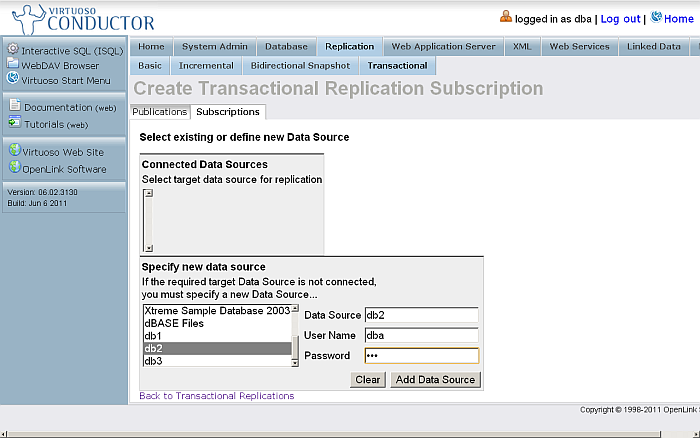
Enter for db1 dba user credentials
Figure 16.234. Chain Replication Topology
-
Click "Add Data Source"
-
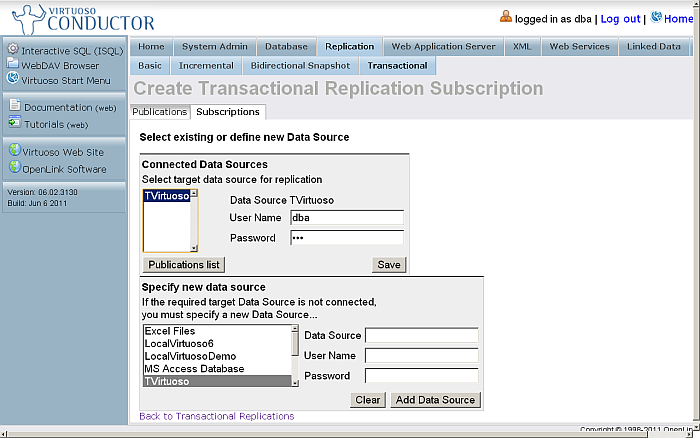
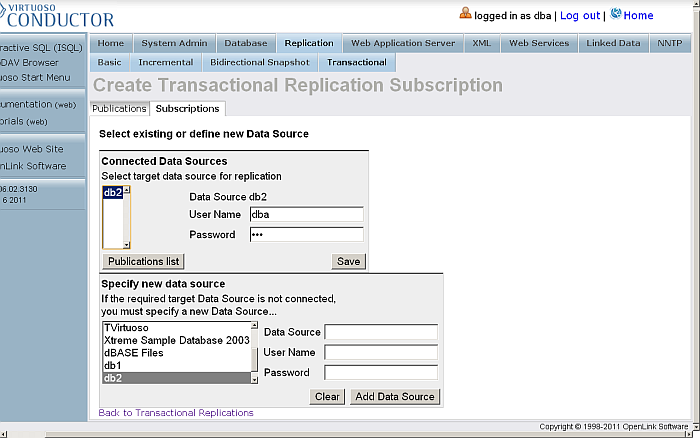
As result
db1
will be shown in the "Connected Data Sources" list.
Figure 16.235. Chain Replication Topology

-
Select
db1
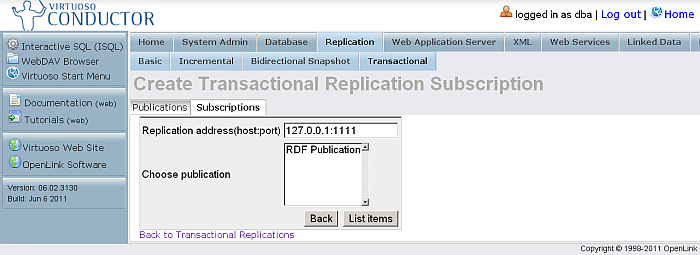
the "Connected Data Sources" list and click "Publications list"
Figure 16.236. Chain Replication Topology
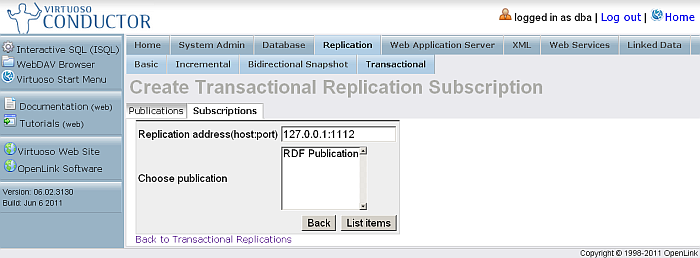
-
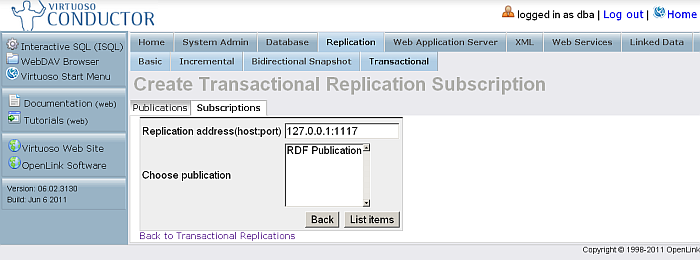
As result will be shown the list of available publications for the selected data source. Select the one with name "RDF Publication" and click "List Items".
Figure 16.237. Chain Replication Topology
-
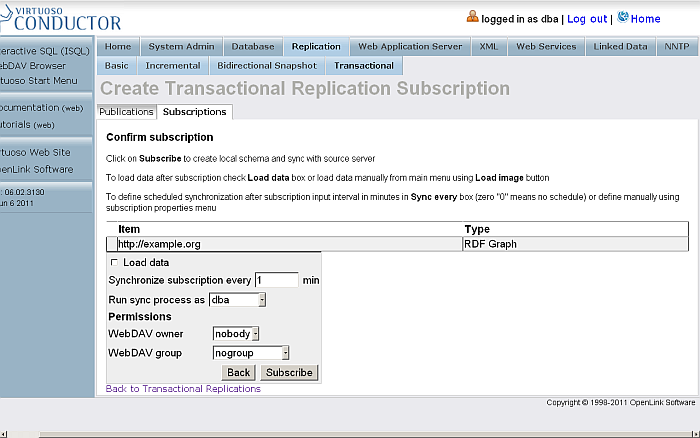
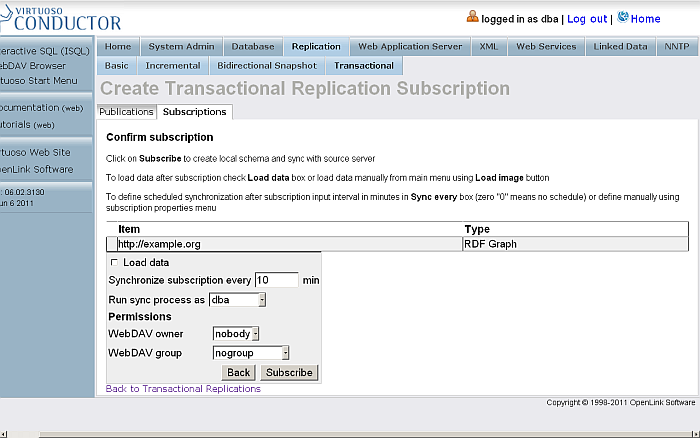
As result will be shown the "Confirm subscription" page.
Figure 16.238. Chain Replication Topology
-
The sync interval by default is 10 minutes. For the testing purposes, we will change it to 1 minute.
Figure 16.239. Chain Replication Topology

-
Click "Subscribe"
-
The subscription will be created.
Figure 16.240. Chain Replication Topology

Create Publication on db2
-
Go to http://example.com:8892/conductor and log in as dba
-
Go to Conductor - > Replication - > Transactional - > Publications
Figure 16.241. Chain Replication Topology

-
Click
Enable RDF Publishing
-
As result publication with the name
RDF Publication
should be created
Figure 16.242. Chain Replication Topology
-
Click the link which is the publication name.
-
You will be shown the publication items page
Figure 16.243. Chain Replication Topology

-
Enter for Graph IRI:
http://example.org
Figure 16.244. Chain Replication Topology

-
Click Add New
-
The item will be created and shown in the list of items for the currently viewed publication.
Figure 16.245. Chain Replication Topology

Create subscription from db3 to db2's Publication
-
Log in at http://example.com:8893/conductor
-
Go to Replication - > Transactional - > Subscriptions
Figure 16.246. Chain Replication Topology

-
Click
New Subscription
Figure 16.247. Chain Replication Topology
-
From the list of "Specify new data source" select Data Source db2
Figure 16.248. Chain Replication Topology
-
Enter for db2 dba user credentials
Figure 16.249. Chain Replication Topology
-
Click "Add Data Source"
Figure 16.250. Chain Replication Topology
-
As result
db2
will be shown in the "Connected Data Sources" list. Select it and click "Publications list"
Figure 16.251. Chain Replication Topology
-
As result will be shown the list of available publications for the selected data source. Select the one with name "RDF Publication" and click "List Items".
Figure 16.252. Chain Replication Topology
-
As result will be shown the "Confirm subscription" page.
Figure 16.253. Chain Replication Topology

-
The sync interval by default is 10 minutes. For the testing purposes, we will change it to 1 minute.
Figure 16.254. Chain Replication Topology

-
Click "Subscribe"
-
The subscription will be created.
Figure 16.255. Chain Replication Topology
Insert Data into a Named Graph on the db1 Virtuoso Instance
-
Log in at http://example.com:8891/conductor
-
Go to Linked Data -> Quad Store Upload:
Figure 16.256. Chain Replication Topology
-
In the shown form:
-
Tick the box for
Resource URL
and enter your resource URL, e.g.:
http://www.openlinksw.com/dataspace/person/kidehen@openlinksw.com#this
-
Enter for Named Graph IRI:
http://example.org
Figure 16.257. Chain Replication Topology

-
-
Click Upload
-
A successful upload will result in a shown message.
Figure 16.258. Chain Replication Topology
-
Check the count of the inserted triples by executing a query like the following against the SPARQL endpoint, http://example.com:8891/sparql:
SELECT COUNT(*)
   FROM <http://example.org>
WHERE { ?s ?p ?o }
Figure 16.259. Chain Replication Topology
-
Should return
57
as total.
Figure 16.260. Chain Replication Topology

Check data on the Destination instances db2 and db3
-
To check the starting count, on each of the Destination Virtuoso Instances db2 and db3 from SPARQL Endpoint execute:
SELECT COUNT(*) FROM <http://example.org> WHERE { ?s ?p ?o } -
Should return
57
as total.
Figure 16.261. Chain Replication Topology
Add new data on db1
-
Disconnect db2 and db3.
-
On the Host Virtuoso Instance db1 go to Conductor - > Database - > Interactive SQL enter the following statement:
SPARQL INSERT INTO GRAPH <http://example.org>
  {
     <http://www.openlinksw.com/dataspace/person/kidehen@openlinksw.com#this>
     <http://xmlns.com/foaf/0.1/interest>
     <http://dbpedia.org/resource/Web_Services>
  } ;
SPARQL INSERT INTO GRAPH <http://example.org>
  {
    <http://www.openlinksw.com/dataspace/person/kidehen@openlinksw.com#this>
    <http://xmlns.com/foaf/0.1/interest>
    <http://dbpedia.org/resource/Web_Clients>
  } ;
SPARQL INSERT INTO GRAPH <http://example.org>
  {
    <http://www.openlinksw.com/dataspace/person/kidehen@openlinksw.com#this>
    <http://xmlns.com/foaf/0.1/interest>
    <http://dbpedia.org/resource/SPARQL>
  } ;
Figure 16.262. Chain Replication Topology
-
Click "Execute"
-
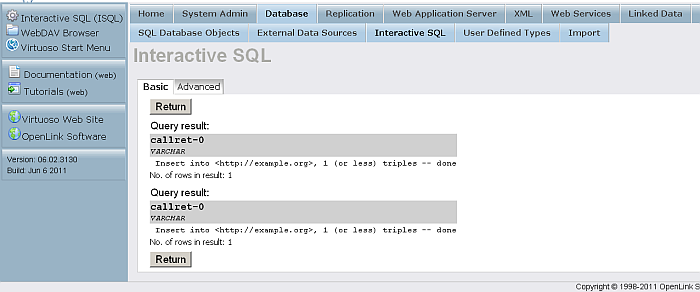
As result the triples will be inserted
Figure 16.263. Chain Replication Topology
-
Check the count of the destination instance graph's triples by executing the following query like against the SPARQL endpoint, http://example.com:8891/sparql:
SELECT COUNT(*) FROM <http://example.org> WHERE { ?s ?p ?o } -
Should return
60
as total.
Figure 16.264. Chain Replication Topology

Check data on the Destination instances db2 and db3
-
Start instances db2 and db3
-
To confirm that the triple count has increased by the number of inserted triples, execute the following on the Destination Virtuoso Instance db2 and db3 SPARQL Endpoint:
SELECT COUNT(*) FROM <http://example.org> WHERE { ?s ?p ?o } -
Should return
60
as total.
Figure 16.265. Chain Replication Topology
Bi-directional Replication Topology
Bi-directional Replication Topology Example
The following How-To walks you through setting up Virtuoso RDF Graph Replication in a Bi-directional Topology.
db1 <---- db2
db1 ---->

 db2
Prerequisites
Database INI Parameters
Suppose there are 2 Virtuoso instances respectively with the following ini parameters values:
-
virtuoso1.ini:
...
[Database]
DatabaseFile    = virtuoso1.db
TransactionFile = virtuoso1.trx
ErrorLogFile     = virtuoso1.log
...
[Parameters]
ServerPort               = 1111
SchedulerInterval        = 1
...
[HTTPServer]
ServerPort                  = 8891
...
[URIQA]
DefaultHost = example.com:8891
...
[Replication]
ServerName   = db1
...
-
virtuoso2.ini:
...
[Database]
DatabaseFile    = virtuoso2.db
TransactionFile = virtuoso2.trx
ErrorLogFile     = virtuoso2.log
...
[Parameters]
ServerPort               = 1112
SchedulerInterval        = 1
...
[HTTPServer]
ServerPort                  = 8892
...
[URIQA]
DefaultHost = localhost:8892
...
[Replication]
ServerName   = db2
...
Database DSNs
Use the ODBC Administrator on your Virtuoso host (e.g., on Windows, Start menu -> Control Panel -> Administrative Tools -> Data Sources (ODBC); on Mac OS X, /Applications/Utilities/OpenLink ODBC Administrator.app) to create a System DSN for db1 and db2 with names db1 and db2 respectively.
Install Conductor package
On each of the 2 Virtuoso instances install the conductor_dav.vad package.
Create Publication on db2
-
Go to http://example.com:8892/conductor and log in as dba
-
Go to Conductor -> Replication -> Transactional -> Publications
Figure 16.266. Bi-directional Replication Topology

-
Click
Enable RDF Publishing
-
As result publication with the name
RDF Publication
should be created
Figure 16.267. Bi-directional Replication Topology
-
Click the link which is the publication name.
-
You will be shown the publication items page
Figure 16.268. Bi-directional Replication Topology

-
Enter for Graph IRI:
http://example.org
Figure 16.269. Bi-directional Replication Topology
-
Click Add New
-
The item will be created and shown in the list of items for the currently viewed publication.
Figure 16.270. Bi-directional Replication Topology
Create subscription from db1 to db2's Publication
-
Log in at http://example.com:8891/conductor
-
Go to Replication -> Transactional -> Subscriptions
Figure 16.271. Bi-directional Replication Topology
-
Click
New Subscription
Figure 16.272. Bi-directional Replication Topology
-
From the list of "Specify new data source" select Data Source db2
Figure 16.273. Bi-directional Replication Topology

-
Enter for db2 dba user credentials
Figure 16.274. Bi-directional Replication Topology
-
Click "Add Data Source"
-
As result
db2
will be shown in the "Connected Data Sources" list.
Figure 16.275. Bi-directional Replication Topology
-
Select
db2
the "Connected Data Sources" list and click "Publications list"
Figure 16.276. Bi-directional Replication Topology
-
As result will be shown the list of available publications for the selected data source. Select the one with name "RDF Publication" and click "List Items".
Figure 16.277. Bi-directional Replication Topology
-
As result will be shown the "Confirm subscription" page.
Figure 16.278. Bi-directional Replication Topology

-
The sync interval by default is 10 minutes. For the testing purposes, we will change it to 1 minute.
Figure 16.279. Bi-directional Replication Topology

-
Click "Subscribe"
-
The subscription will be created.
Figure 16.280. Bi-directional Replication Topology
Create Publication on db1
-
Go to http://example.com:8891/conductor and log in as dba
-
Go to Conductor -> Replication -> Transactional -> Publications
Figure 16.281. Bi-directional Replication Topology
-
Click
Enable RDF Publishing
-
As result publication with the name
RDF Publication
should be created
Figure 16.282. Bi-directional Replication Topology

-
Click the link which is the publication name.
-
You will be shown the publication items page
Figure 16.283. Bi-directional Replication Topology
-
Enter for Graph IRI:
http://example.org
Figure 16.284. Bi-directional Replication Topology

-
Click Add New
-
The item will be created and shown in the list of items for the currently viewed publication.
Figure 16.285. Bi-directional Replication Topology

Create subscription from db2 to db1's Publication
-
Log in at http://example.com:8892/conductor
-
Go to Replication -> Transactional -> Subscriptions
Figure 16.286. Bi-directional Replication Topology
-
Click
New Subscription
Figure 16.287. Bi-directional Replication Topology

-
From the list of "Specify new data source" select Data Source db1
Figure 16.288. Bi-directional Replication Topology

-
Enter for db1 dba user credentials
Figure 16.289. Bi-directional Replication Topology

-
Click "Add Data Source"
Figure 16.290. Bi-directional Replication Topology
-
As result
db1
will be shown in the "Connected Data Sources" list. Select it and click "Publications list"
Figure 16.291. Bi-directional Replication Topology

-
As result will be shown the list of available publications for the selected data source. Select the one with name "RDF Publication" and click "List Items".
Figure 16.292. Bi-directional Replication Topology
-
As result will be shown the "Confirm subscription" page.
Figure 16.293. Bi-directional Replication Topology

-
The sync interval by default is 10 minutes. For the testing purposes, we will change it to 1 minute.
Figure 16.294. Bi-directional Replication Topology

-
Click "Subscribe"
-
The subscription will be created.
Figure 16.295. Bi-directional Replication Topology
Insert Data into a Named Graph on the db2 Virtuoso Instance
-
Log in at http://example.com:8892/conductor
-
Go to Linked Data -> Quad Store Upload:
Figure 16.296. Bi-directional Replication Topology
-
In the shown form:
-
Tick the box for
Resource URL
and enter your resource URL, e.g.:
http://www.openlinksw.com/dataspace/person/kidehen@openlinksw.com#this
-
Enter for Named Graph IRI:
http://example.org
Figure 16.297. Bi-directional Replication Topology
-
Click Upload
-
A successful upload will result in a shown message.
Figure 16.298. Bi-directional Replication Topology
-
Check the count of the inserted triples by executing a query like the following against the SPARQL endpoint, http://example.com:8892/sparql:
SELECT COUNT(*)
   FROM <http://example.org>
WHERE { ?s ?p ?o }
Figure 16.299. Bi-directional Replication Topology
-
Should return
57
as total.
Figure 16.300. Bi-directional Replication Topology

Check data on the Destination instance db1
-
To check the starting count, execute from db1's SPARQL Endpoint:
SELECT COUNT(*) FROM <http://example.org> WHERE { ?s ?p ?o } -
Should return
57
as total.
Figure 16.301. Bi-directional Replication Topology
Add new data on db2
-
Disconnect db1.
-
On the Host Virtuoso Instance db2 go to Conductor -> Database -> Interactive SQL enter the following statement:
SPARQL INSERT INTO GRAPH <http://example.org>
  {
     <http://www.openlinksw.com/dataspace/person/kidehen@openlinksw.com#this>
     <http://xmlns.com/foaf/0.1/interest>
     <http://dbpedia.org/resource/Web_Services>
  } ;
Figure 16.302. Bi-directional Replication Topology
-
Click "Execute"
-
As result the triples will be inserted
Figure 16.303. Bi-directional Replication Topology
-
Check the count of the destination instance graph's triples by executing the following query like against the SPARQL endpoint, http://example.com:8892/sparql:
SELECT COUNT(*) FROM <http://example.org> WHERE { ?s ?p ?o } -
Should return
58
as total.
Figure 16.304. Bi-directional Replication Topology

Check data on the Destination instance db1
-
Start instance db1
-
To confirm that the triple count has increased by the number of inserted triples, execute the following statement on db1's SPARQL Endpoint:
SELECT COUNT(*) FROM <http://example.org> WHERE { ?s ?p ?o } -
Should return
58
as total.
Figure 16.305. Bi-directional Replication Topology
Add new data on db1
-
Disconnect db2.
-
On the Host Virtuoso Instance db1 go to Conductor -> Database -> Interactive SQL enter the following statement:
SPARQL INSERT INTO GRAPH <http://example.org>
  {
    <http://www.openlinksw.com/dataspace/person/kidehen@openlinksw.com#this>
    <http://xmlns.com/foaf/0.1/interest>
    <http://dbpedia.org/resource/Web_Clients>
  } ;
SPARQL INSERT INTO GRAPH <http://example.org>
  {
    <http://www.openlinksw.com/dataspace/person/kidehen@openlinksw.com#this>
    <http://xmlns.com/foaf/0.1/interest>
    <http://dbpedia.org/resource/SPARQL>
  } ;
Figure 16.306. Bi-directional Replication Topology
-
Click "Execute"
-
As result the triples will be inserted
Figure 16.307. Bi-directional Replication Topology
-
Check the count of the destination instance graph's triples by executing the following query like against the SPARQL endpoint, http://example.com:8891/sparql:
SELECT COUNT(*) FROM <http://example.org> WHERE { ?s ?p ?o } -
Should return
60
as total.
Figure 16.308. Bi-directional Replication Topology

Check data on the Destination instance db2
-
Start instance db2
-
To confirm that the triple count has increased by the number of inserted triples, execute the following statement on db2's SPARQL Endpoint:
SELECT COUNT(*) FROM <http://example.org> WHERE { ?s ?p ?o } -
Should return
60
as total.
Figure 16.309. Bi-directional Replication Topology