14.5.4. Migrating ASP.Net Applications to Virtuoso
Creating a Simple Data Bound Application
This section will describe how to use the MS Visual Studio to create an application using as much drag and drop as possible. We want to create a table of data in a web page from a database.
-
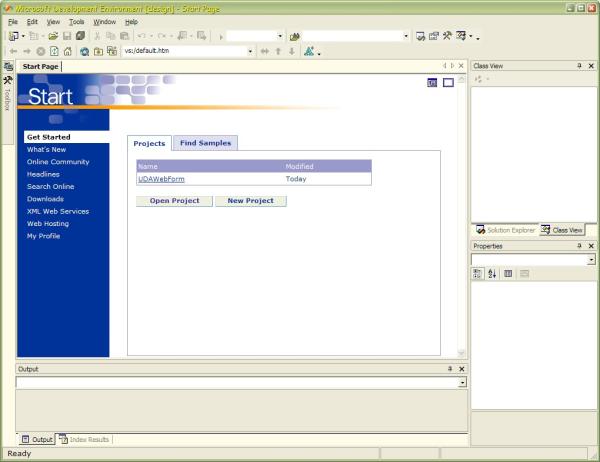
Launch Microsoft's Visual Studio. Once Visual Studio has been launch it present you with the start page that lets you create a New Project.
Figure 14.18. Databound Examples using MS Visual Studio
-
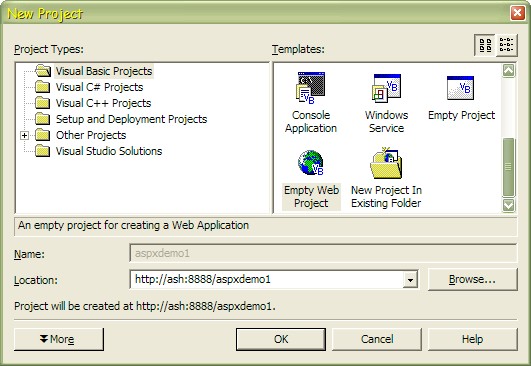
Create a new . From the templates select a new Empty Web Project found in the Visual Basic Projects type. You must also select a location on an IIS web server.
Figure 14.19. Databound Examples using MS Visual Studio
-
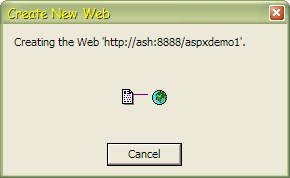
Wait for IIS application to be set-up. You will be shown a progress dialogue as Visual Studio contacts your web server creating a new web application there.
Figure 14.20. Databound Examples using MS Visual Studio
-
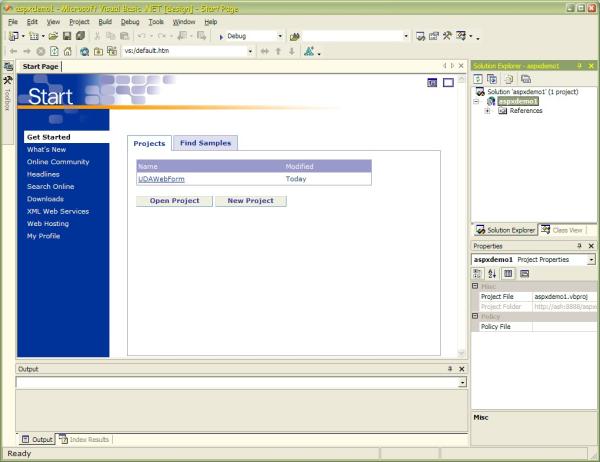
Add New Web Form. When the application-space has been configured on the web server you will be returned to the main Visual Studio windows. Now we must create our page. Right-click on the project name in the Solution Explorer and select Add New Web Form.
Figure 14.21. Databound Examples using MS Visual Studio
-
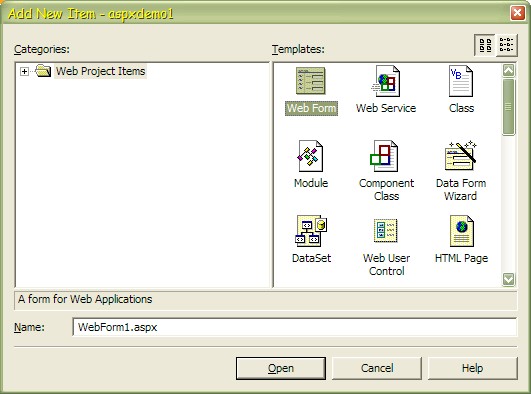
New Web Form. The option will appear, automatically selecting the "Web Form" item to add. Supply a name for the page and click Open to begin.
Figure 14.22. Databound Examples using MS Visual Studio
-
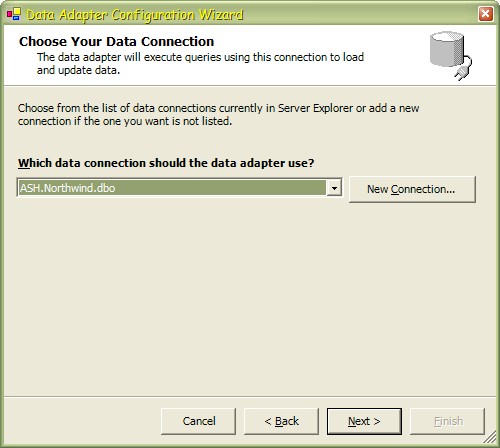
Add a SqlDataAdapter Control. With the fresh "Web Form" we can start. From the double-click on the in the panel. This will start the . After reading the description on the first panel click on the Next button. You will be asked to choose your connection. Assuming that you have access to a Northwind database hosted in MS SQLServer you can either make use of an existing connection to it or configure a new one using the button. Pressing the button will present the normal OLEDB dialogues for creating a new datasource. Once a data connection has been selected press Next to continue.
Figure 14.23. Databound Examples using MS Visual Studio
-
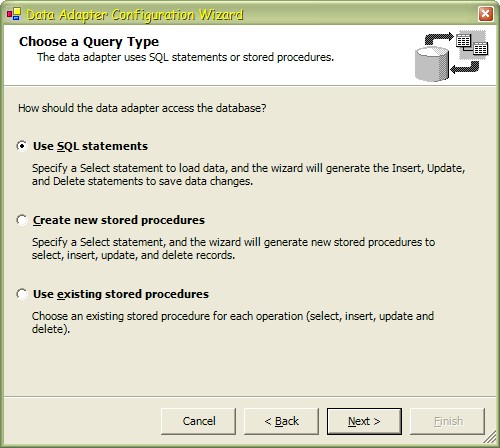
Choose a Query Type. The next panel will ask how the data adapter should access the database. For simplicity we will stick with the default of Use SQL Statements. Press Next.
Figure 14.24. Databound Examples using MS Visual Studio
-
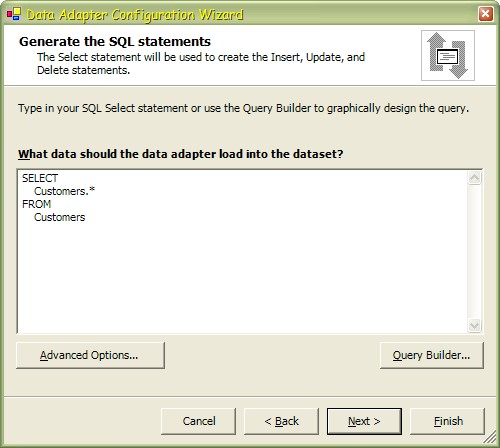
Generate SQL Statements. At this point you can either type a SQL statement if you know exactly what you are looking to get back from the database, or you can use the to point-and-click to your data. In our case we will retrieve everything from the Customers table using a simple query:
select * from Customers.Figure 14.25. Databound Examples using MS Visual Studio
-
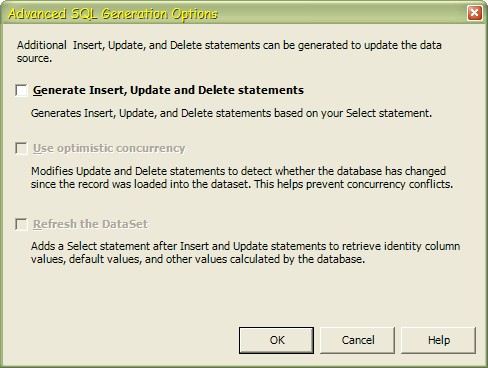
Advanced Options. Click on the Advanced Options button. Unselect the top checkbox. This will also unselect the other two automatically. We will not be performing any updates in this example. OK the advanced options, upon return to the main dialogue press the Next button to continue onwards.
Figure 14.26. Databound Examples using MS Visual Studio
-
View Wizard Results. The next panel confirms all the options selected leaving us to simply complete the wizard.
Figure 14.27. Databound Examples using MS Visual Studio

-
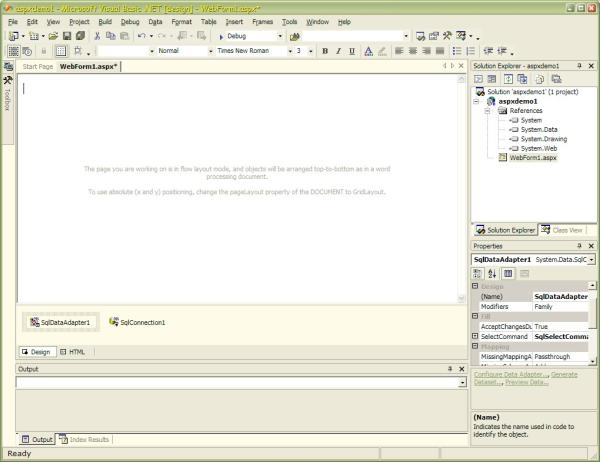
Back to the main window... When the wizard finishes and returns you to the main Visual Studio window you will see that two controls have been added to the Web Form. The connection control has been automatically generated to support the Data Adapter.
Figure 14.28. Databound Examples using MS Visual Studio
-
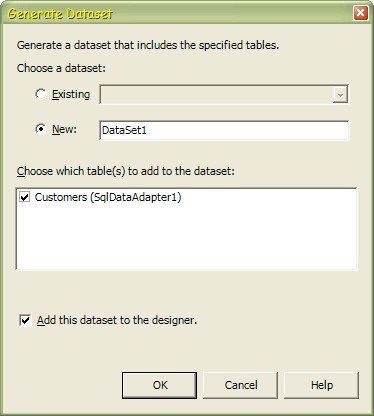
Generate Dataset. Before we can display anything on the page we need to form a Dataset. Right-click on the SQLDataAdapter1 control you previously added and select Generate Dataset. Defaults on the displayed dialog are all sufficient. After verifying them click the OK button to generate the dataset.
Figure 14.29. Databound Examples using MS Visual Studio
-
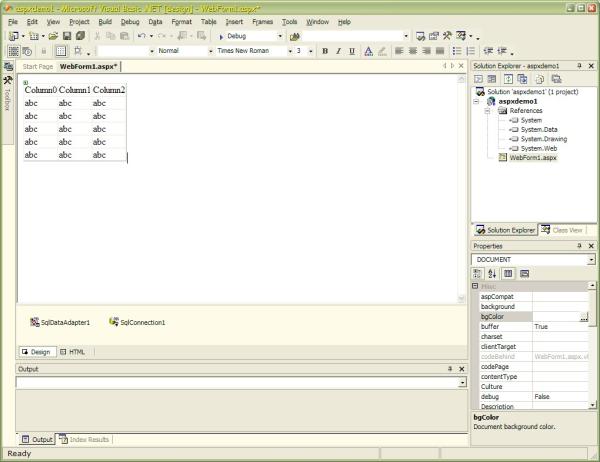
Add a DataGrid Control. Now we need to show the dataset that we are fetching from the database. We will use a simple DataGrid for this. Open the toolbox in the Web Forms panel and double-click on the DataGrid control. This add the control to the page and will display a table on the web page view.
Figure 14.30. Databound Examples using MS Visual Studio

-
Table Properties. Configure the DataGrid control by right-clicking on the table and selecting .
Figure 14.31. Databound Examples using MS Visual Studio
-
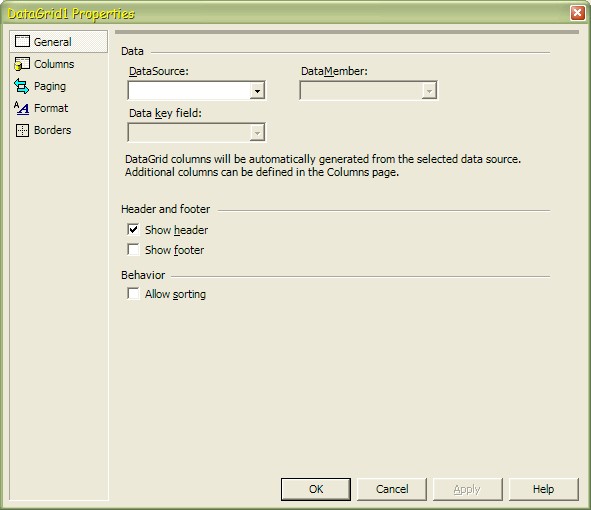
DataGrid Properties. You can adjust most properties of the table such as colours, fonts, borders, etc. You can control paging aspects that will be taken care of automatically by the control, you only need specify the number of results per page. For now we only want to adjust the most important aspects of the table, where the data comes from.
Figure 14.32. Databound Examples using MS Visual Studio
-
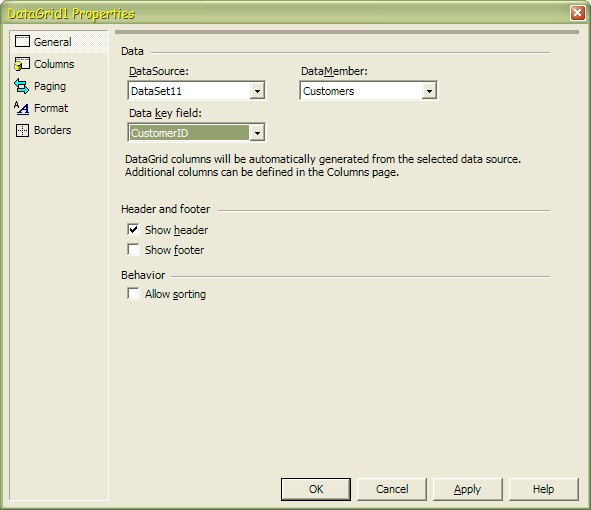
DataGrid Bindings. From the first properties panel you must select the DataSource, DataMember, and select the Data key field (especially important for updatable tables). These properties may be selected via the drop-downs on the panel, allowing you to select the now-familiar controls configured earlier. Once configured, press the OK button to save the changes.
Figure 14.33. Databound Examples using MS Visual Studio
-
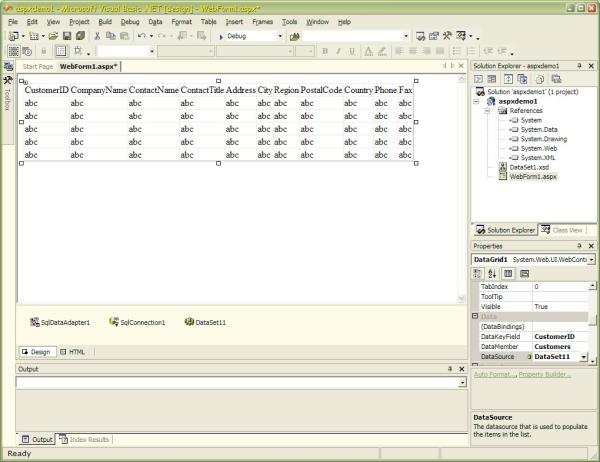
Preview. Once the details have been saved the view of the table in the page will be updated to reflect the dataset details.
Figure 14.34. Databound Examples using MS Visual Studio
-
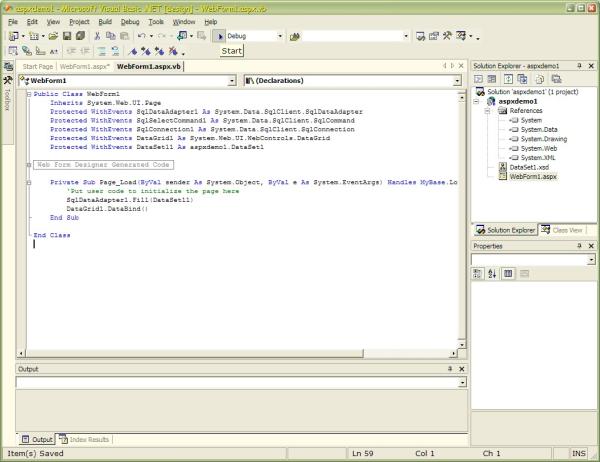
Page Initialization. We are very nearly finished. The controls are all ready to be used, however, the final touch is to edit our Page_Load function. Double-click on the empty part of the web page view in Visual Studio and the associated
.vbfile will be opened. This is the file containing the actual code. You will be automatically placed at the Page_Load function. This is the page initialization section where will need to instruct the DataAdapter to fill with data, and then instruct the DataGrid to bind to that data.These lines of code need to be added by hand:
SqlDataAdapter1.Fill(DataSet11)
DataGrid1.DataBind()
You will find that Visual Studio will offer some assistance in the form of intellisense command-completion while you are typing.
Figure 14.35. Databound Examples using MS Visual Studio
-
The End Result. Next we will set the project's initial start-page by right-clicking on the form name in solution explorer and selecting option. Finally we can run the project using the start button at the top. The project will automatically be built and a browser window launched automatically. Admire your results. When finished, on closing the browser windows you will automatically return to Visual Studio.
Figure 14.36. Databound Examples using MS Visual Studio
Migrating ASP.Net Applications to Virtuoso
The previous section showed us how to build a very basic web application using an ASPX data-bound control. Now we will host this same application in Virtuoso demonstrating that IIS is no longer required for ASPX application deployment.
-
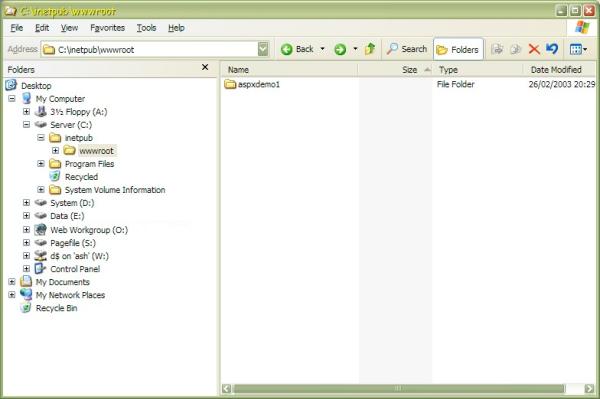
Locating your ASPX application. Use explorer to locate the ASPX application you want to move away from IIS and re-deploy under Virtuoso. The previous section created the application in the IIS virtual directory represented by
http://ash:8888/aspxdemo1/which was physically located inc:\inetpub\wwwroot\aspxdemo1\. We can simply copy this directory and place it somewhere under either the VSP root directory or WebDAV. We will copy the application to a location in WebDAV for a local Virtuoso server.Figure 14.37. Migrating ASP.Net Applications to Virtuoso
-
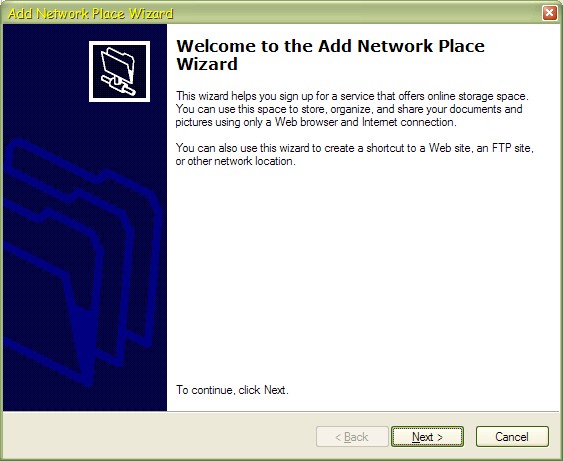
Add a Network Place to DAV. From My Network Places in explorer or Network Neighborhood double-click on the shortcut to start the wizard.
Figure 14.38. Migrating ASP.Net Applications to Virtuoso
-
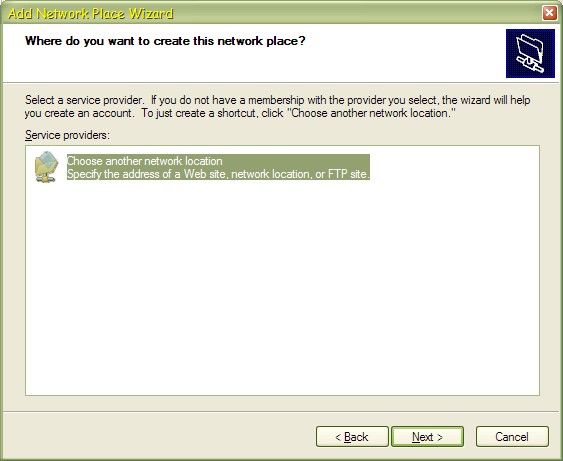
Network service provider. Select the default option. Click next to continue.
Figure 14.39. Migrating ASP.Net Applications to Virtuoso
-
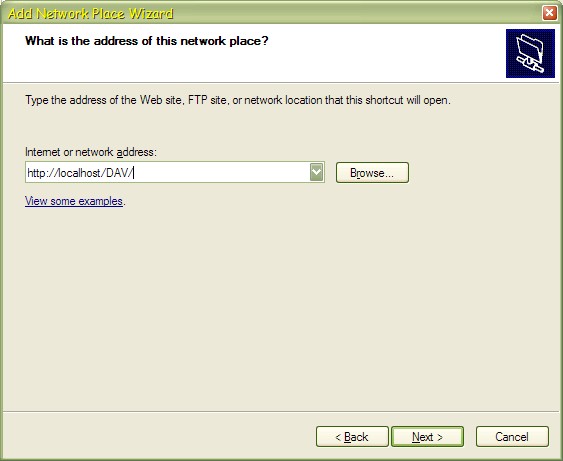
Internet or Network Address. Here you specify the URL of DAV on the Virtuoso server. We are using Virtuoso on the local machine but this could be anywhere on the Internet. Click next to continue.
Figure 14.40. Migrating ASP.Net Applications to Virtuoso
-
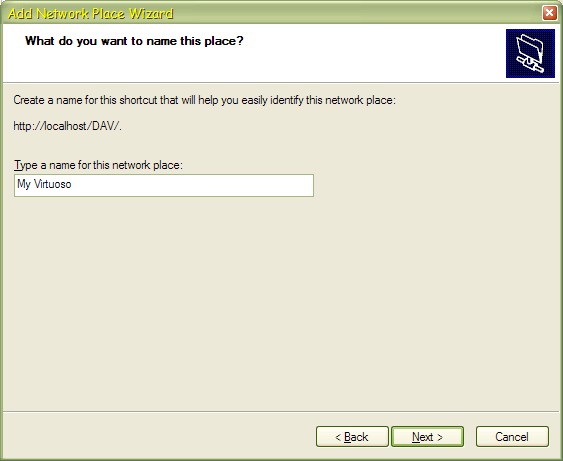
Name the Network Place. Provide the network place with a meaningful name so we can easily find this location in the future. Click on next to continue.
Figure 14.41. Migrating ASP.Net Applications to Virtuoso
-
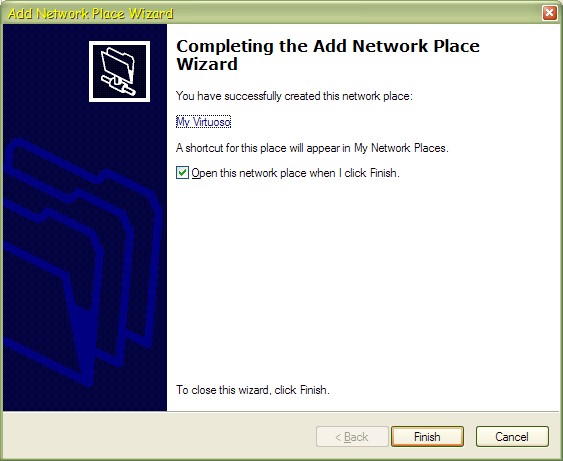
Open the Network Place. On the final panel of the wizard there is a checkbox to "Open this network place when I click Finish" that we will leave checked. Click Finish to continue and open the DAV directory.
Figure 14.42. Migrating ASP.Net Applications to Virtuoso
-
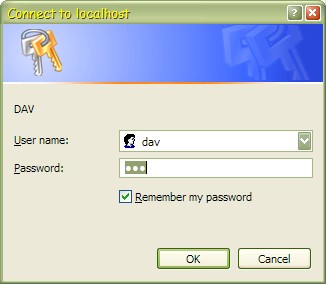
Connect to DAV. When you attempt to connect to DAV you will be prompted for a User name and Password. These will be whatever you entered during the installation, possibly both dav, in which case type dav in both fields and press the OK button to continue.
Figure 14.43. Migrating ASP.Net Applications to Virtuoso
-
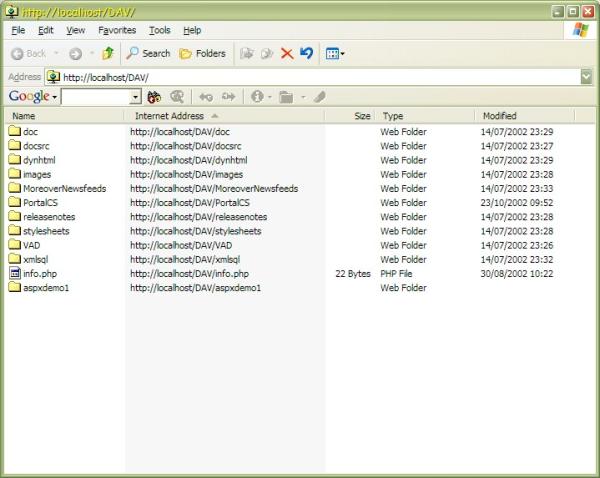
Copy the ASPX application to DAV. Once the explorer opens up on the DAV network place we can copy the
aspxdemo1application directory to it.Figure 14.44. Migrating ASP.Net Applications to Virtuoso
-
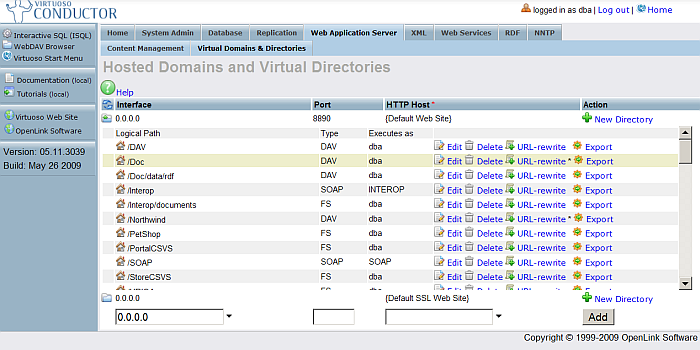
Configure Virtual Directory. Now we have to configure a Virtuoso virtual directory. Go to Conductor / Web Application Server / HTTP Hosts & Directories.
Figure 14.45. Migrating ASP.Net Applications to Virtuoso

-
Add Virtual Directory. The "folder" icon for the hosts defined will list all mappings currently present for the Virtuoso server. Click on the "New Directory" link to continue.
Figure 14.46. Migrating ASP.Net Applications to Virtuoso
-
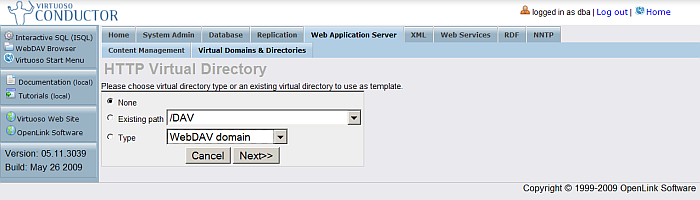
Select DAV Domain template. On the next page select for "Type" the DAV Domain template and click "Next".
Figure 14.47. Migrating ASP.Net Applications to Virtuoso
-
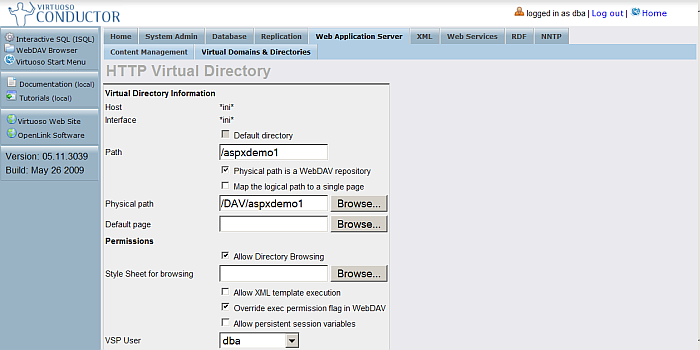
Configure the Virtual Directory parameters. We must supply a logical path,
/aspxdemo1, in this case. We must also supply the physical path that this represents, we can either type in the DAV location or use the Browse button to the find the directory under DAV. The WebDAV checkbox will correctly already be checked. For now we will also set to Allow Directory Browsing, and Override execution permissions in WebDAV. Finally we must set the VSP Execution user todbausing the drop down. To save the changes click on the "Save Changes" button at the bottom of the page.Figure 14.48. Migrating ASP.Net Applications to Virtuoso
-
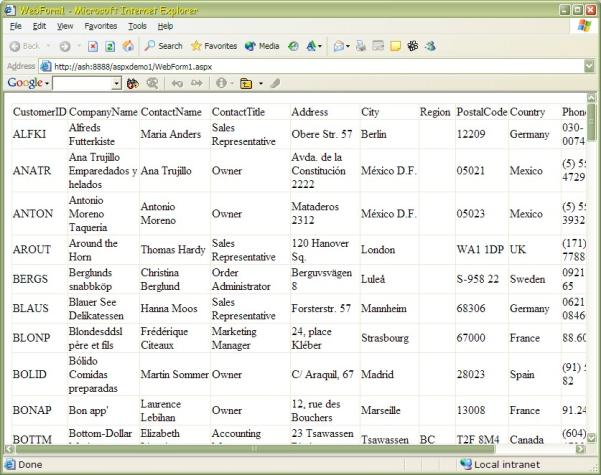
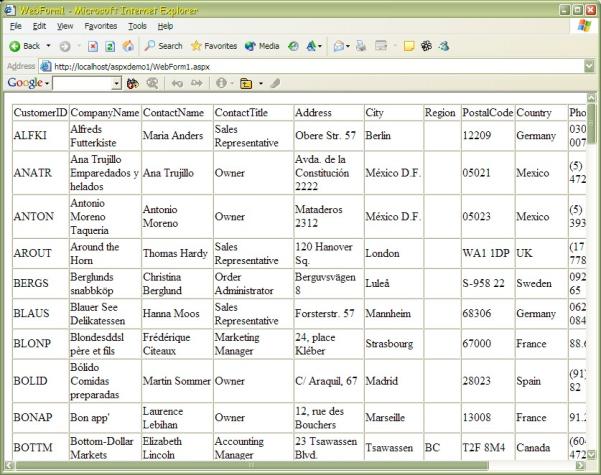
View the ASPX page hosted in Virtuoso DAV. With the virtual directory configured we have only to test that it works as expected. On opening a browser at:
http://example.com/aspxdemo1/WebForm1.aspx, we will see the same output as before.Figure 14.49. Migrating ASP.Net Applications to Virtuoso
![[Note]](images/note.png)
|
Note: |
|---|---|
|
If ASPX hosting is attempted on a machine that never had IIS installed it is possible that ASP.NET is not configured, although required. The Virtuoso installer will take care of this for you in most cases but if you run into problems you may want to confirm that ASP.NET is configured correctly. You will have to use the regedit utility to edit the registry, changing a search-path so System.Web.dll can find aspnet_asapi.dll. Always exercise caution whenever editing the registry as invalid data can prevent your machine from operating properly. You will first need to find out what version of the
Assuming the version is 1.0.3705.288, we should enter the following
details into the registry if the
[HKEY_LOCAL_MACHINE\SOFTWARE\Microsoft\ASP.NET]
     "RootVer"="1.0.3705.288"
[HKEY_LOCAL_MACHINE\SOFTWARE\Microsoft\ASP.NET\1.0.3705.288]
     "Path"="C:\WINDOWS\Microsoft.NET\Framework\v1.0.3705"
     "DllFullPath"="C:\WINDOWS\Microsoft.NET\Framework\v1.0.3705\aspnet_isapi.dll"
|