4.2.2. Windows 95/98/NT/2000
C++ Demo
-
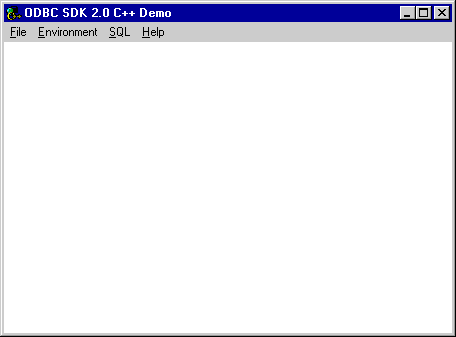
Go to the Virtuoso "Start Menu" item, then click on the "C++ Demo 32 Bit" menu item.
Figure 4.1. C++ Demo
-
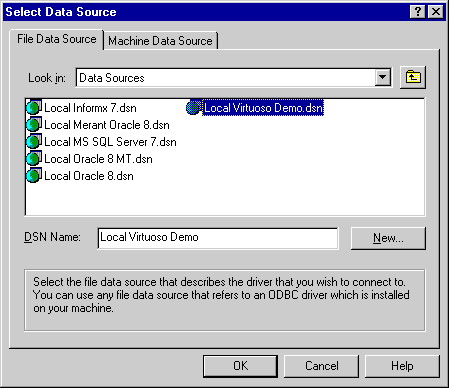
Follow the Environment->Open Connection menu path. Selecting the "Open Connection" menu item results in the ODBC Driver Manager presenting you with a list of ODBC DSNs on your machine as depicted by the screen capture below:
Figure 4.2. C++ Demo

-
Select the ODBC DSN that you want to be connecting to, in this case "Local Virtuoso Demo" has been chosen since this will connect you to a sample Virtuoso database that has been populated with data.
-
You are then presented with a Login Dialog by the Virtuoso driver for ODBC, enter a valid user name and password (default being user: demo and password: demo) into the appropriate fields.
Figure 4.3. C++ Demo

-
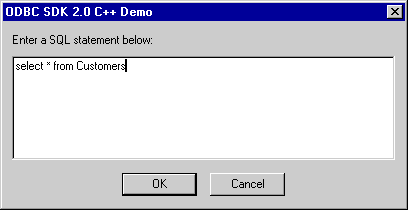
At this point you will be connected to the Virtuoso demonstration database, you can now use the SQL-->Execute SQL menu path to open up the Interactive SQL input dialog. Enter a valid SQL statement (see example in screen shot) and then click on the "OK" button.
Figure 4.4. C++ Demo
-
You will be presented with the results of your query.
Figure 4.5. C++ Demo

-
You exit this demo by following the Environment-->Close Connection menu path.
ODBC Bench Test 32
-
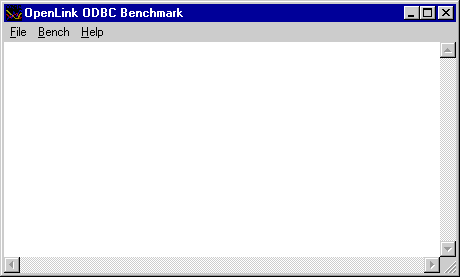
Go to the Virtuoso "Start Menu" item, then click on the "ODBC Bench Test 32 Bit" menu item. You will be presented with the "Bench Test" interface.
Figure 4.6. ODBC Bench
-
Follow the File-Connect menu path which initializes the ODBC Driver Manager which in turn presents you with a list of ODBC DSN's installed on your machine. Select the DSN that you want to benchmark, remember that by benchmarking a DSN you are benchmarking the ODBC Driver that serves the DSN in question and the backend database engine that serves the ODBC Driver. Choose the "Local Virtuoso Demo" DSN if you want to benchmark Virtuoso.
Figure 4.7. ODBC Bench
-
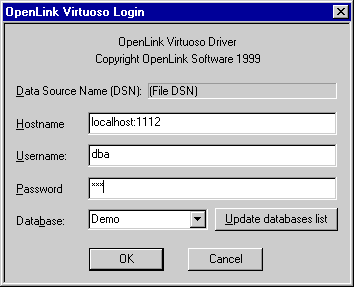
You will then be presented with a Login Dialog by the Virtuoso driver for ODBC, enter a valid user name and password (default being user: demo and password: demo for the Demo database) into the appropriate fields.
Figure 4.8. ODBC Bench
-
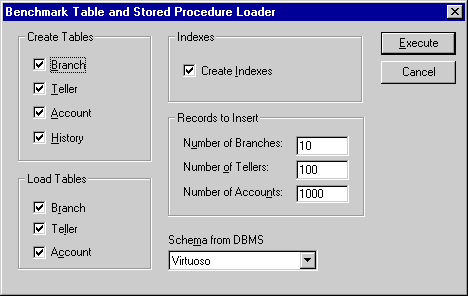
Now follow the Bench-->Load Tables menu path and you will be presented with a dialog that enables you to configure key elements of your benchmark. Click the "Execute" button to commence the process of setting up your database for the benchmark tests.
Figure 4.9. ODBC Bench
-
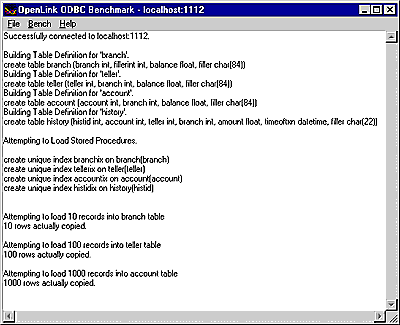
As the process of loading data occurs, all the way up to completion, the benchmark program will provide status information into the benchmark output pane as shown below:
Figure 4.10. ODBC Bench
-
Now that all the benchmark data has been loaded into your database, follow the Bench-->Run Benchmark menu path and then configure your actual benchmark session parameters:
These benchmark parameters fall into 3 categories, Timing Options, SQL Options, and Execution Options.
Figure 4.11. ODBC Bench
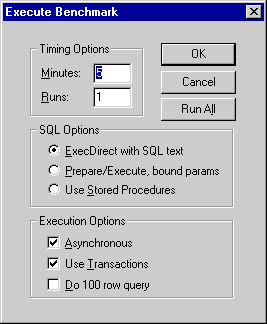
Timing Options: These setting allow you to configure the duration related aspects of this benchmark program
Minutes - this is the duration of each benchmark run
Runs - this controls how many iterations of the benchmarks you actually run (the default is one benchmark iteration with a duration of 5 minutes)
SQL Options: These setting allow you to configure how your benchmark's SQL instructions are actually handled.
ExecDirect with SQL Text - this means that no form of repetitive SQL execution optimization is being applied (SQL statements are prepared and executed repetitively)
Prepare/Execute Bound Params - this means that the Parameter Binding SQL execution optimization is being applied (SQL is prepared once but executed many times without the overhead of re-preparing statements prior to execution)
Use Stored Procedures - this means that the Stored Procedure SQL optimization is being applied (benchmark instructions are stored within database being benchmarked)
Execution Options: These setting allow you to configure the tone of your benchmark, for instance it could have Transaction scoping and a mix of record retrieval queries, or it could simply be input and update intensive with a minimal amount of record retrieval queries (the case when the 100 row query checkbox is unchecked a typical OLTP scenario)
Asynchronous - execute the benchmark instructions asynchronously
Use Transactions - make the benchmark use transaction control (instructions are scoped to transaction blocks)
Do 100 row Query - perform a simulation of a 100 record retrieval as part of the benchmark activity.
-
Click on the "Run All" button if you would like all the different benchmark type combinations to be performed.
-
When benchmark run complete benchmark data is written to the benchmark program's output pane.
Figure 4.12. ODBC Bench
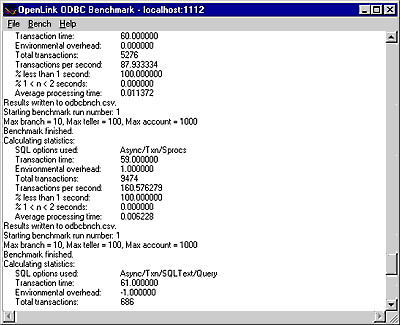
The key pieces of benchmark data that you need to look out for are:
Total Transactions: total number of transactions completed during the benchmark run
Transactions Per Second number of transaction completed per second for the benchmark run
Information from this benchmark is automatically written to an Excel format CSV (the file odbcbnch.csv) which makes it easy for you to graph and pivot data collated from several benchmark runs. A later version of this demo will actually write the benchmark data into an ODBC DSN that you provide thereby offering even more flexibility and accessibility to benchmark data.